These Santa Belt Cupcakes are the perfect treat at Christmas time. Kids will love them and they are the ideal cake to serve up for a Christmas party. If you've been searching for something to make for the kids school party, these tasty treats are perfect for that!
When it comes to Christmas time one of the best things about this time of year is all of the glorious food. Finding sweet treats that are gluten-free and dairy-free can be tricky, but these Santa Belly Cupcakes are perfectly safe to enjoy.
Using gluten-free flour, dairy-free butter, and milk and making your very own safe to enjoy frosting, you can create these wonderful cupcakes that look all festive and jolly.
If you are Ho Ho Ho hoping to create some festive magic through your bakes this year then this is an easy cupcake recipe that you can use. One of the easiest Christmas desserts you will make all holiday.
The kids could even get involved and you could make it a fun Christmas activity.
We love finding new recipes to share with you so if you wanted to create some more festive cupcakes then you must give these Mickey Mouse Christmas Cupcakes or these incredibly adorable Polar Bear Cupcakes a try.

🎅 Why You’ll Love These Santa Belt Cupcakes
- Safe to enjoy - Using gluten and dairy-free ingredients
- Kid-friendly - They will love this Santa cupcake recipe perfect for the holiday season
- Super tasty - who doesn’t love a cupcake adorned with homemade buttercream frosting? Yum!
🧁 Ingredients Needed
Vanilla cupcake ingredients
- Gluten-free flour - for baking, we like to use Bob's Red Mill 1-1 Baking Flour. You can use other flour options or blends, just be sure to add xanthan gum if yours needs it. We like to buy our flour in bulk because it tends to be slightly cheaper in the long run and it's nice to make sure we always have some on hand.
- Baking powder - always check that you're using fresh powder and baking soda
- Baking soda
- Kosher salt
- Dairy-free milk - you can use a shelf stable dairy free milk alternative or a refrigerated option, either will work
- Pure vanilla extract - always check that yours is allergen friendly or make your own
- Dairy-free butter, slightly softened -- we like using Earth's Balance Buttery Sticks in all our recipes
- Sugar
- Large egg
- Large egg whites
Buttercream frosting ingredients
These are the ingredients we use to make our own homemade buttercream frosting to create the red Santa belly, his belt and yellow belt buckle!
- Shortening- we prefer to use palm shortening
- Clear vanilla extract— this can be hard to find locally at your regular grocery stores. Clear vanilla extract can be purchased here or use this McCormick brand traditional vanilla extract if you’re not looking for a pure white colored frosting. But since we are so we can make a white polar bear, do you best to find the clear stuff!
- Dairy-free butter— we use Earth Balance Soy Free Buttery Sticks that are soy and vegan too. We haven’t tried this recipe with other dairy-free butter substitutes though.
- Dairy-free milk— we use this unsweetened almond milk. While we haven't tried this with a different milk alternative, you can try it out if you like.
- Confectioners’ sugar
- Yellow gel food coloring- always make sure that it is gluten and dairy free
- Black gel food coloring- always make sure that it is gluten and dairy free
- Red gel food coloring- always make sure that it is gluten and dairy free
Helpful Tools
Mixing Bowls
[amazon box="B00LGLHUA0" template="horizontal" description_items=1]
Measuring cups and spoons
[amazon box="B01E2HU4A2" template="horizontal" description_items=1]
Piping bag
[amazon box="B0BBFT82KH" template="horizontal" description_items=1]
Small offset spatula
[amazon box="B078XGJ6J7" template="horizontal" description_items=1]
Hand mixer or stand mixer
[amazon box="B01K2FQ4DE" template="horizontal" description_items=1]
Cupcake liners
[amazon box="B07VQJJ5FL" template="horizontal" description_items=1]
Cupcake tin
[amazon box="B001K26ZPG" template="horizontal" description_items=1]
Piping bags
[amazon box="B0BBFT82KH" template="horizontal" description_items=1]
Silicone Baking Mat
[amazon box="B0725GYNG6" template="horizontal" description_items=1]
How To Make The Santa Belt Cupcakes
To make the gluten and dairy free cupcakes:
- The first thing you will need to do is preheat the oven to 325 degrees. Get your cupcake baking pan and line it with 18 paper liners.
- Grab your mixing bowl and add whisk together the gluten free flour, baking powder, baking soda, and salt. Separately in a smaller bowl stir the dairy free milk and vanilla together.
- In the bowl of a stand mixer fitted with the paddle attachment, beat the dairy free butter and sugar on medium-high speed until the mixture has become light and fluffy.
- Reduce the speed to medium-low, and then slowly add the egg and egg whites one at a time. You will need to beat the mixture until creamy.
- Slowly add half the gluten free flour mixture, then the dairy free milk mixture, then the remaining gluten free flour mixture, beating until just blended after each addition.
- Divide the cake batter evenly among the cupcake liners and bake until the tops are just dry to the touch, and a toothpick inserted into the center comes out clean. This should be around 18 to 20 minutes.
- Allow the cupcakes to cool completely. While they are cooling you can get on with making the frosting.
For the homemade buttercream frosting:
- In a large bowl, cream shortening and dairy free butter with an electric handheld or stand mixer until light and fluffy.
- Add vanilla and mix well.
- Add confectioners' sugar 1 cup at a time. Mix on low. Scrape down the sides of the mixing bowl often.
- Add in dairy-free milk 1 Tablespoon at a time. Add in more for your desired consistency.
- Now you will want to separate the frosting into three separate bowls. Add the yellow food coloring to one, the red to the other, and finally, with the third bowl of frosting add the black food coloring. Stir until you get the desired colors for each.
- Store frosting covered in the refrigerator for up to 1 week. Allow softening to room temperature before frosting your baked goods.
Building the Santa belt cupcakes:
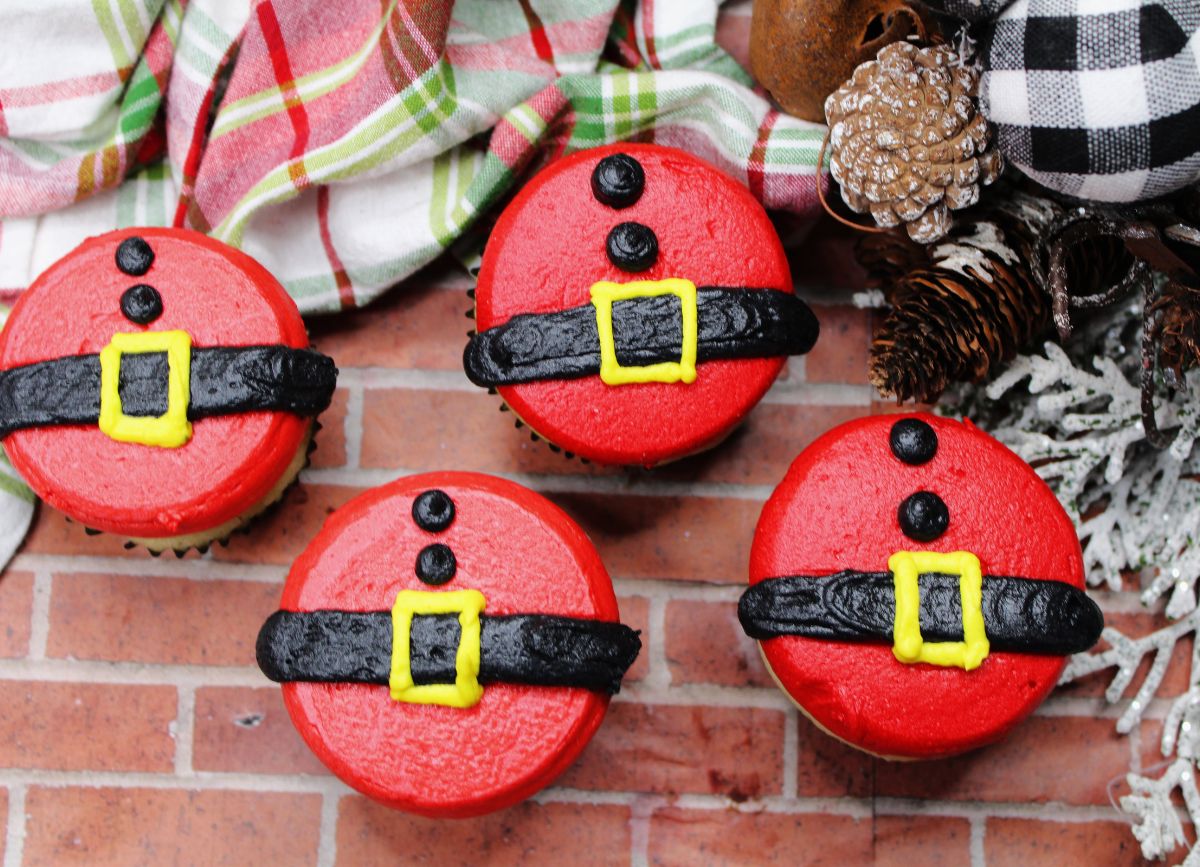
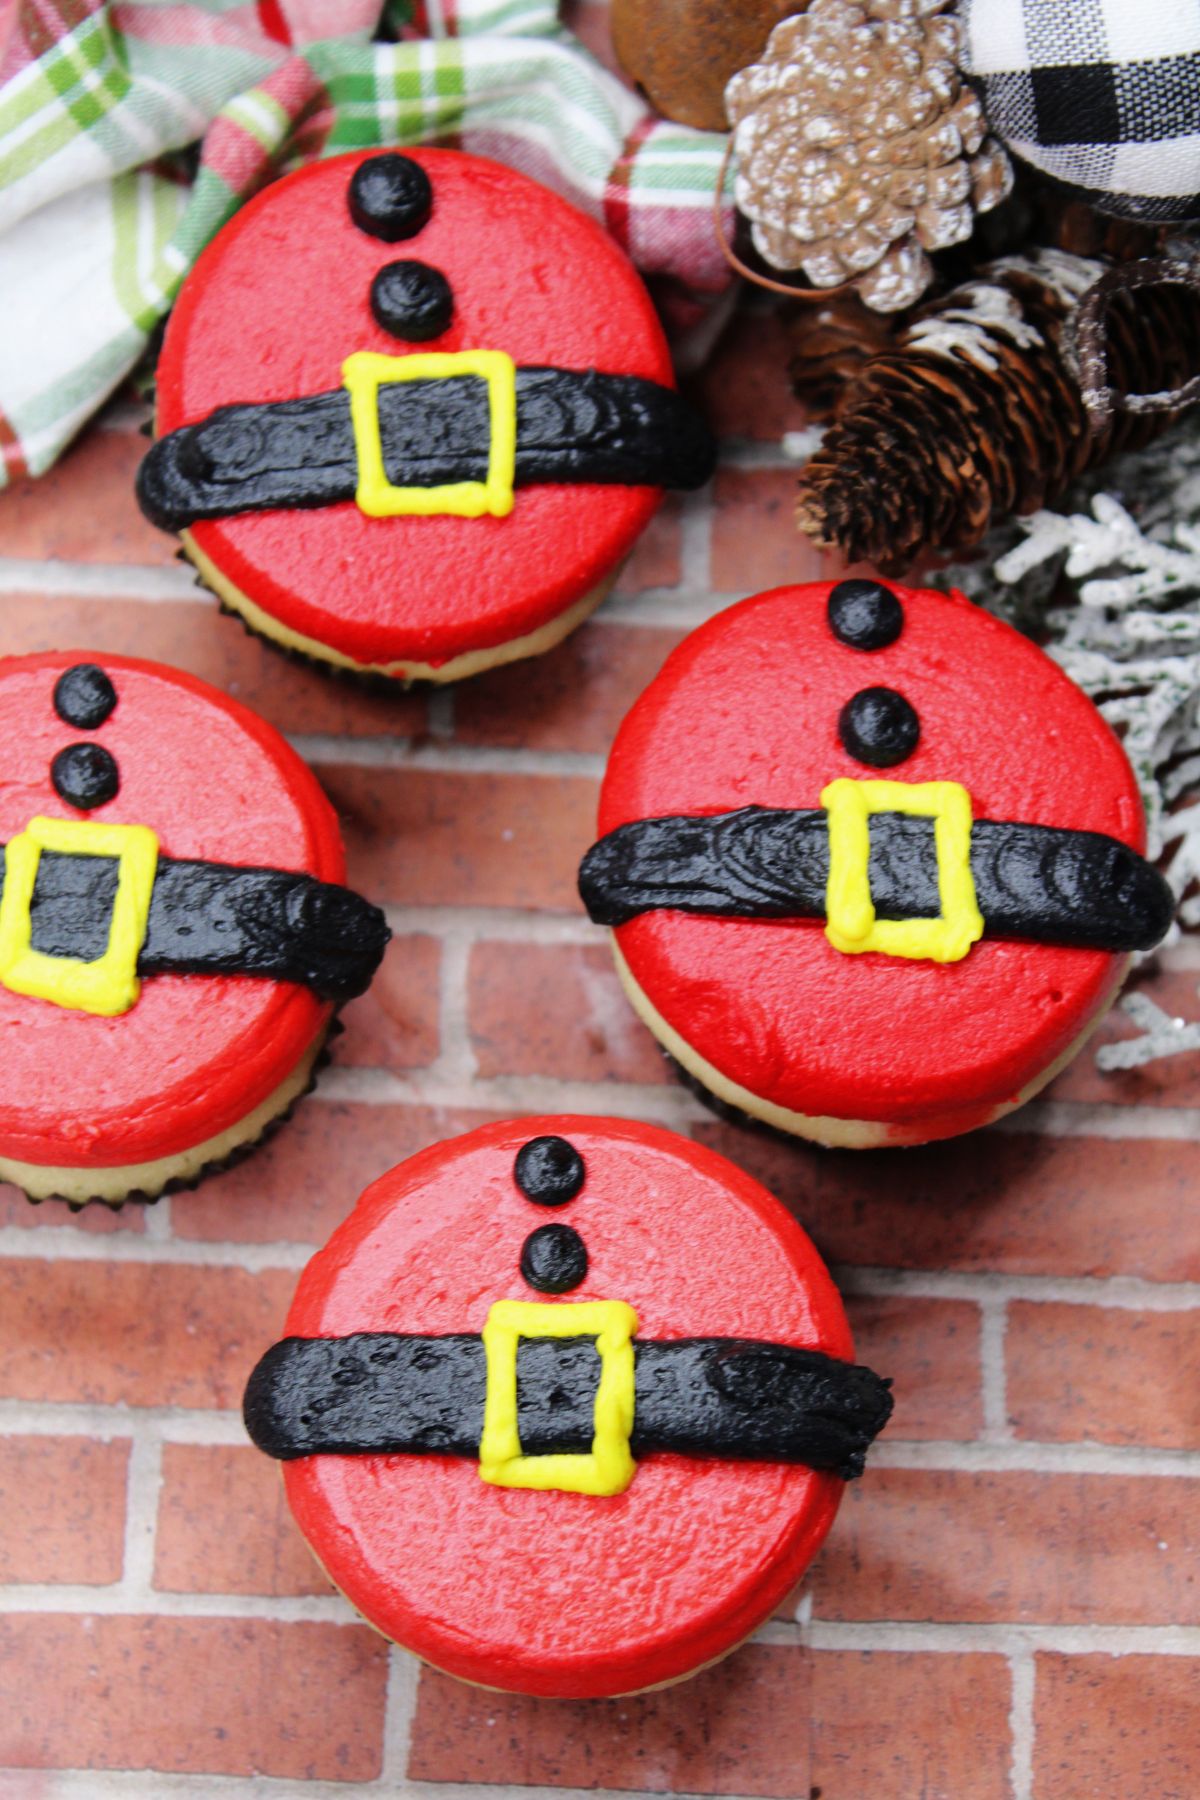
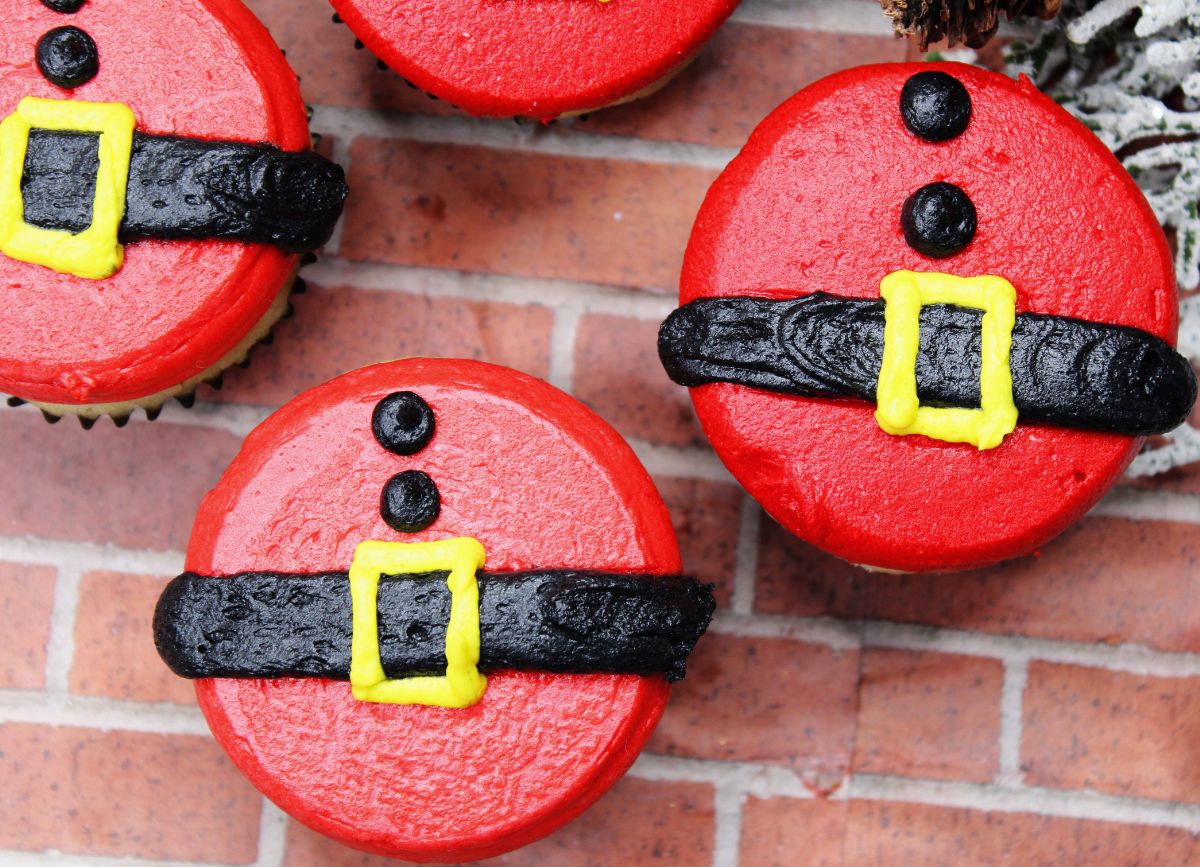
- Scoop a mound of red frosting onto the top of the cupcake. Make sure they are completely cooled before frosting.
- Carefully place the cupcake upside down so that the frosting is flat on the silicone baking mat.
- Repeat the step above for the rest of the cupcakes before placing them in the freezer for 10 minutes or until the frosting on top is firm.
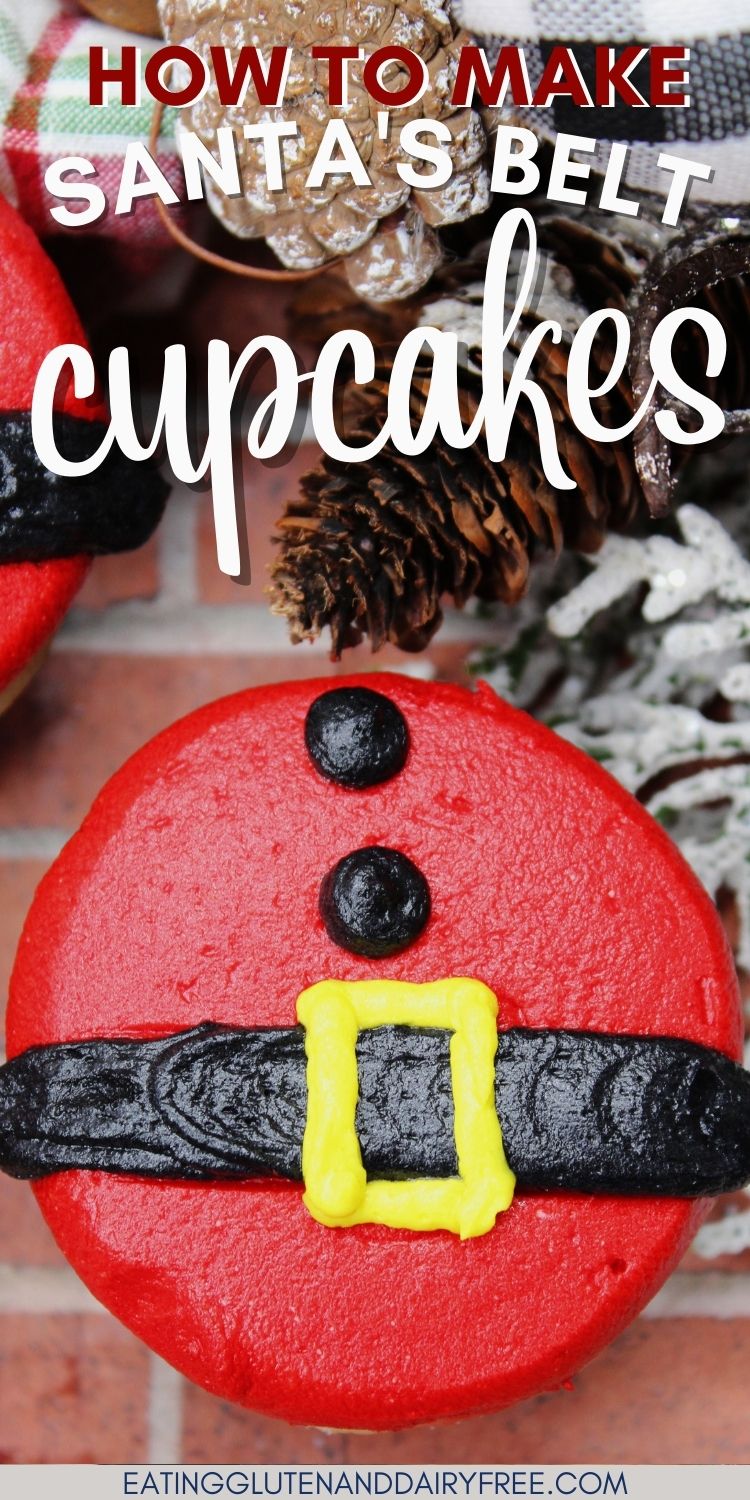
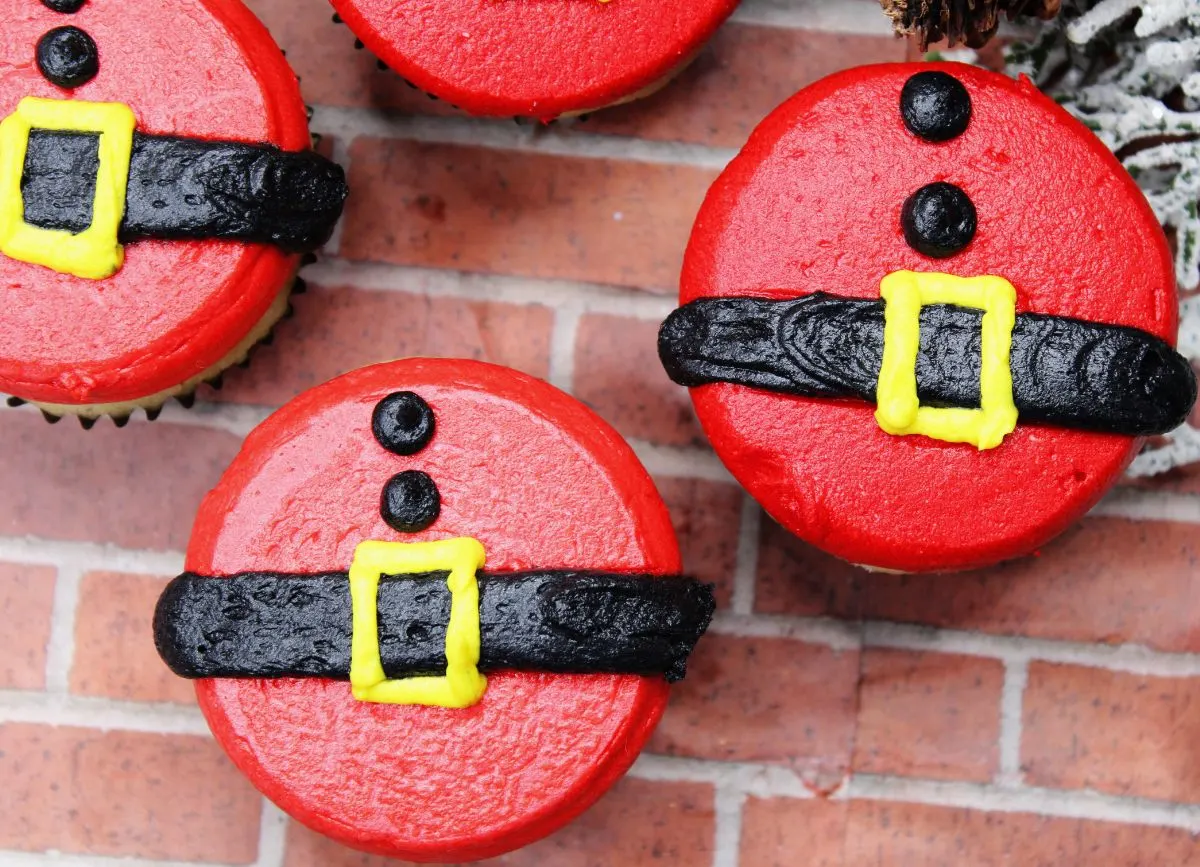
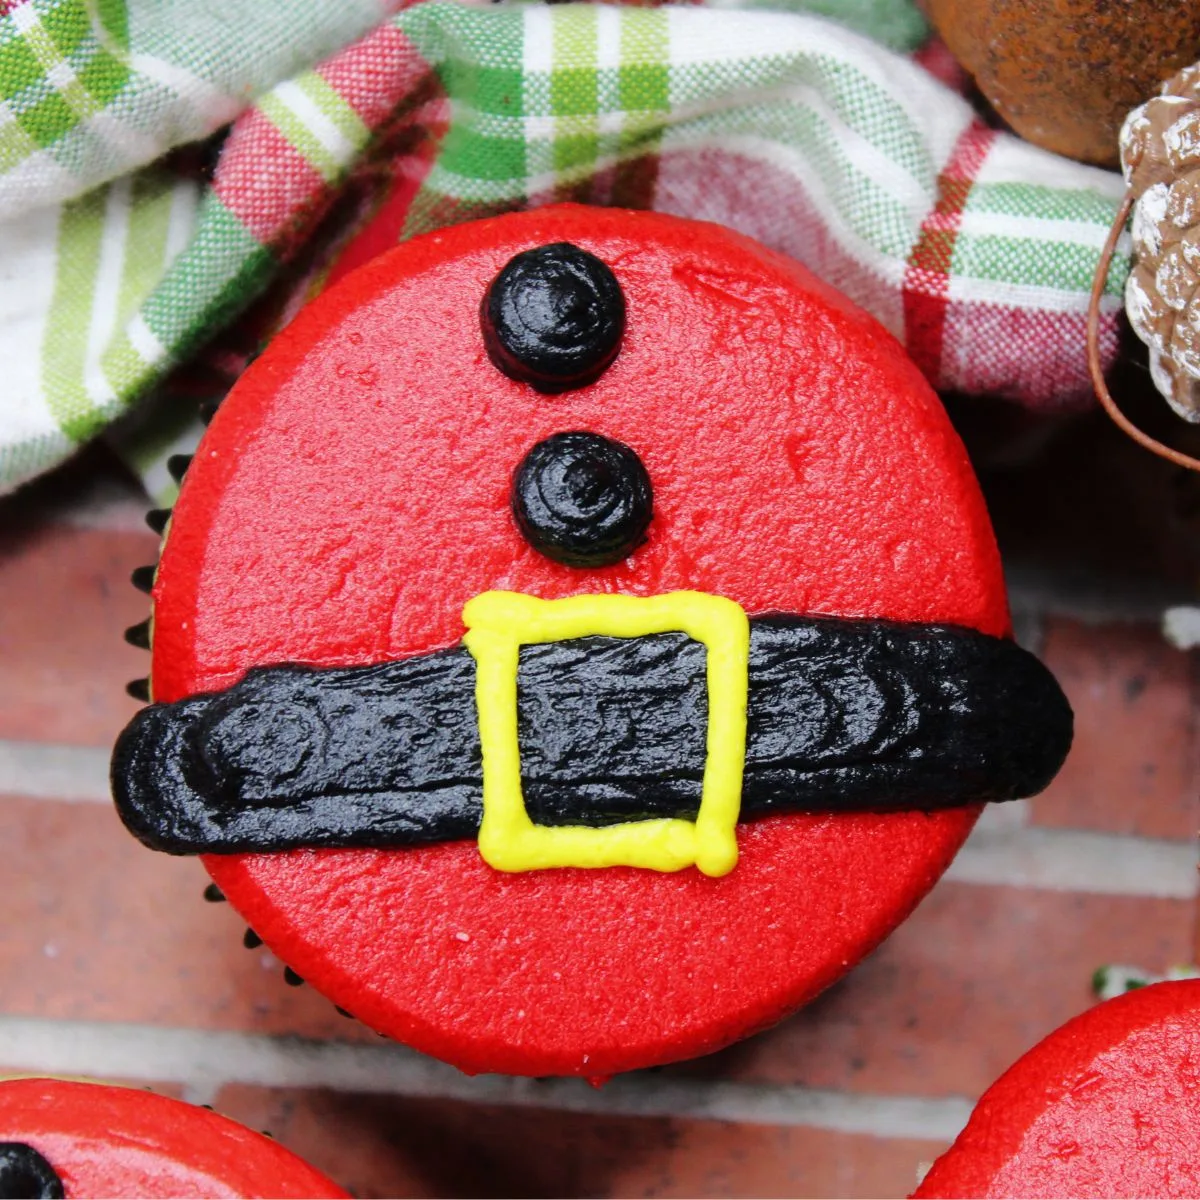
- Carefully peel off the cupcake and frosting from the silicone baking mat. Transfer black frosting to a piping bag. Using the black frosting pipe a thick line of black frosting across the center of the cupcake. This will be your Santa belt.
- Transfer some yellow into a piping bag. Using the yellow, create an open square in the center of the black line. This is the belt buckle.
- Using the black frosting again, pipe two dots above the buckle. This completes Santa's coat buttons on his Santa suit with Santa’s black belt.
- There you have it your Santa belly cupcakes. Yummy!


Recipe Variations
Want to make these cupcakes really festive? Sprinkle some red edible glitter over the top to make them sparkle. You could also use some white frosting to add a trim to the suit. Mini marshmallows will also work well. This is such a fun recipe for Christmas.
Adding flavor to the frosting or cupcakes. If you want a different flavor you could use peppermint extract or almond extract instead of vanilla.
Different flavored cupcakes. You could make chocolate cupcakes or red velvet cupcakes as something a little different. The secret to these cute Santa cupcakes is all in the frosting and presentation.
Keep it authentic. Use printable cupcake wrappers that have a Christmas theme or Santa's head on them.

Tips & Tricks
- Don't skip the freezing step. It helps you to get a smooth and hardened surface to work with when piping your belt and buckle details on top of the gluten and dairy-free cupcakes and frosting.
- In order to avoid a frosting mess, be sure your cupcakes have cooled sufficiently before frosting.
- A great piping tip is to use a small tip on your piping bag. It will be the easiest way to get the desired decorated look.
Storage
These Santa belt cupcakes will last 3-5 days when stored in an airtight container. They can be stored on your counter at room temperature so no need to refrigerate them.
If you wanted to freeze them you are best to freeze the cupcakes before adding the frosting. You can then decorate them once you defrost them ready to enjoy.


FAQ
What if I haven't got enough frosting?
This recipe makes 2 cups of frosting. If you think you need more, you can always double it.
You can always use yellow candy buckles instead.
What kind of piping tips do I use?
For the black belt and black buttons on his suit, use a number 2A tip and for the yellow belt buckle square, you can use a #4 decorating tip.
Additionally, you can change these to suit your needs depending on the size of your Santa Belly Cupcakes.
Other cake recipes
- The best easy eggnog cake - This incredible cake has the decadent flavor of eggnog and is a real crowd-pleaser. Perfect for your holiday parties.
- Shark Cake- This is perfect for holidays, and we love serving it at birthday parties. It's simple to make and fun to decorate.
- Pineapple Upside Down Cake - This light and fluffy Pineapple Upside Down Cake is a definite showstopper. Between this cake’s gorgeous caramelized brown sugar and pineapple cherry topping to its mouthwatering flavor, this cake is a must-bake.
- Ice Cream Cone Cake
- Sprinkle Cake
- Galaxy Cake (coming soon)
- Peanut Butter Cake (coming soon)

Santa Belt Cupcakes
Ingredients
Vanilla Cupcake Ingredients
- 1 ½ cups gluten free flour see suggestions in post
- 1 teaspoon baking powder
- ¼ teaspoon baking soda
- ¼ teaspoon kosher salt
- ⅔ cup dairy free milk see suggestions in post
- 1 ½ teaspoon pure vanilla extract
- ½ cup dairy free butter slightly softened - suggestions in post
- 1 cup sugar
- 1 large egg
- 2 large egg whites
Frosting Ingredients
- ½ cup shortening suggestion in post
- ½ cup dairy free butter softened not melted suggestion in post
- 1 teaspoon clear vanilla extract
- 4 cups sifted confectioners' sugar
- 3-4 Tablespoons dairy free milk water will also work
- red gel food coloring
- yellow gel food coloring
- black gel food coloring
Instructions
To make the cupcakes:
- The first thing you will need to do is preheat the oven to 325 degrees.
- Get your cupcake baking pan and line it with 18 paper liners.
- Grab your mixing bowl and add whisk together the flour, baking powder, baking soda, and salt.
- Separately in a smaller bowl stir the milk and vanilla together. In the bowl of a stand mixer fitted with the paddle attachment, beat the butter and sugar on medium-high speed until the mixture has become light and fluffy.
- Reduce the speed to medium-low, and then slowly add the egg and egg whites one at a time. You will need to beat the mixture until creamy.
- Slowly add half the flour mixture, then the milk mixture, then the remaining flour mixture, beating until just blended after each addition.
- Divide the cake mix evenly among the cupcake liners and bake until the tops are just dry to the touch, and a toothpick inserted into the center comes out clean. This should be around 18 to 20 minutes.
- Allow the cupcakes to cool completely. While they are cooling you can get on with making the frosting.
For the homemade buttercream frosting:
- In a large bowl, cream shortening and butter with an electric handheld or stand mixer until light and fluffy.
- Add vanilla and mix well.
- Add confectioners' sugar 1 cup at a time. Mix on low. Scrape down the sides of the mixing bowl often.
- Add in dairy-free milk 1 Tablespoon at a time. Add in more for your desired consistency.
- Now you will want to separate the frosting into three separate bowls.
- Add the yellow food coloring to one, the red to the other, and finally, with the third bowl of frosting add the black food coloring. Stir until you get the desired colors for each.
- Store frosting covered in the refrigerator for up to 1 week. Allow softening to room temperature before frosting your baked goods.
Building the Santa belt cupcakes:
- Scoop a mound of red frosting onto the top of the cupcake. Make sure they are completely cooled before frosting.
- Carefully place the cupcake upside down so that the frosting is flat on the silicone baking mat.
- Repeat the step above for the rest of the cupcakes before placing them in the freezer for 10 minutes or until the frosting on top is firm.
- Carefully peel off the cupcake and frosting from the silicone baking mat.
- Transfer black frosting to a piping bag. Using the black frosting pipe a thick line of black frosting across the center of the cupcake. This will be your Santa belt.
- Transfer some yellow into a piping bag. Using the yellow, create an open square in the center of the black line. This is the belt buckle.
- Using the black frosting again, pipe two dots above the buckle. This completes Santa's coat buttons on his Santa suit with Santa’s black belt.
- There you have it your Santa belly cupcakes. Yummy!
Notes
- Don't skip the freezing step. It helps you to get a smooth and hardened surface to work with when piping your belt and buckle details on top of the gluten and dairy free cupcakes and frosting.
- In order to avoid a frosting mess, be sure your cupcakes have cooled sufficiently before frosting.
- A great piping tip is to use a small tip on your piping bag. It will be the easiest way to get the desired decorated look.
Nutritional Disclaimer
These Nutritional Facts are ESTIMATED. Your actual nutritional info with this recipe may vary depending on the brands you choose. “Eating Gluten and Dairy Free” is not a registered dietician or nutritionist. The provided nutritional info above is based on a generic calculator, if you want more accurate info, use your nutritional calculator of choice where you can choose brands and get more info that way.
Pin It For Later