Polar Bear Cupcakes
This post may contain affiliate links. As an Amazon Associate, and through other affiliate programs, I earn a small commission from qualifying purchases — at no extra cost to you. I only ever recommend products I use and love. See our full disclosure policy for details. Thank you for supporting Eating Gluten and Dairy Free!
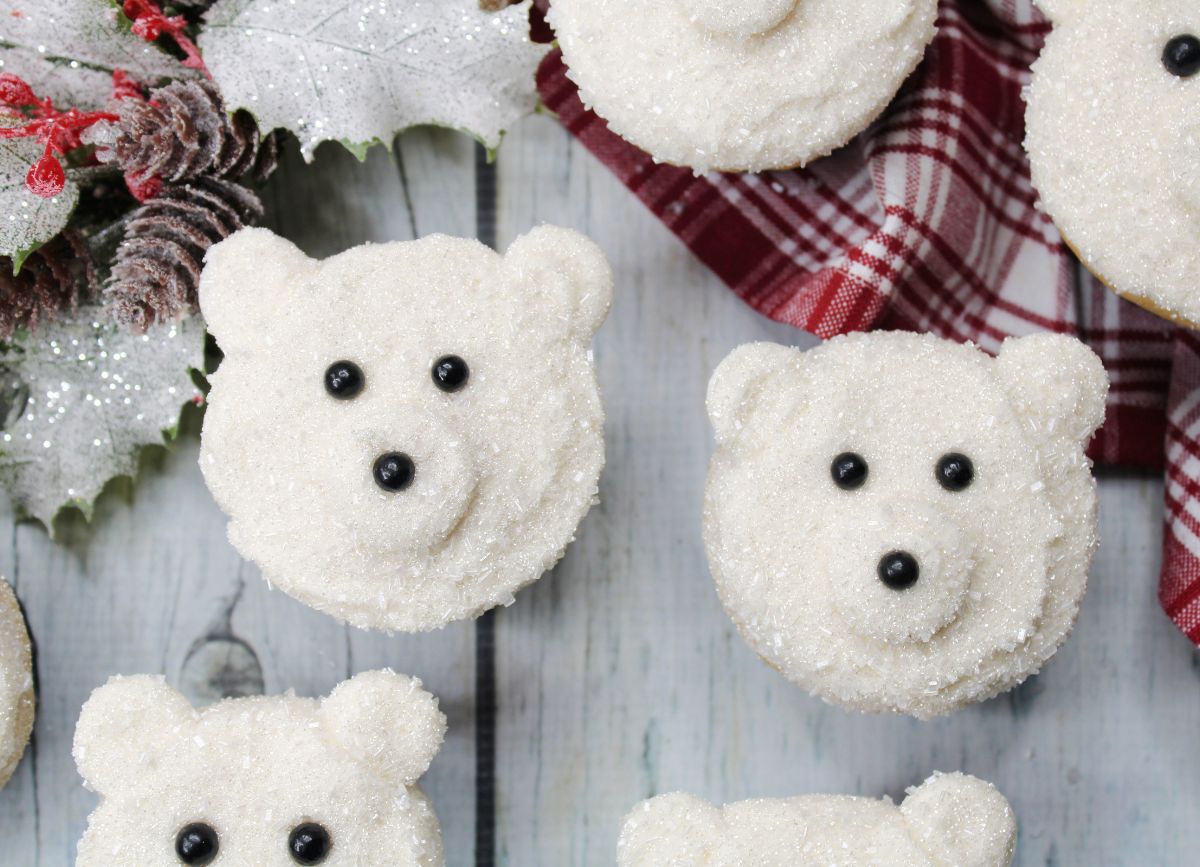
These Polar Bear Cupcakes are so tasty and look very festive. Perfect to serve up at holiday parties and during the winter months, everyone will love how tasty they are. Sweet vanilla cupcake with buttercream frosting. You can’t go wrong!
When it comes to finding cute cupcakes that you feel confident are safe to enjoy then this easy recipe is the one to try. It may look like there are a lot of steps, but once you get into it you will be making incredible vanilla cupcakes that look the part.
These Polar Bear Cupcakes are adorable and would be a great winter party dessert! Made with a simple cupcake recipe and our favorite homemade buttercream frosting that we use in like SOOO many desserts!
We love finding new recipes to share with you so if you wanted to create some more festive cupcakes then you must give these Mickey Mouse Christmas Cupcakes a try. They are super tasty.
Why You’ll Love These Polar Bear Cupcakes
- Kid-friendly - these are adorable and the kids will love eating them.
- Safe to enjoy - full of dairy and gluten-free ingredients.
- Super festive - These would work during the holiday season or the winter months.
Ingredients Needed
Vanilla cupcake ingredients
- Gluten-free flour - for baking, we like to use Bob's Red Mill 1-1 Baking Flour. You can use other flour options or blends, just be sure to add xanthan gum if yours needs it. We like to buy our flour in bulk because it tends to be slightly cheaper in the long run and it's nice to make sure we always have some on hand.
- Baking powder - always check that you're using fresh powder and baking soda
- Baking soda
- Kosher salt
- Dairy-free milk - you can use a shelf stable dairy free milk alternative or a refrigerated option, either will work
- Pure vanilla extract - always check that yours is allergen friendly or make your own
- Dairy-free butter, slightly softened -- we like using Earth's Balance Buttery Sticks in all our recipes
- Sugar
- Large egg
- Large egg whites
Buttercream frosting ingredients
These are the ingredients we use to make our own homemade buttercream frosting!
- Shortening- we prefer to use palm shortening
- Clear vanilla extract— this can be hard to find locally at your regular grocery stores. Clear vanilla extract can be purchased here or use this McCormick brand traditional vanilla extract if you’re not looking for a pure white colored frosting. But since we are so we can make a white polar bear, do you best to find the clear stuff!
- Dairy-free butter— we use Earth Balance Soy Free Buttery Sticks that are soy and vegan too. We haven’t tried this recipe with other dairy-free butter substitutes though.
- Dairy-free milk— we use this unsweetened almond milk. While we haven't tried this with a different milk alternative, you can try it out if you like.
- Confectioners’ sugar
Decorating ingredients
- Black edible pearl sprinkles - since we only need a few, we grab a few from one of our Sweets Indeed containers of sprinkles!
- White sanding sprinkles- we like this sparkling sugar from King Arthur
- White chocolate bars (dairy free) - I take this brand of dairy free white chocolate and cut them into circles to make the polar bear ears. You can use Enjoy Life too or make your own ears from other dairy free chocolate.
Helpful Tools
Mixing Bowls
Measuring cups and spoons
Piping bag
Small offset spatula
Hand mixer or stand mixer
Cupcake liners
Cupcake tin
Piping Bag
How To Make The Polar Bear Cupcakes
To make the cupcakes:
- Gather all of the ingredients together. Preheat the oven to 325F. Get your cupcake pan or tins and line it with 18 cupcake liners so that you are prepared. This recipe will make 18 cupcakes, so line another tin if needed.
- In a medium bowl, whisk together some of the dry ingredients. Add the gluten free flour, baking powder, baking soda, and salt.
- In a small bowl, stir together the dairy free milk and vanilla. Set both aside.
- In the bowl of a stand mixer fitted with the paddle attachment, beat the dairy free butter and sugar on medium-high speed until light and fluffy. This should take you about 2 to 3 minutes.
- Reduce the speed to medium-low, slowly add the egg and egg whites one at a time, and beat until creamy. It should only take you 1-2 minutes but keep an eye on it.
- Slowly add half the gluten free flour mixture, then the dairy free milk mixture, then the remaining gluten free flour mixture, beating until just blended after each addition.
- Divide the batter evenly among the cupcake liners and bake until the tops are just dry to the touch, and a toothpick inserted into the center comes out clean. We recommend baking the cupcakes for 18-20 minutes depending on your oven.
To make the buttercream frosting:
- In a large bowl, cream shortening and dairy free butter with an electric handheld or stand mixer until light and fluffy.
- Add vanilla and mix well.
- Add confectioners' sugar 1 cup at a time. Mix on low. Scrape down the sides of the mixing bowl often.
- Add in dairy-free milk 1 Tablespoon at a time. Add in more for your desired consistency.
To decorate the cupcakes:
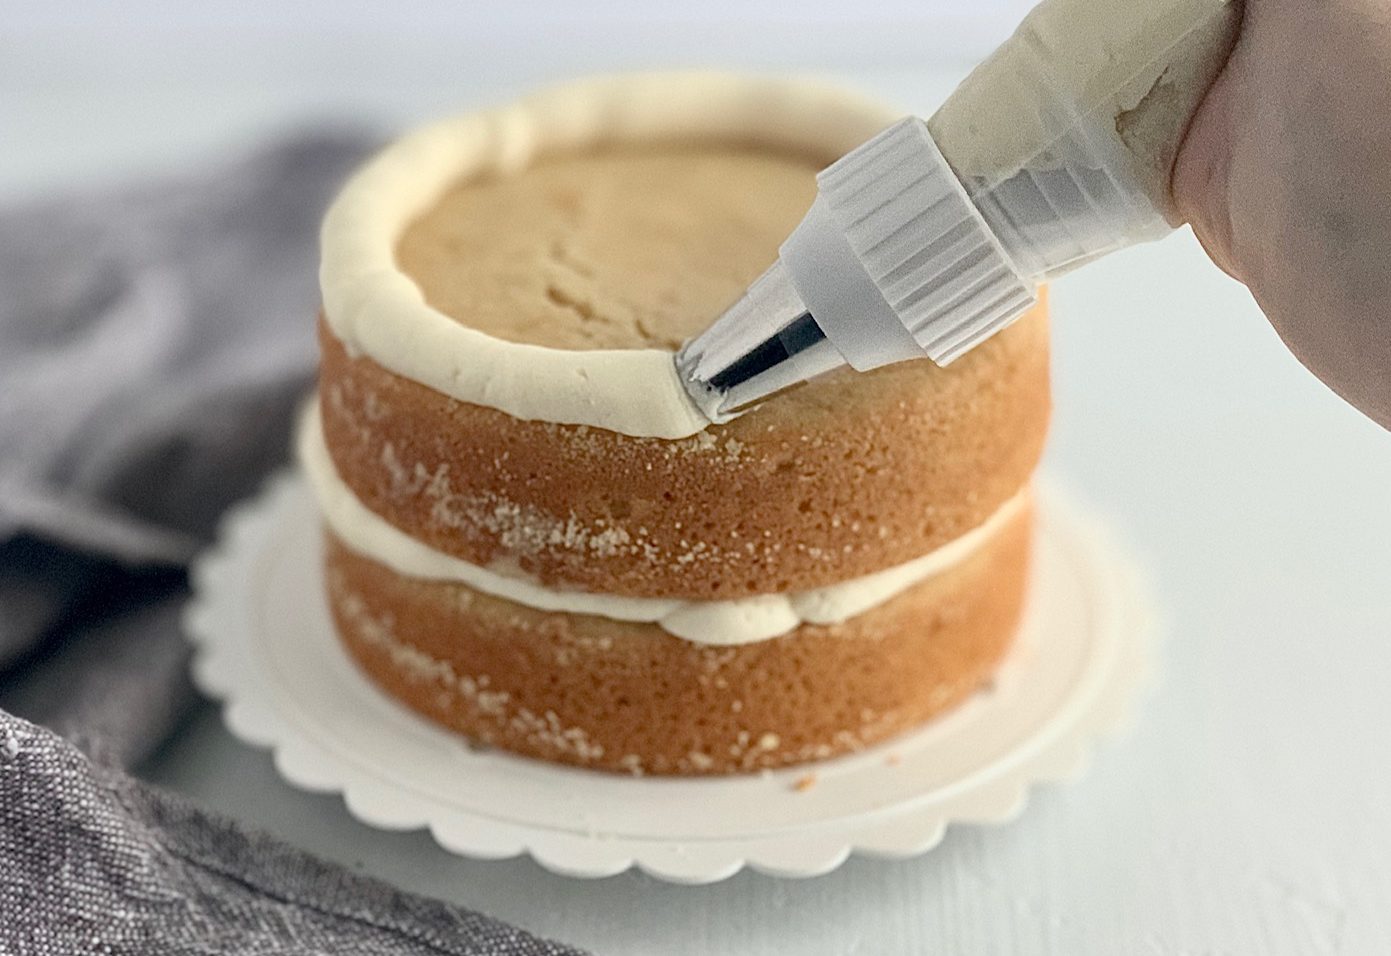
- Scoop a mound of frosting on top of the cupcake and use the cake spatula to smooth into a thick mound.
- Now you will want to scoop some frosting into the piping bag.
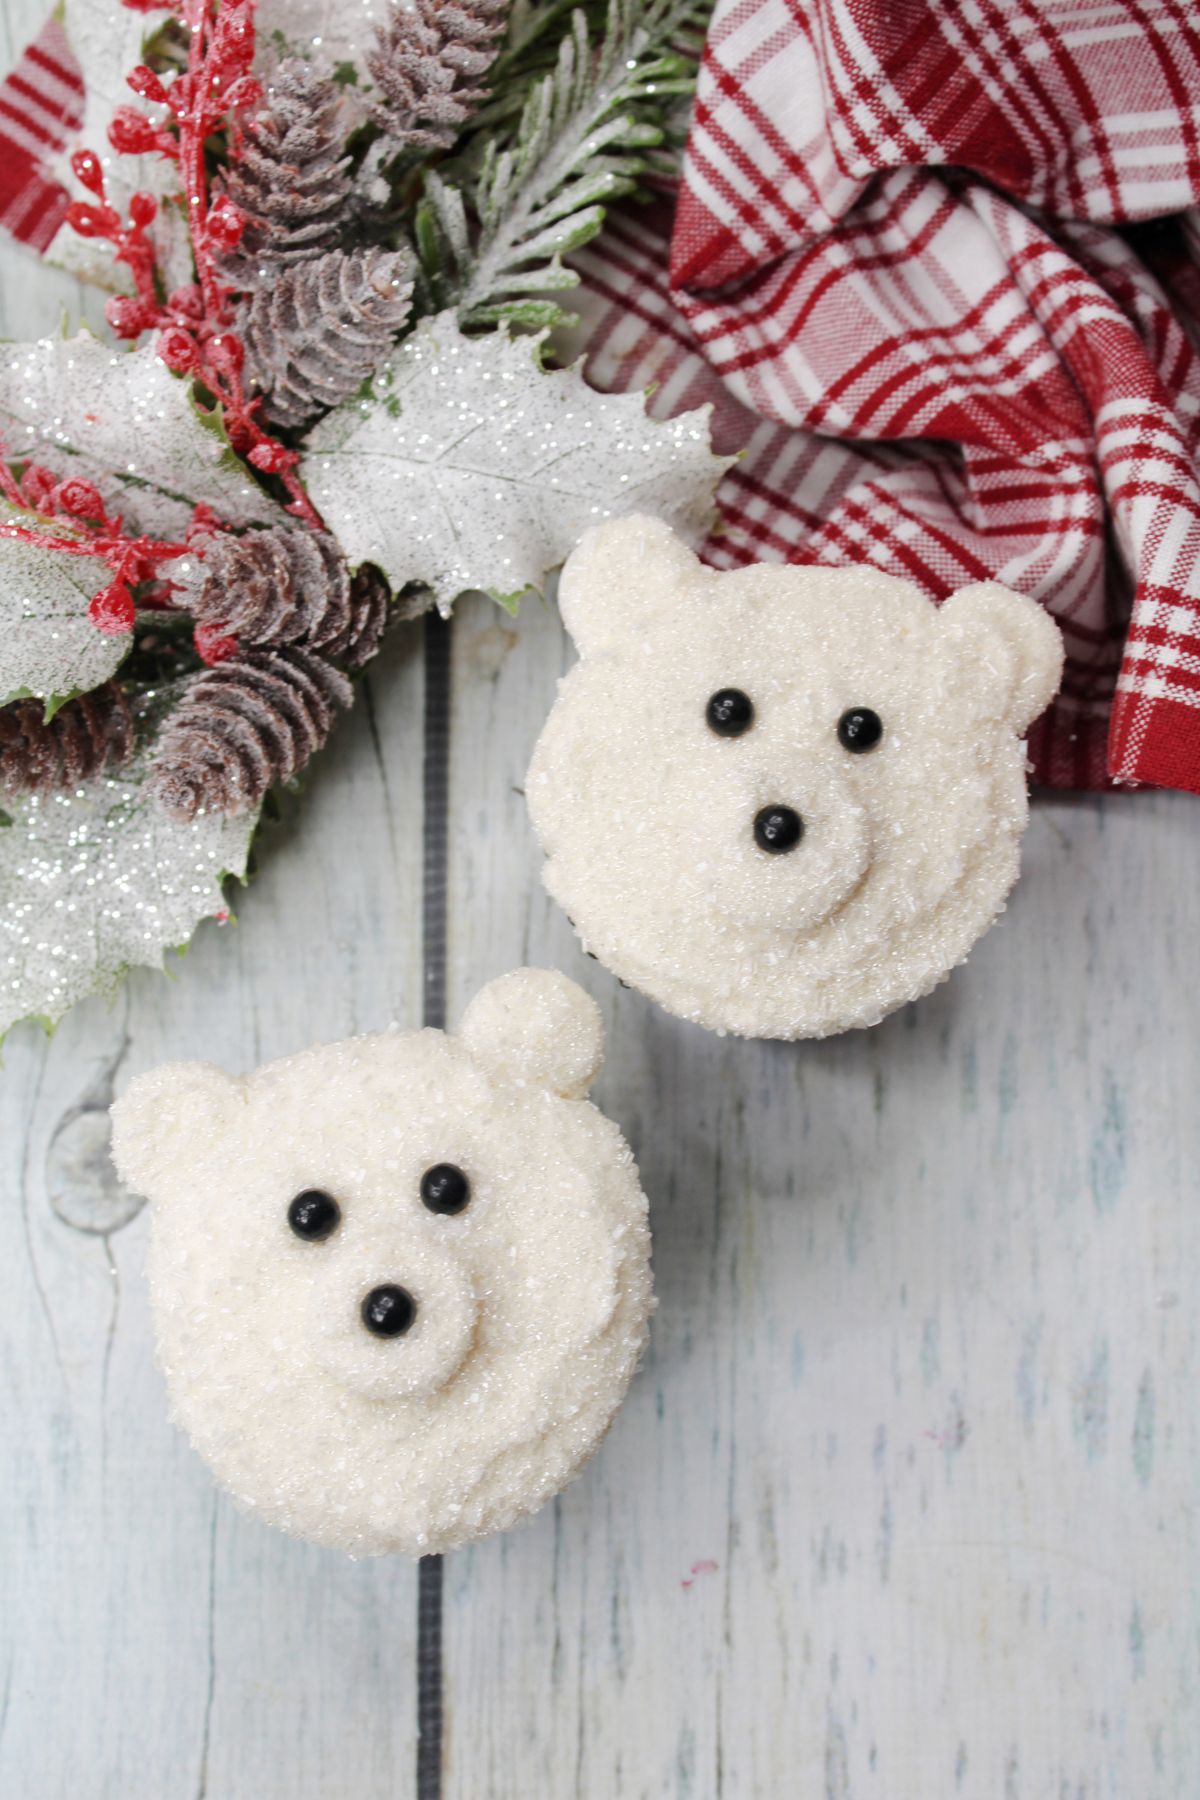
- Take a circular piece of dairy free white chocolate and pipe a dollop of buttercream on top of it. Place the buttercream chocolate into 1 top corner of the frosting mound to create the ear of the bear. You will want to repeat for the other side.
- Now you should have the ‘head’ and ‘ears‘ made. The head is the whole cupcake and ears are the chocolate pieces with frosting.
- Place a piece of dairy free white chocolate in the center of the frosting to create the polar bear nose.
- Pipe frosting on top of the wafer to bring more life to the nose.
- Using the allergen friendly white sanding sugar, coat the cupcake in the sanding sugar to give them a white polar bear glistening look. Make sure to do this part over a bowl that way you don't end up with sanding sugar EVERYWHERE! It’s not the easiest to clean up. Trust us!
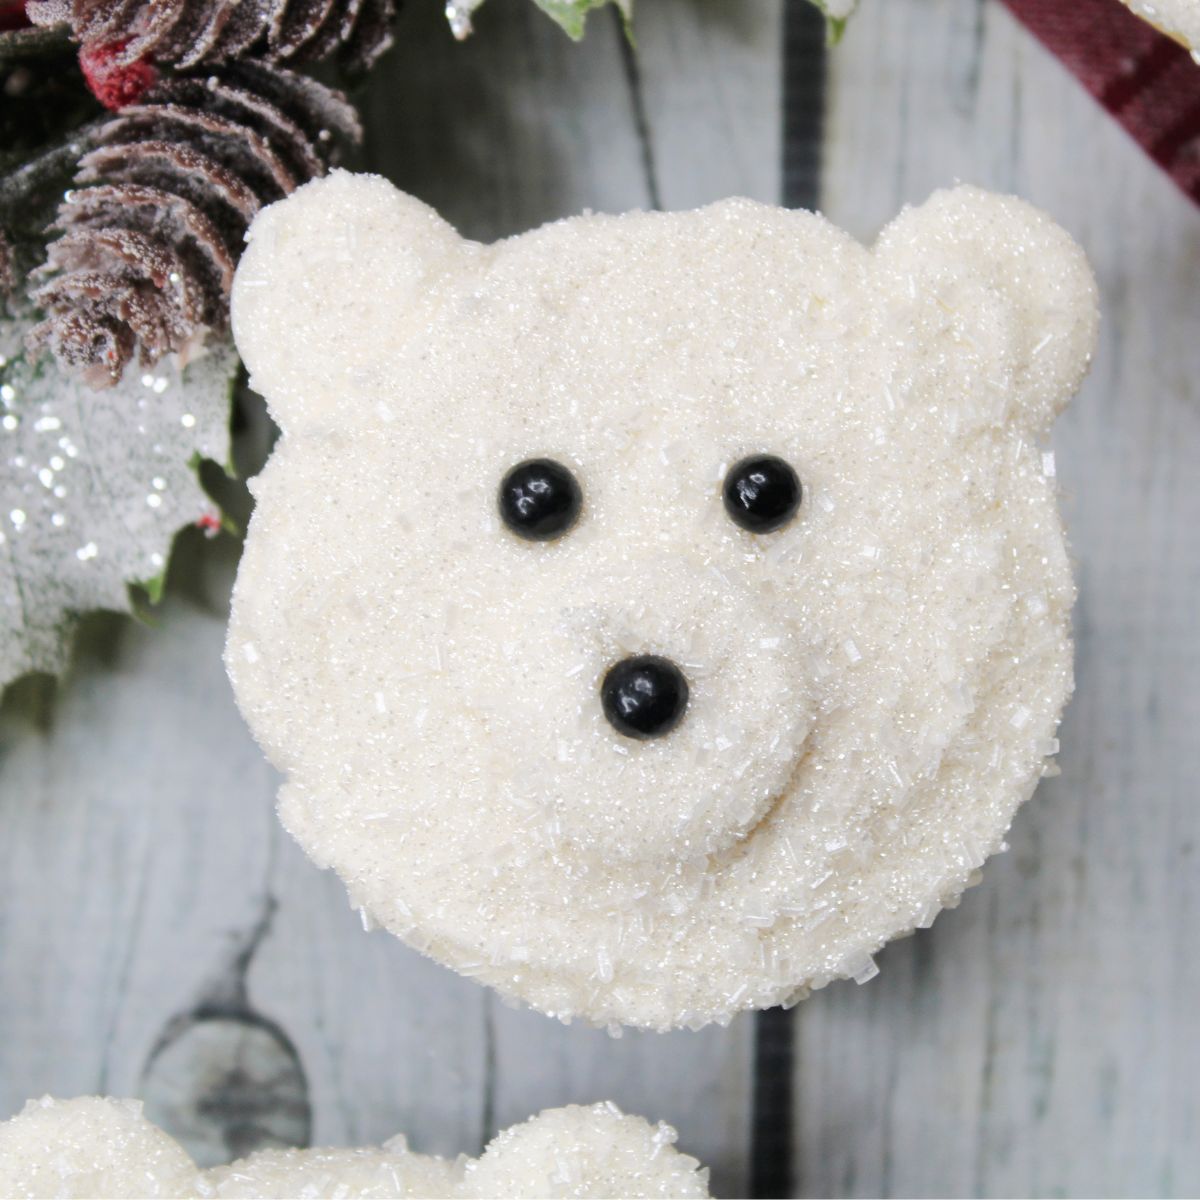
- Pick out two large size black pearl sprinkles for the eyes and place them above the nose. Make sure to press down into the frosting so they don't go rolling around.
- Pick out a slightly smaller black pearl sprinkle for the nose and place into the frosting.
- Enjoy!


Recipe Variations
Want to add a bit of sparkle? You could sprinkle over a little silver edible glitter to give the polar bears that festive glow.
Make snowmen. You could use the frosting and a similar idea to make snowmen cupcakes. Use an orange sweet for the nose and add a few details with the black pearl sprinkle and you have snowmen.
Flavored cupcakes. You don’t need to stick with vanilla cupcakes. You could make chocolate cupcakes or use a different flavoring. Things like almond extract or peppermint extract could be great options.
Tips & Tricks
- Make sure you take time when creating your cupcake mixture. It may sound strange to add parts of the flour and milk separately and beat in between, but this is where you will add air to the cupcake mixture which will make light and fluffy cupcakes.
- Make sure the cupcakes are cooled completely before adding the frosting. Otherwise, the frosting will melt and make a big mess.
Storage
These are great cupcakes to enjoy, but if you have any leftovers, you will want to store them in an airtight container in the refrigerator. You can enjoy them from the refrigerator for the next 3-5 days.
If you choose to freeze the cupcakes you should do so before adding the buttercream frosting. You can decorate them once you defrost them. They will last in the freezer for up to 3 months.
FAQ
What is the secret to a moist cupcake?
The secret to light and fluffy cupcakes is to ensure that you take your time when mixing the mixture. Using your stand mixer and gradually add the flour and milk helps to add air to the mixture. When baked this is where the lightness and fluffiness come into effect.
Other dessert recipes
- Mississippi Mud Cake - Gluten and dairy-free Mississippi Mud Cake is a delicious homemade chocolate cake, topped with melted, ultra-gooey marshmallows and warm, rich chocolate frosting.
- Chocolate Chip Cream Cheese Bars - What is better than two layers of chocolate chip cookie dough with a cream cheese layer in between? With only a few pantry staples and loads of semisweet chocolate chips, this is an addictive and wonderful after dinner treat that will not disappoint.
- The best easy eggnog cake - You have got to try The Best Easy Eggnog Cake recipe that you are ever going to make. This incredible cake has the decadent flavor of eggnog and is a real crowd-pleaser. Perfect for your holiday parties.
- Santa Belt Cupcakes- fun and festive these cupcakes are decorated to look like Santa's big belly with his belt and two of the buttons from his red coat.
Ingredients
Vanilla Cupcake Ingredients
- 1 ½ cups gluten free flour see suggestions in post
- 1 teaspoon baking powder
- ¼ teaspoon baking soda
- ¼ teaspoon kosher salt
- ⅔ cup dairy free milk see suggestions in post
- 1 ½ teaspoon pure vanilla extract
- ½ cup dairy free butter slightly softened - suggestions in post
- 1 cup sugar
- 1 large egg
- 2 large egg whites
Frosting Ingredients
- ½ cup shortening suggestion in post
- ½ cup dairy free butter softened not melted suggestion in post
- 1 teaspoon clear vanilla extract
- 4 cups sifted confectioners' sugar
- 3-4 Tablespoons dairy free milk water will also work
- 48 Black edible pearl sprinkles suggestions in post
- 2 - 8 oz white sanding sprinkles suggestions in post
- 30 oz white chocolate bar suggestions in post
Instructions
To make the cupcakes:
- Gather all of the ingredients together. Preheat the oven to 325F.
- Get your cupcake pan or tin and line it with 12 cupcake liners so that you are prepared. This recipe will make 16 cupcakes, so line another tin if needed.
- In a medium bowl, whisk together some of the dry ingredients. Add the gluten free flour, baking powder, baking soda, and salt. In a small bowl, stir together the dairy free milk and vanilla. Set both aside.
- In the bowl of a stand mixer fitted with the paddle attachment, beat the dairy free butter and sugar on medium-high speed until light and fluffy. This should take you about 2 to 3 minutes.
- Reduce the speed to medium-low, slowly add the egg and egg whites one at a time, and beat until creamy. It should only take you 1-2 minutes but keep an eye on it.
- Slowly add half the gluten free flour mixture, then the dairy free milk mixture, then the remaining gluten free flour mixture, beating until just blended after each addition.
- Divide the batter evenly among the cupcake liners and bake until the tops are just dry to the touch, and a toothpick inserted into the center comes out clean. We recommend baking the cupcakes for 18-20 minutes depending on your oven.
To make the buttercream frosting:
- In a large bowl, cream shortening and dairy free butter with an electric handheld or stand mixer until light and fluffy.
- Add vanilla and mix well.
- Add confectioners' sugar 1 cup at a time. Mix on low. Scrape down the sides of the mixing bowl often
- .Add in dairy-free milk 1 Tablespoon at a time.
- Add in more for your desired consistency.
To decorate the cupcakes:
- Scoop a mound of frosting on top of the cupcake and use the cake spatula to smooth into a thick mound.
- Now you will want to scoop some frosting into the piping bag.
- Take a circular piece of dairy free white chocolate and pipe a dollop of buttercream on top of it. Place the buttercream chocolate into 1 top corner of the frosting mound to create the ear of the bear. You will want to repeat for the other side.
- Now you should have the ‘head’ and ‘ears‘ made. The head is the whole cupcake and ears are the chocolate pieces with frosting.
- Place a piece of dairy free white chocolate in the center of the frosting to create the polar bear nose. Pipe frosting on top of the wafer to bring more life to the nose.
- Using the allergen friendly white sanding sugar, coat the cupcake in the sanding sugar to give them a white polar bear glistening look. Make sure to do this part over a bowl that way you don't end up with sanding sugar EVERYWHERE! It’s not the easiest to clean up. Trust us!
- Pick out two large size black pearl sprinkles for the eyes and place them above the nose. Make sure to press down into the frosting so they don't go rolling around.
- Pick out a slightly smaller black pearl sprinkle for the nose and place into the frosting.
- Enjoy!
Notes
- Make sure you take time when creating your cupcake mixture. It may sound strange to add parts of the flour and milk separately and beat in between, but this is where you will add air to the cupcake mixture which will make light and fluffy cupcakes.
- Make sure the cupcakes are cooled completely before adding the frosting. Otherwise, the frosting will melt and make a big mess.
Nutritional Disclaimer
These Nutritional Facts are ESTIMATED. Your actual nutritional info with this recipe may vary depending on the brands you choose. “Eating Gluten and Dairy Free” is not a registered dietician or nutritionist. The provided nutritional info above is based on a generic calculator, if you want more accurate info, use your nutritional calculator of choice where you can choose brands and get more info that way.
Pin It For Later

Cooking Gluten & Dairy Free for the Holidays?
Our Holiday Recipes Cookbook has 50+ tested gluten & dairy free recipes — desserts, sides, and holiday staples for every season and celebration, all in one place. Instant download, just $15.