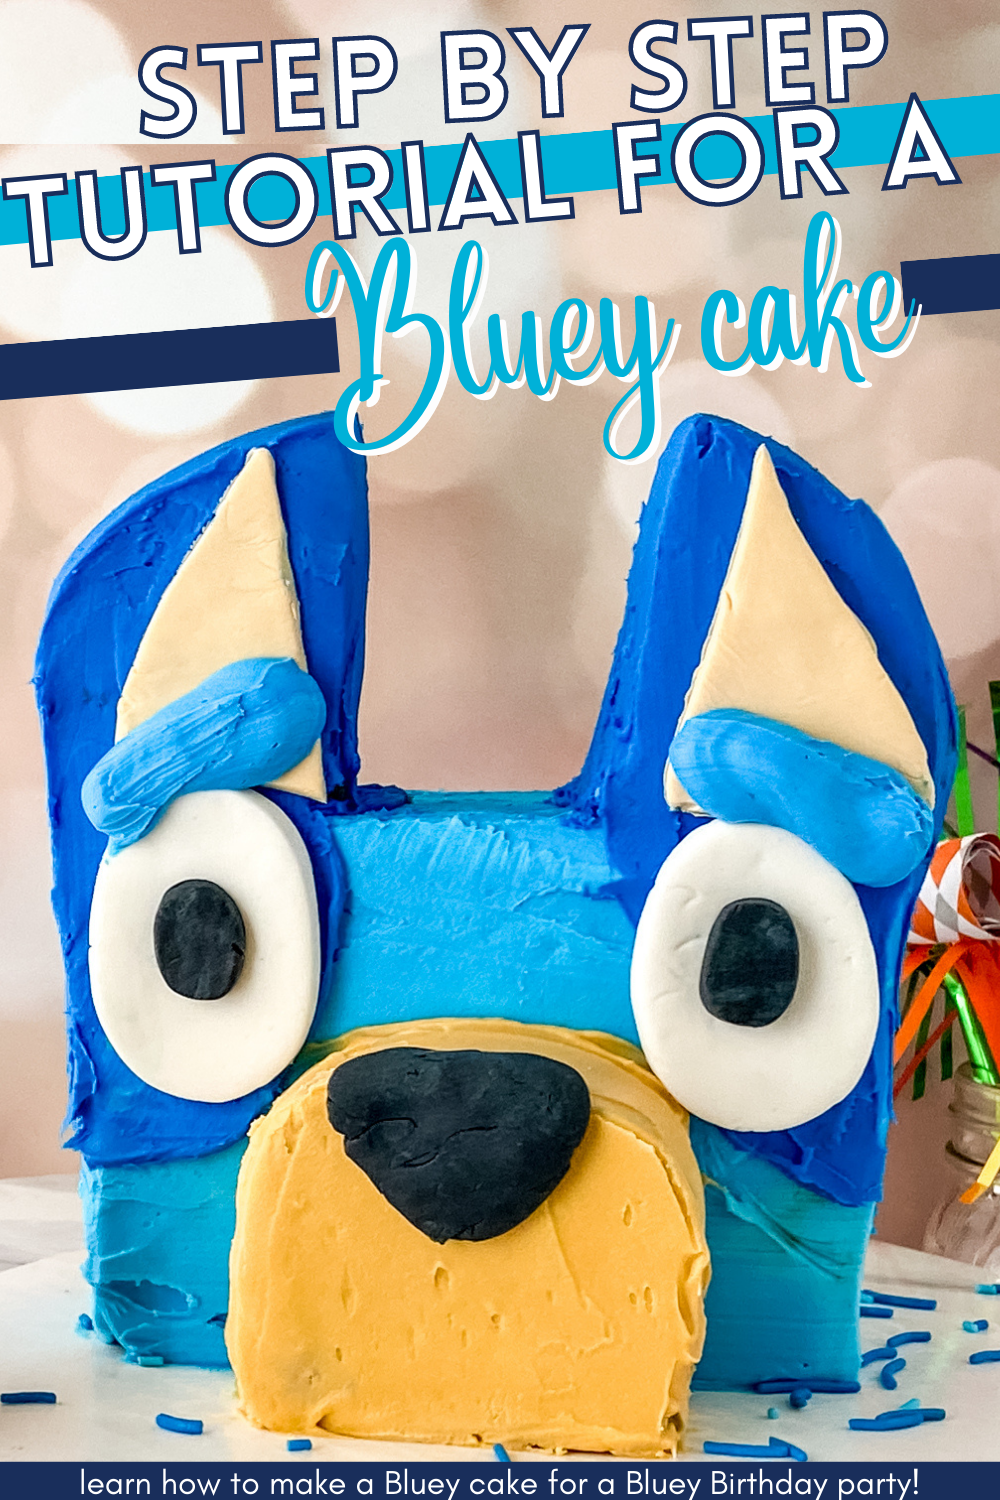
Bluey Cake Recipe (and SUPER easy Tutorial)
This post may contain affiliate links. As an Amazon Associate, and through other affiliate programs, I earn a small commission from qualifying purchases — at no extra cost to you. I only ever recommend products I use and love. See our full disclosure policy for details. Thank you for supporting Eating Gluten and Dairy Free!
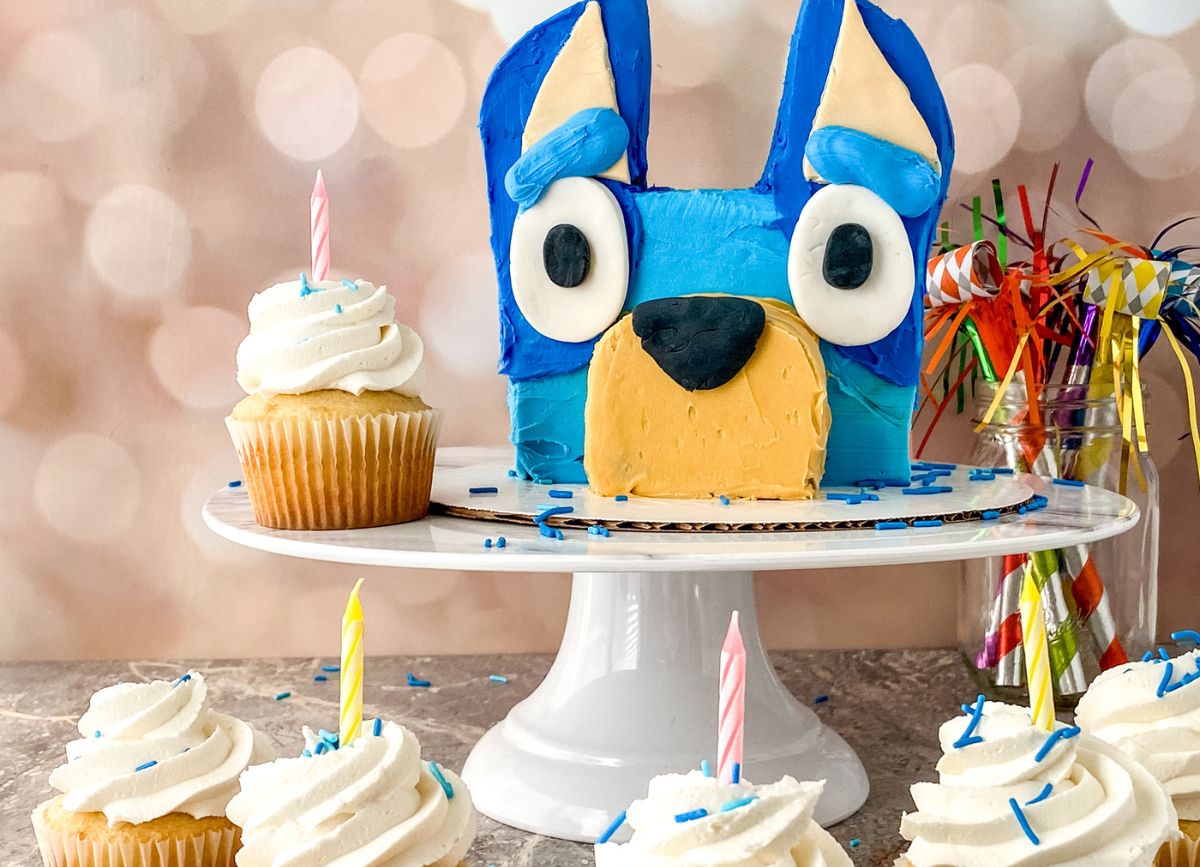
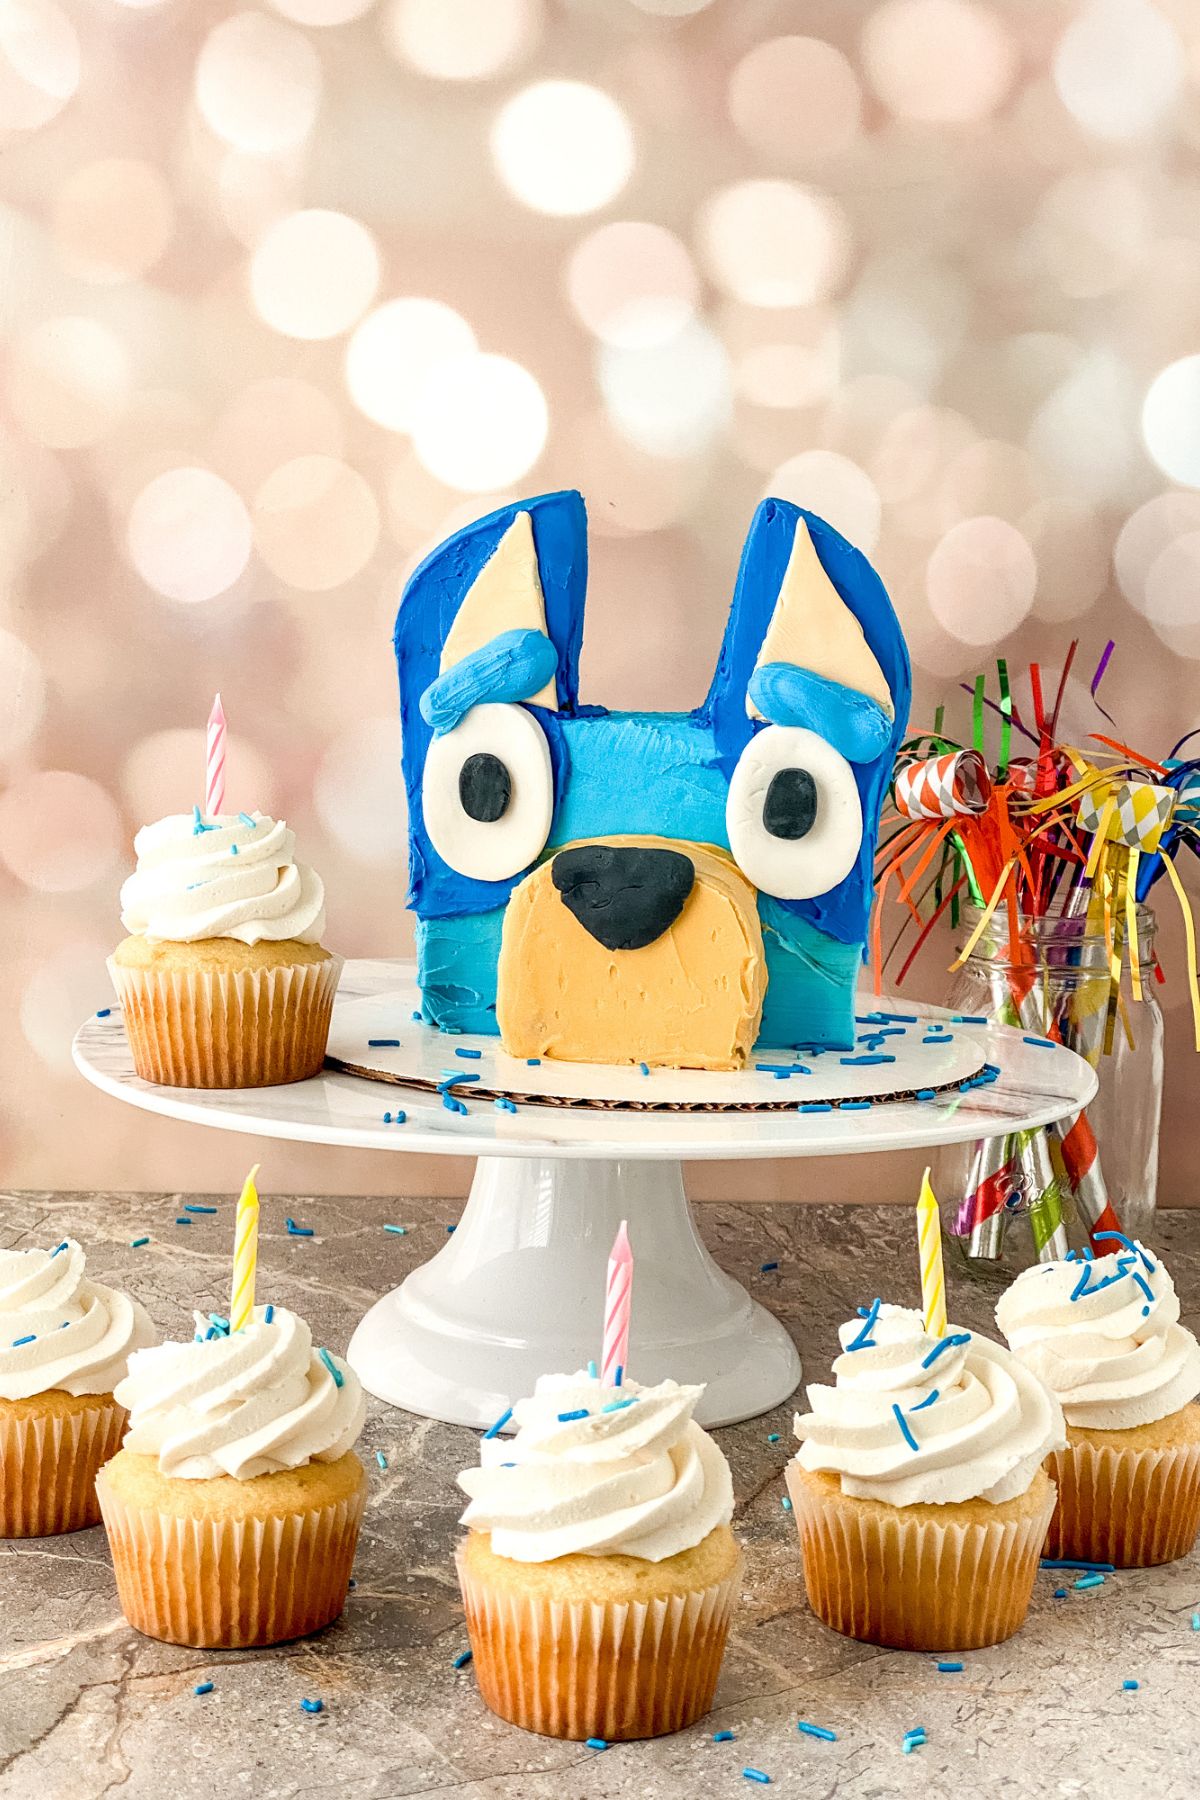
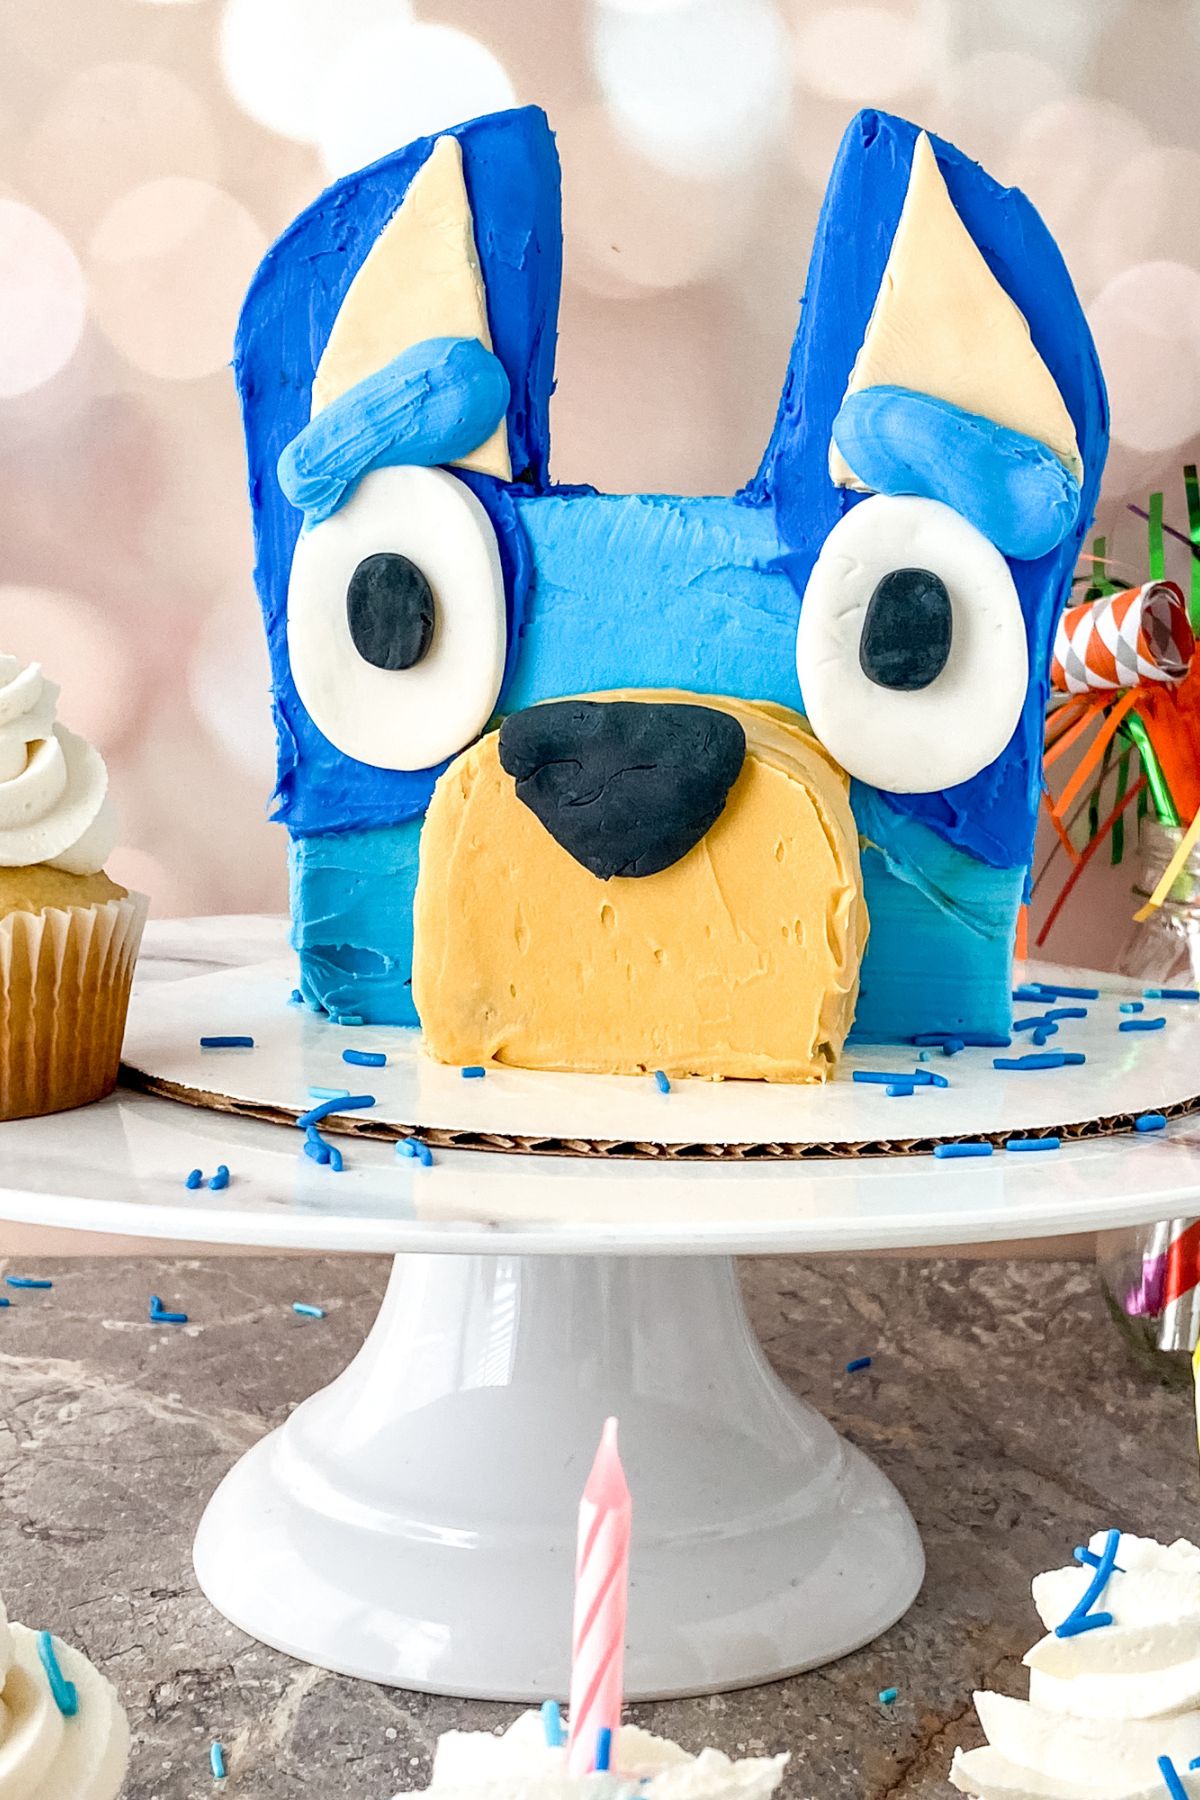
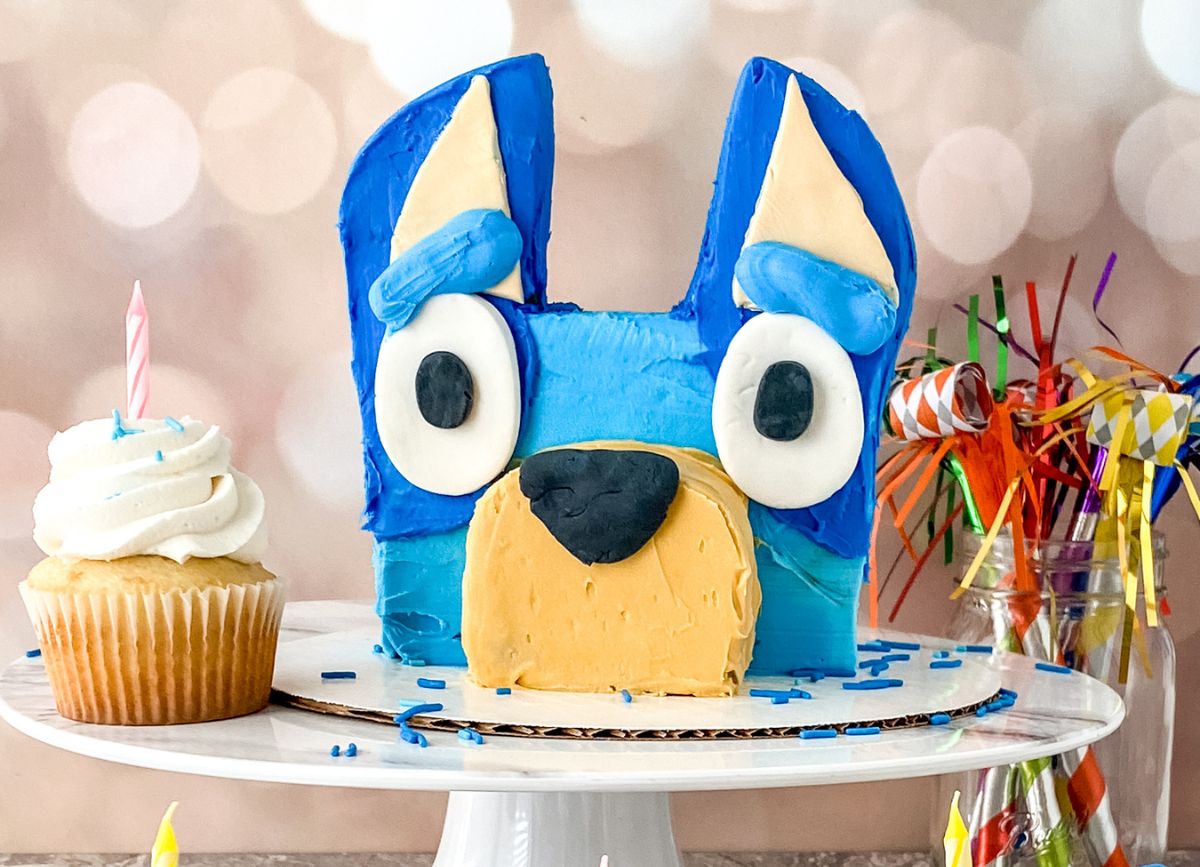
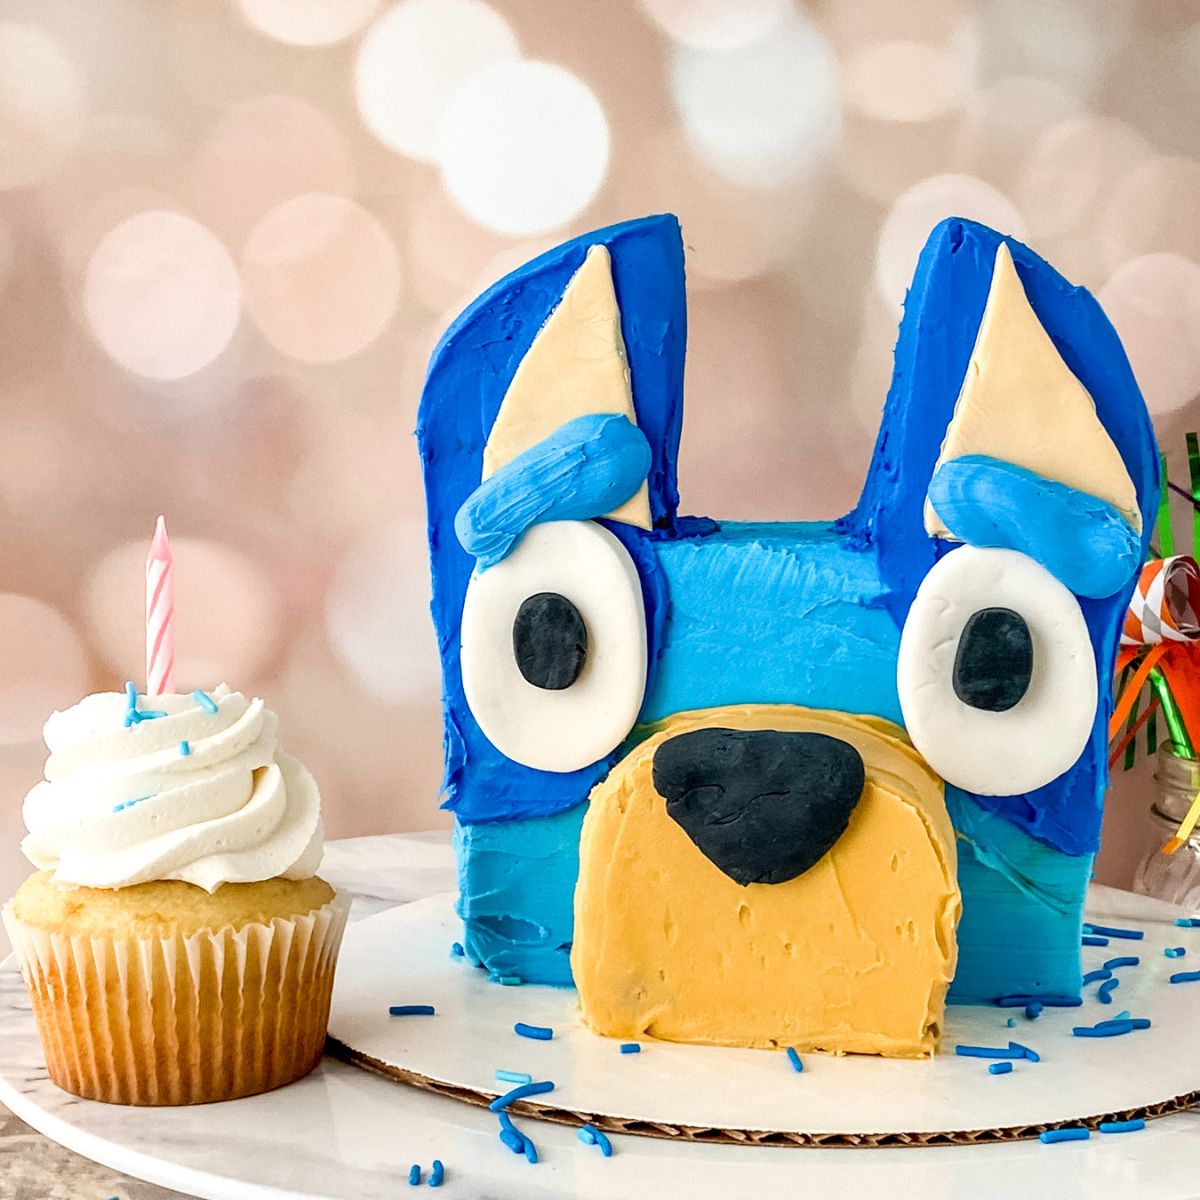
Does your child LOVE all things Bluey as much as ours do? Bluey is the cutest show and would be a great theme for a kids birthday party! If you decide throwing a Bluey party is what you want to do, then you MUST make this Bluey Cake! Keep reading to learn how to make the most adorable birthday cake.
We have an easy, step-by-step set of instructions showing you how to make this birthday cake in the shape of Bluey's head. No need for an edible cake topper image.
No need to order some custom cakes or order a custom order from your local bakery when you can make your own cakes with easy recipes like this!
The best part is, this cake is gluten and dairy free, but you and your guests won't even know!
Don't let the length of the instructions stop you from making this cake. We went into tons of details to make it so anybody can use this tutorial to make a Bluey Cake!
Why You'll Love This Tutorial
- You get step-by-step instructions on how to make this allergen-friendly cake
- You can easily make your Bluey fan happy with this adorable cake
- It is not SUPER hard to make- but looks like a professional made it
- A fun cake for parties or a special occasion
- Goes with any birthday party decorations for your Bluey birthday party
- More fancy and appealing than edible cake images that you would great from the grocery store
Ingredients Needed (more info in the recipe card at bottom)
- Black Fondant - This is the Satin Ice Black Fondant that we like. It's gluten free, dairy free, vegan, and nut free!
- White Fondant - This is the White Fondant we use that is also gluten, dairy and nut free, as well as vegan. It has a vanilla flavor too.
- Sky Blue Gel Food Color- This is the Sky Blue Food Coloring that we used in this recipe. Love that it says gluten free right on the bottle! Here is another gluten free, vegan, and kosher option if you need it.
- Royal Blue Gel Food Color - Here's the royal blue made by the first brand we recommend with the sky blue version. You can also find it in the other pack we recommended there too.
- Ivory Gel Food Color - Again, this Ivory gel food color is gluten free and peanut free and is what we used. You'll find another version
- Buttercream - we have our dairy free vanilla buttercream that is our go to for ANY and ALL sweet dessert needs. Have this prepared and ready to go.
- 8 inch cooled cake - you can use a homemade gluten and dairy free simple cake recipe. Or you can use a gluten and dairy free boxed cake mix to make your 8-inch cake. Have this cake ready to go before starting this. Our favorite is from King Arthur available here. It's a certified gluten free vanilla cake mix, however they have announced their mixes have a risk of dairy cross-contamination; see here for more info.
- lemon extract, optional - we like this lemon extract. It's sugar free, vegan (dairy free), non-gmo, and gluten free.

Helpful Kitchen Tools
Small Egg or Oval Shaped Cookie Cutter
Small Egg or Oval Shaped Cookie Cutter
Measuring Cups and Spoons
Mixing Bowls
Piping Tips with Bags
Cake Board
Turn Table
2 long Skewers
Serrated Knife
How to Make a Bluey Cake
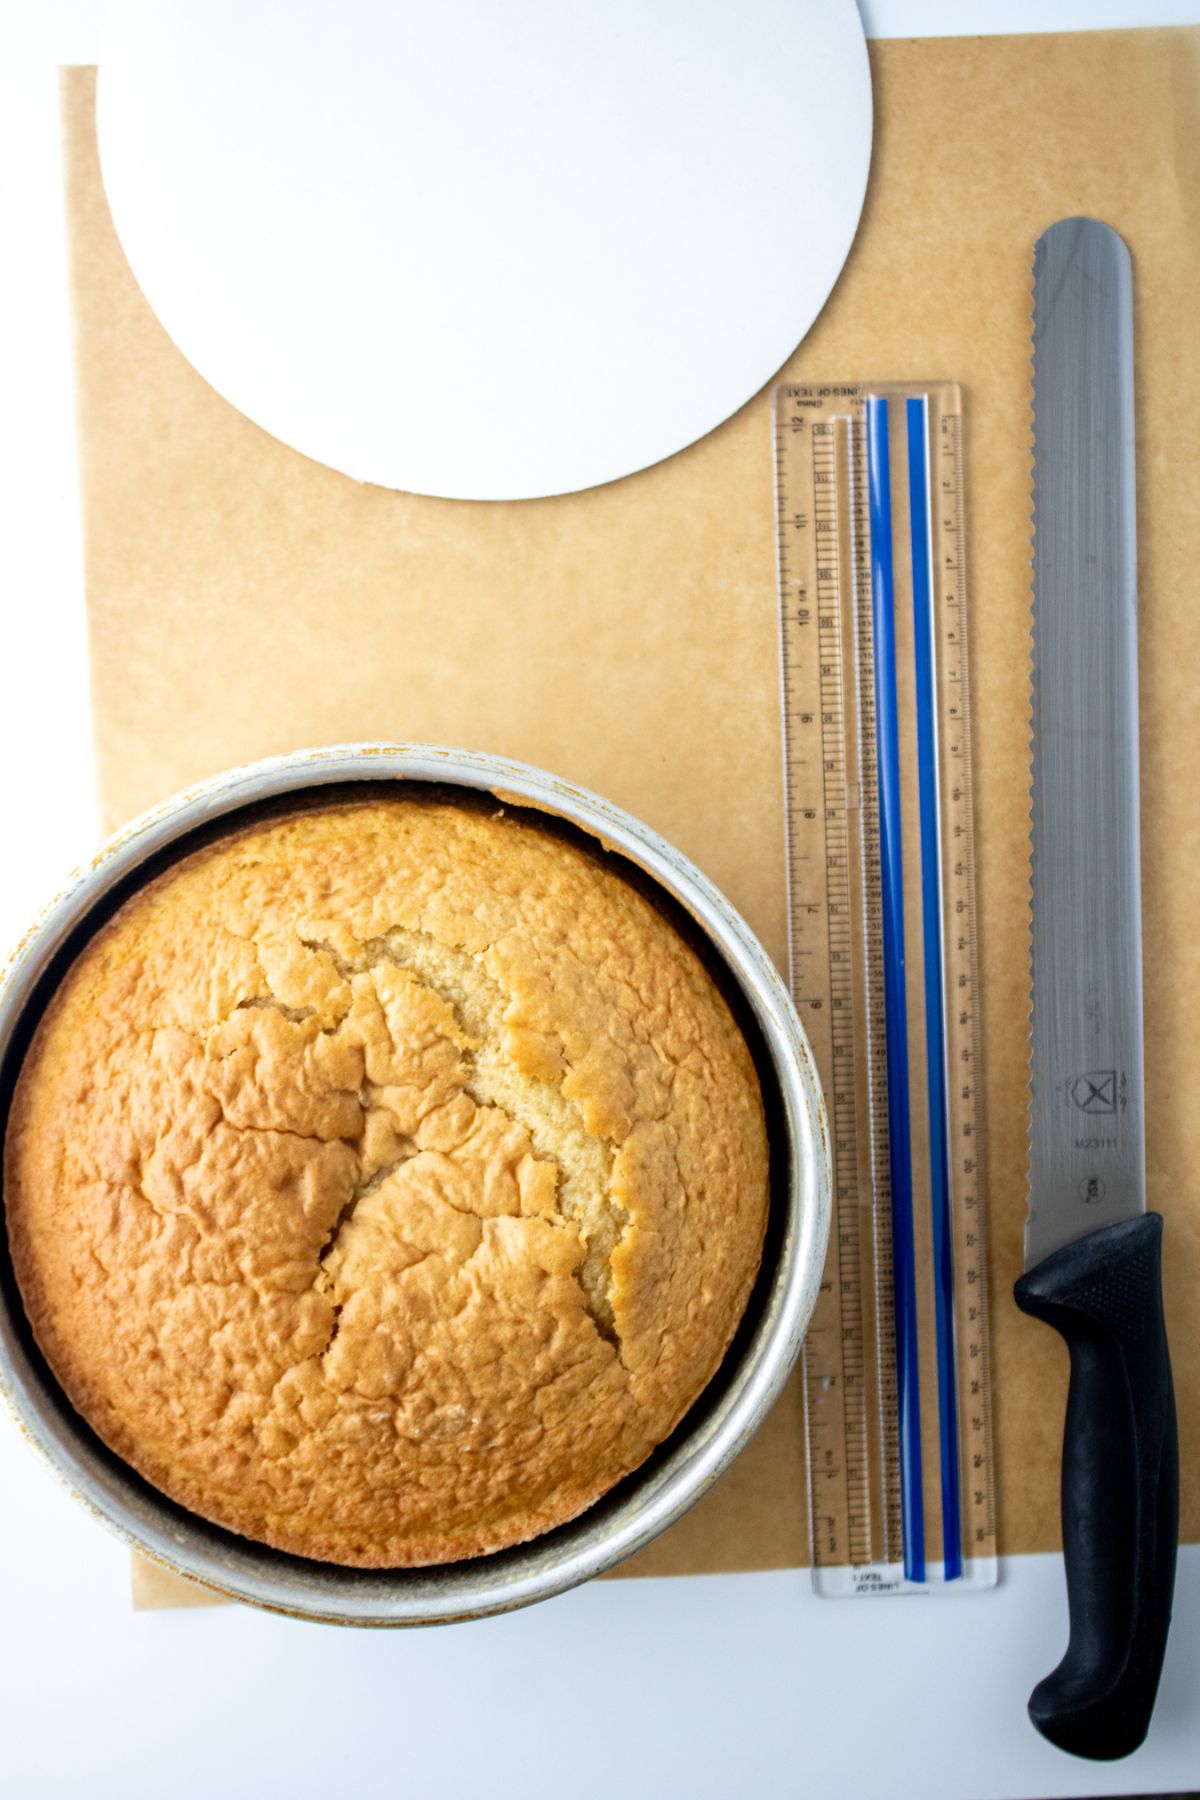
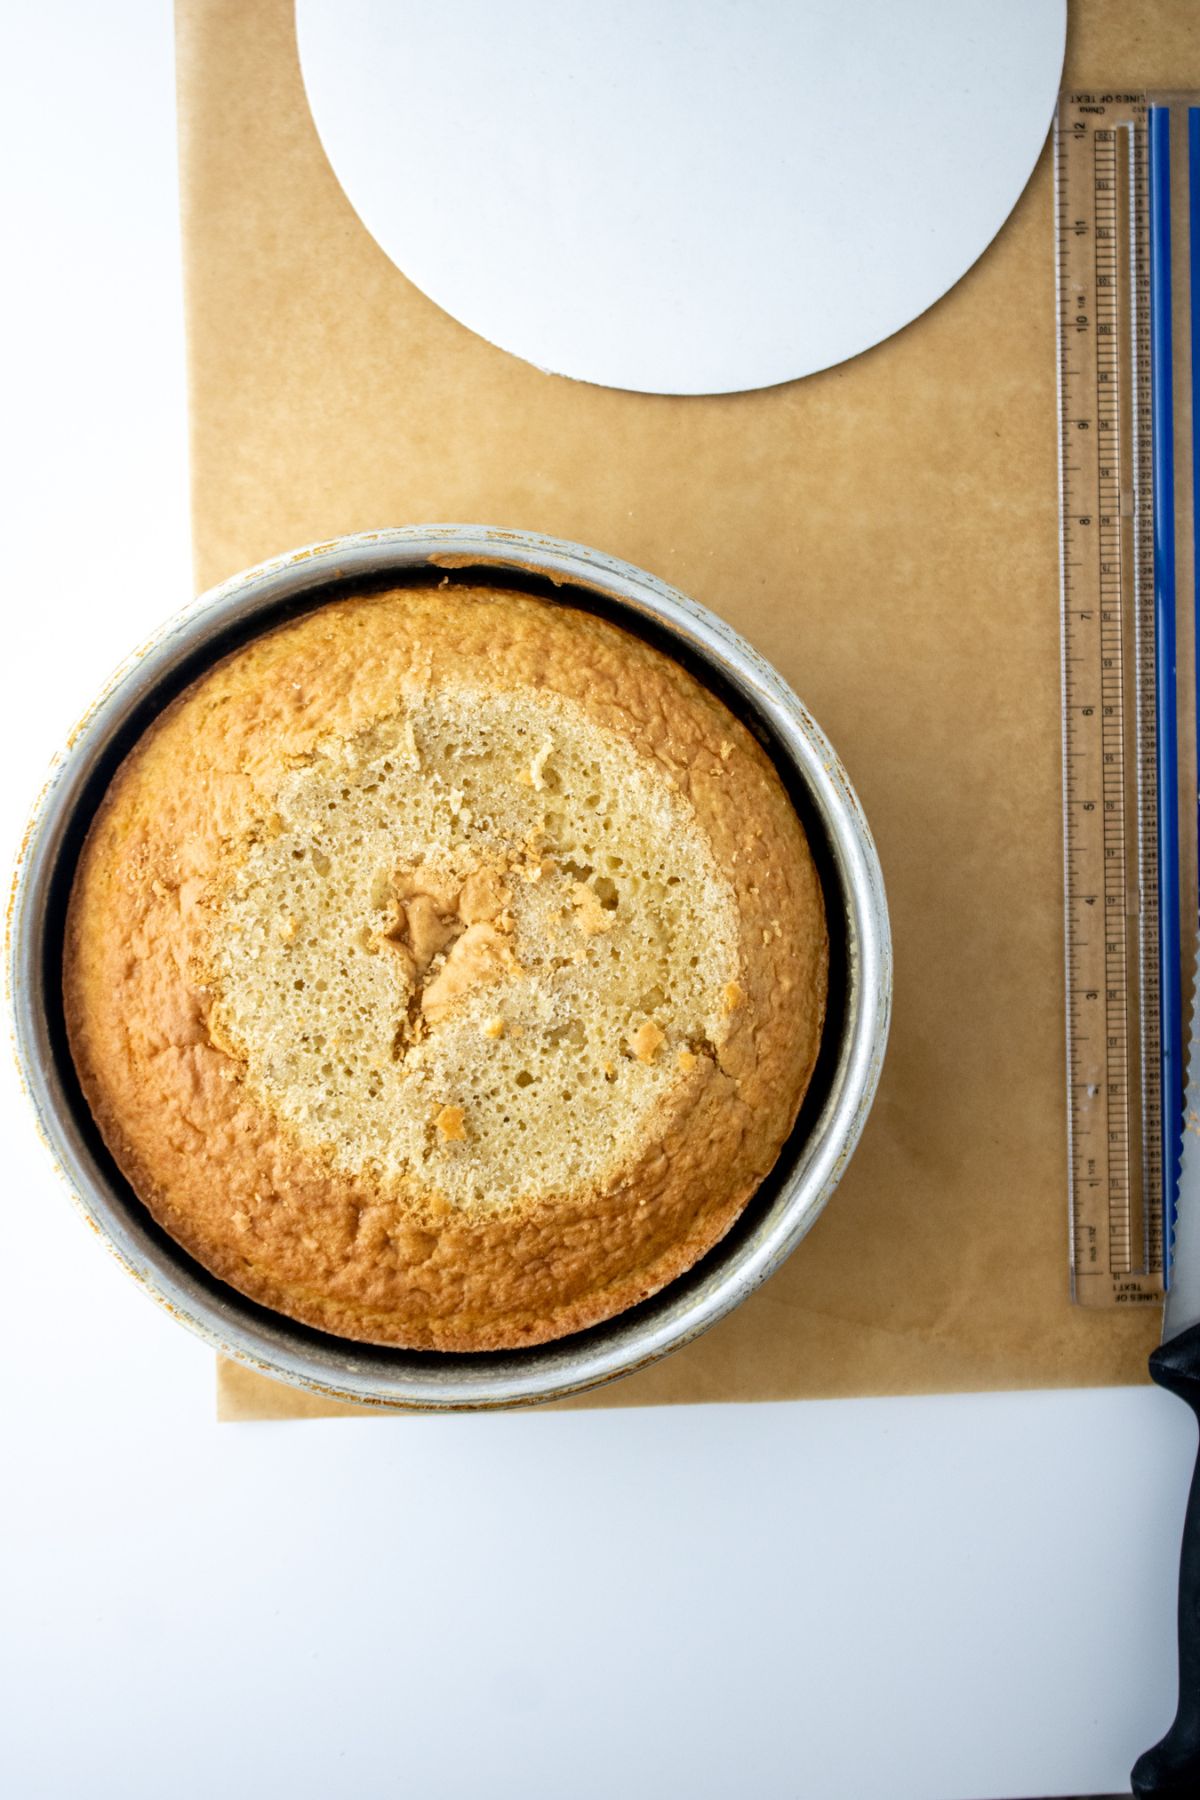
While the cakes are still in the pan, use a serrated knife to cut the dome of the cake, or the top off of the cake.
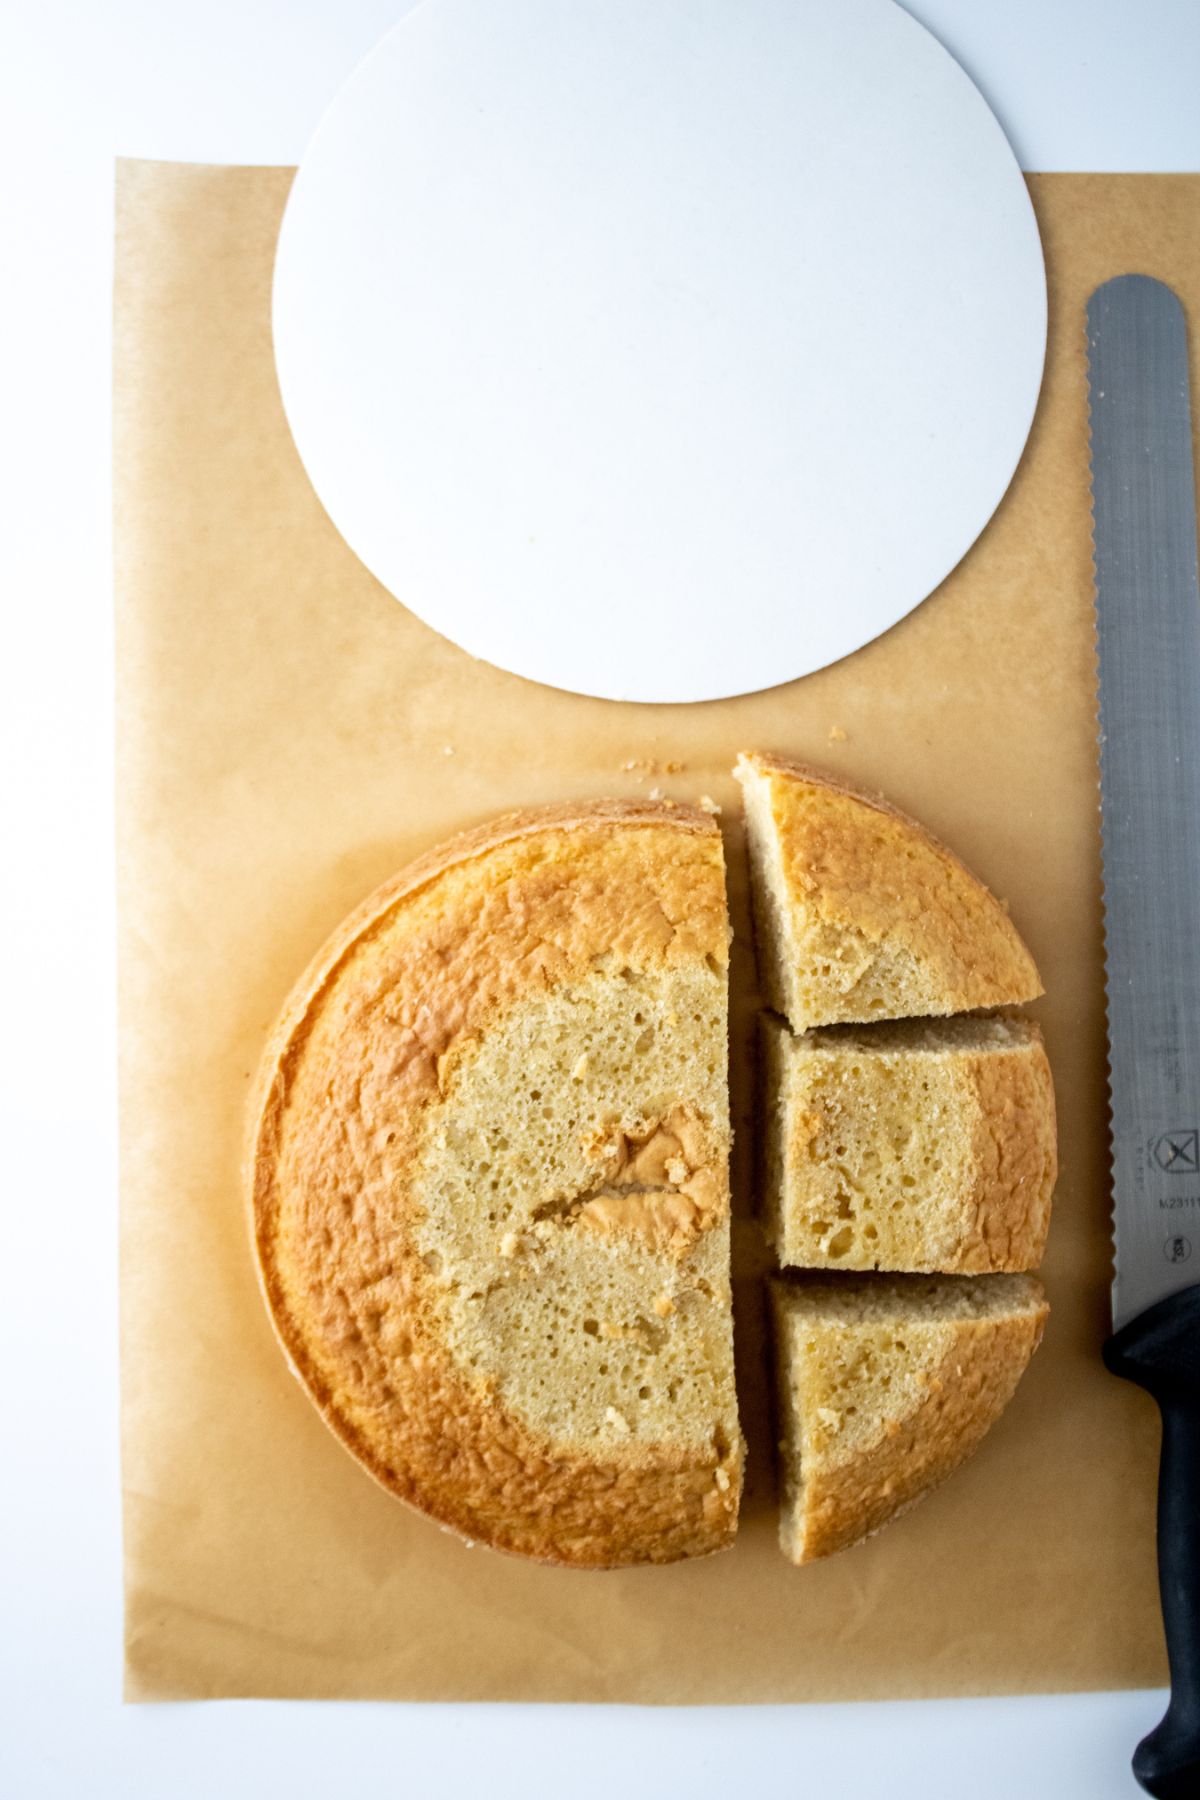
Cut off 1.5 inches of the cake from the side and cut it into three sections of equal size.
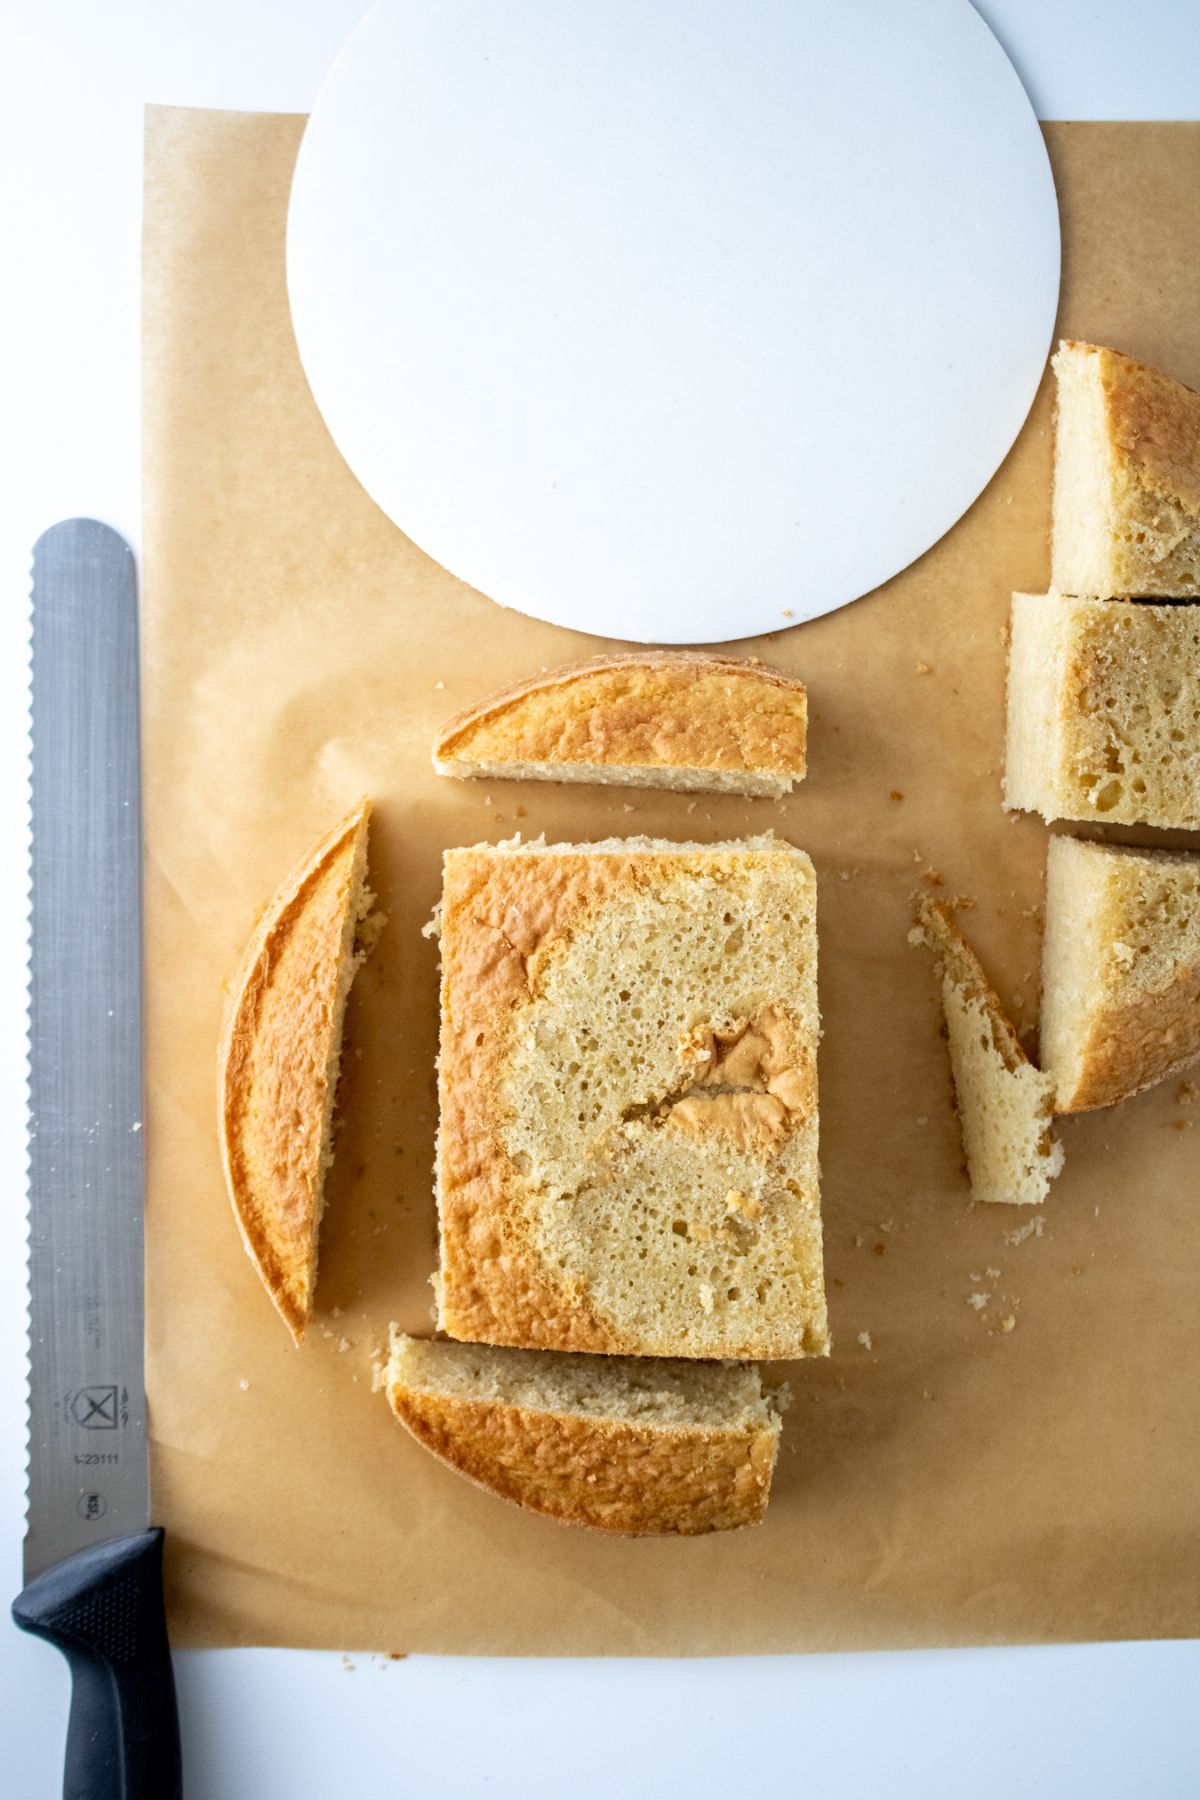
Square off the rest of the cake. You can use the scrap cake for cake pops if desired!
To Make the Ears:
The two outer pieces of the cake that you cut off will be the ears.
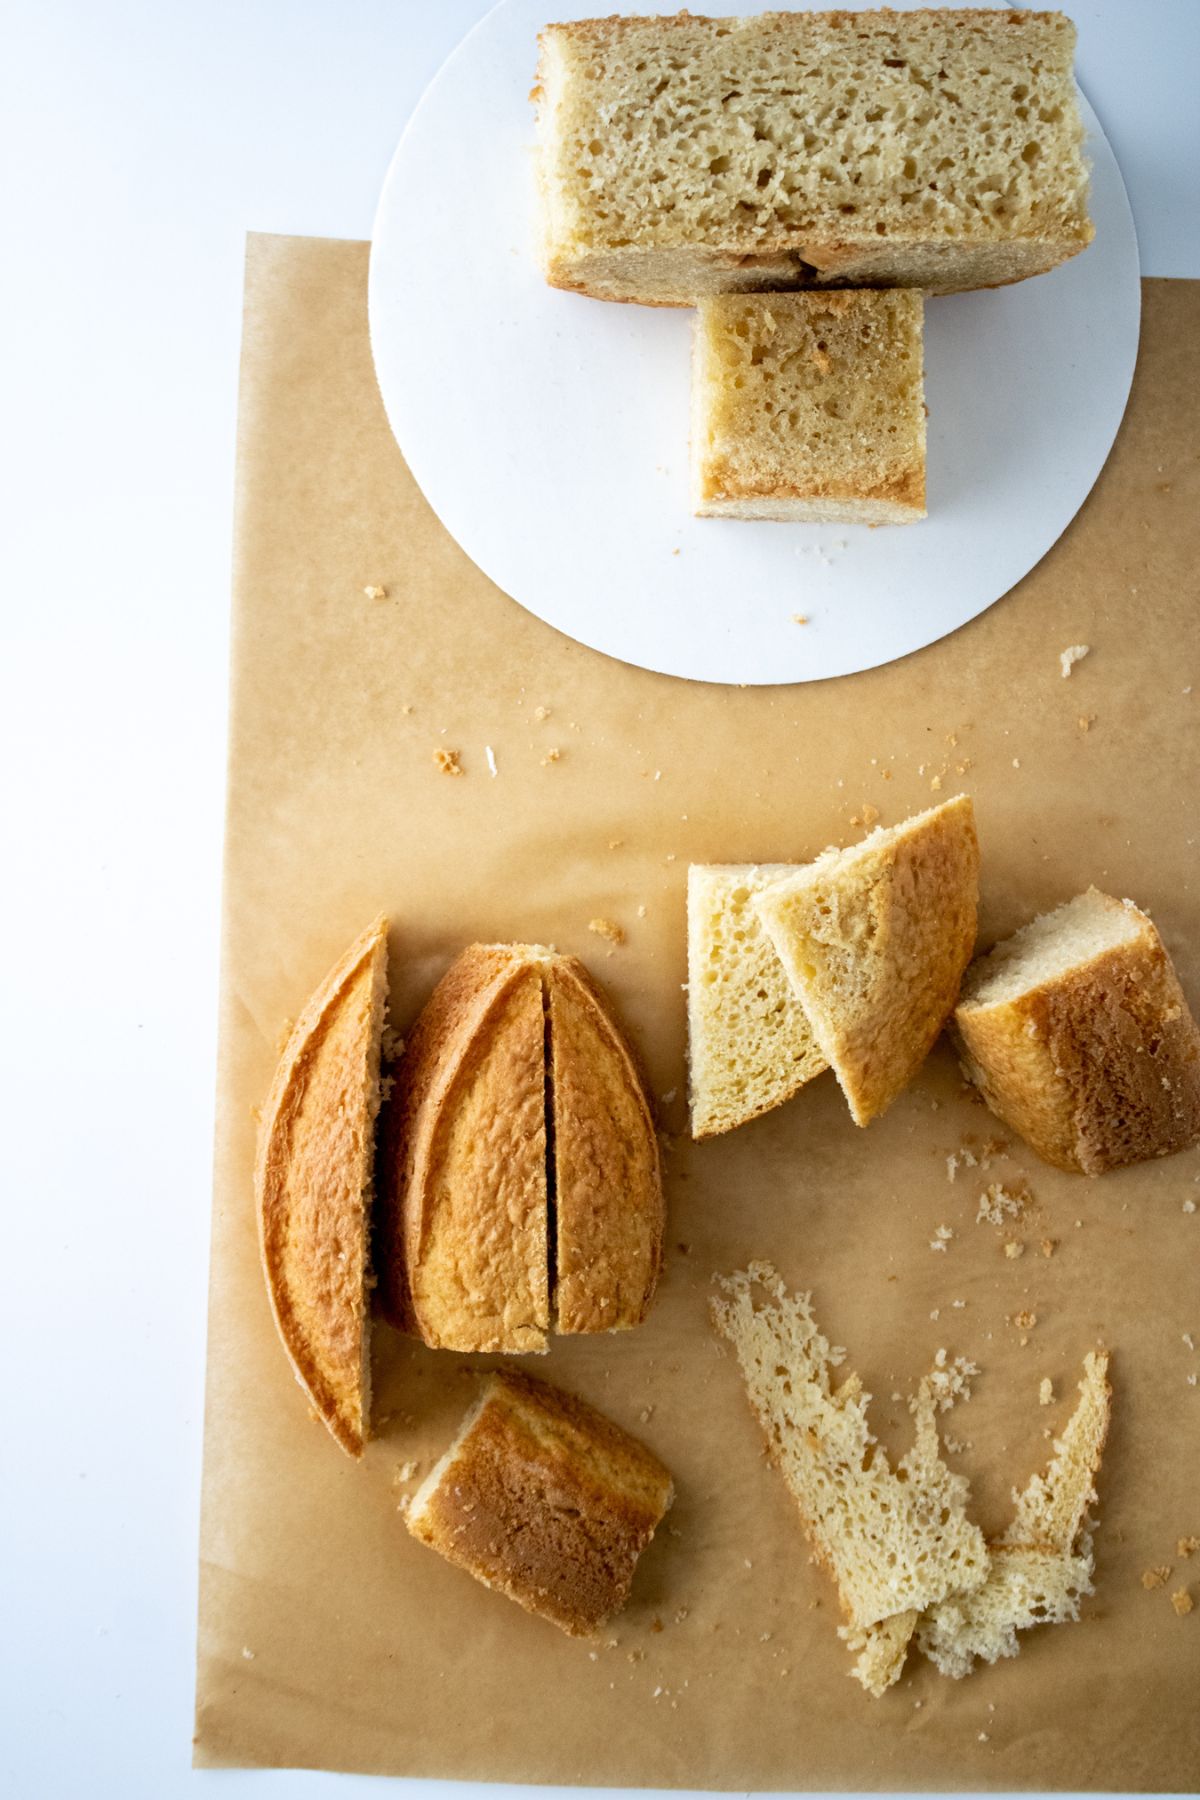
Pay attention to the sizes and the direction you have cut them in, place them on a baking sheet and freeze them while you work on the rest of the cake.
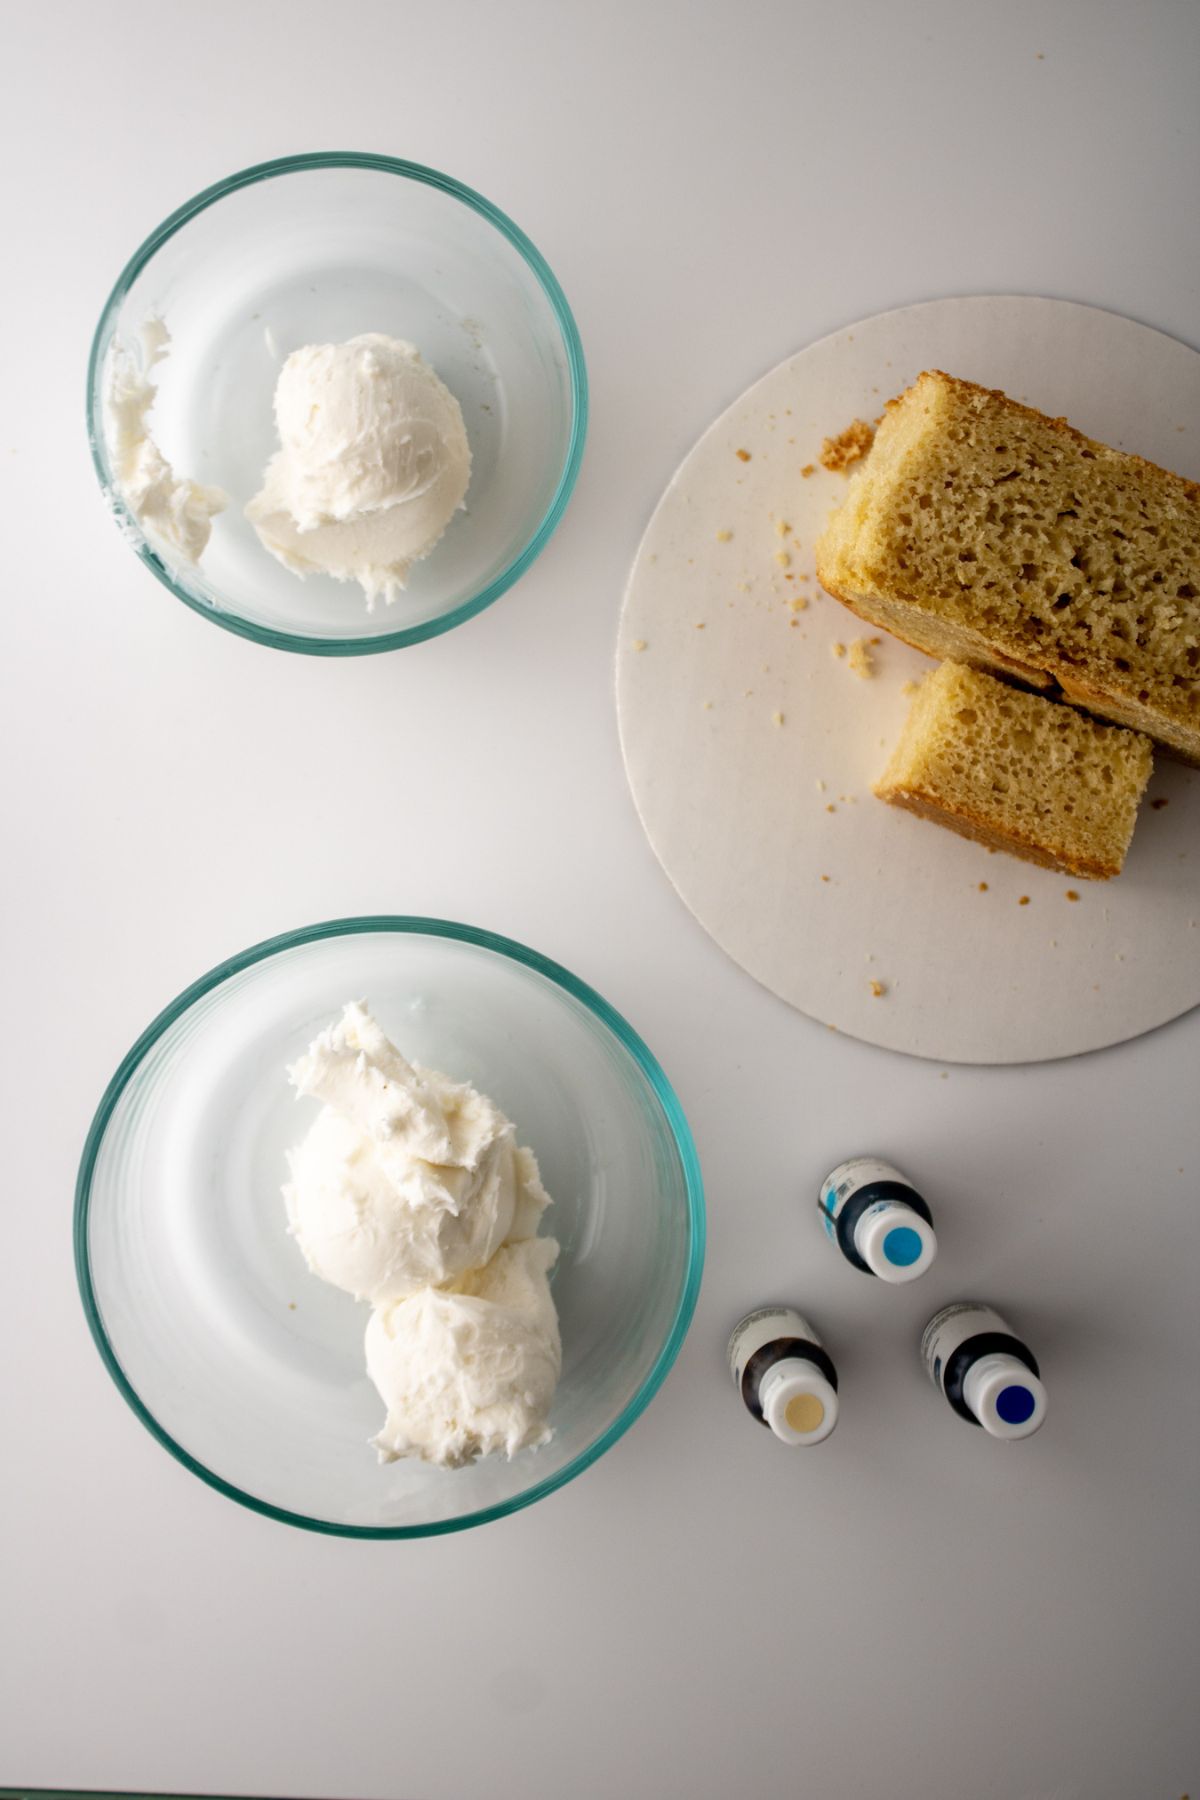
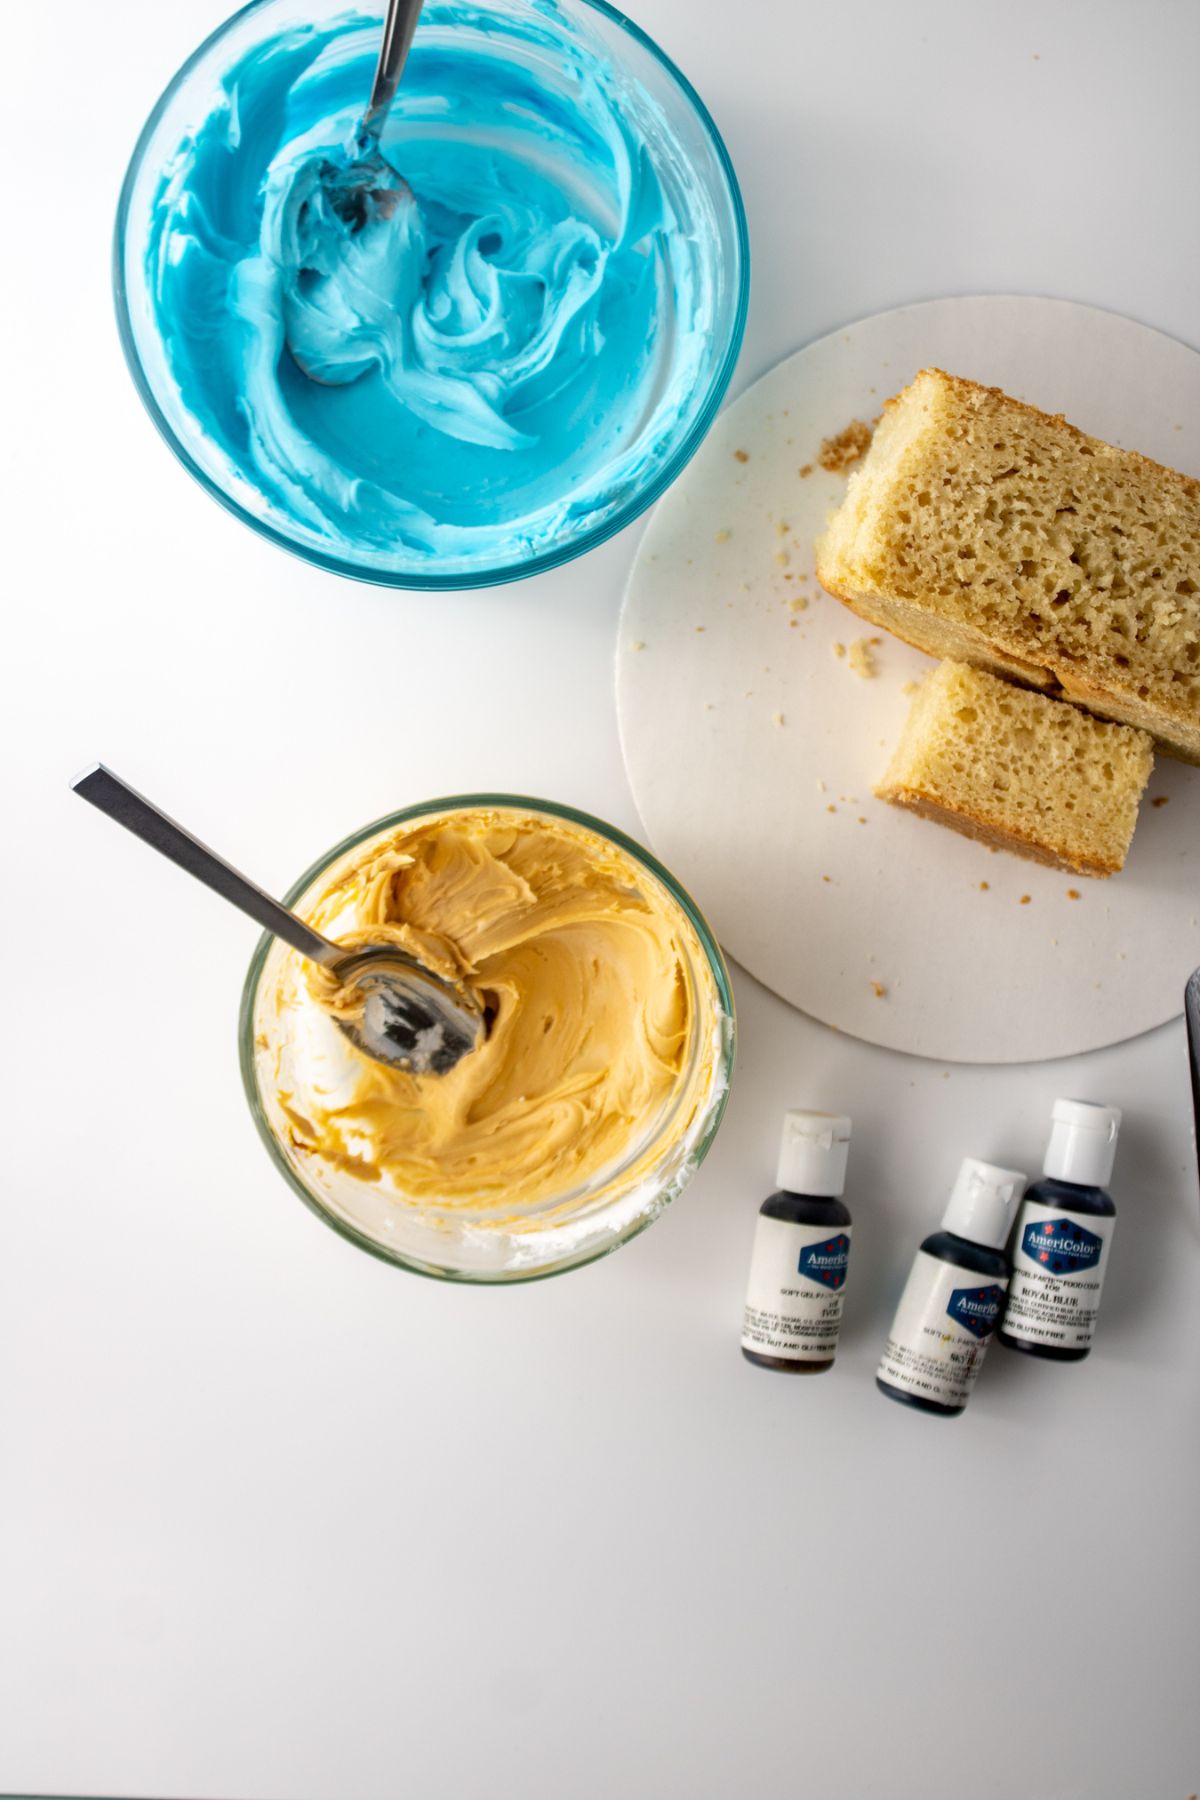
Dye the frosting
Add two cups of dairy free buttercream frosting to a mixing bowl with 1-2 drops of sky blue food coloring gel. Mix it well before adding more.
In another bowl, add ½ cup of buttercream for the nose and add 1 drop of ivory gel food coloring.
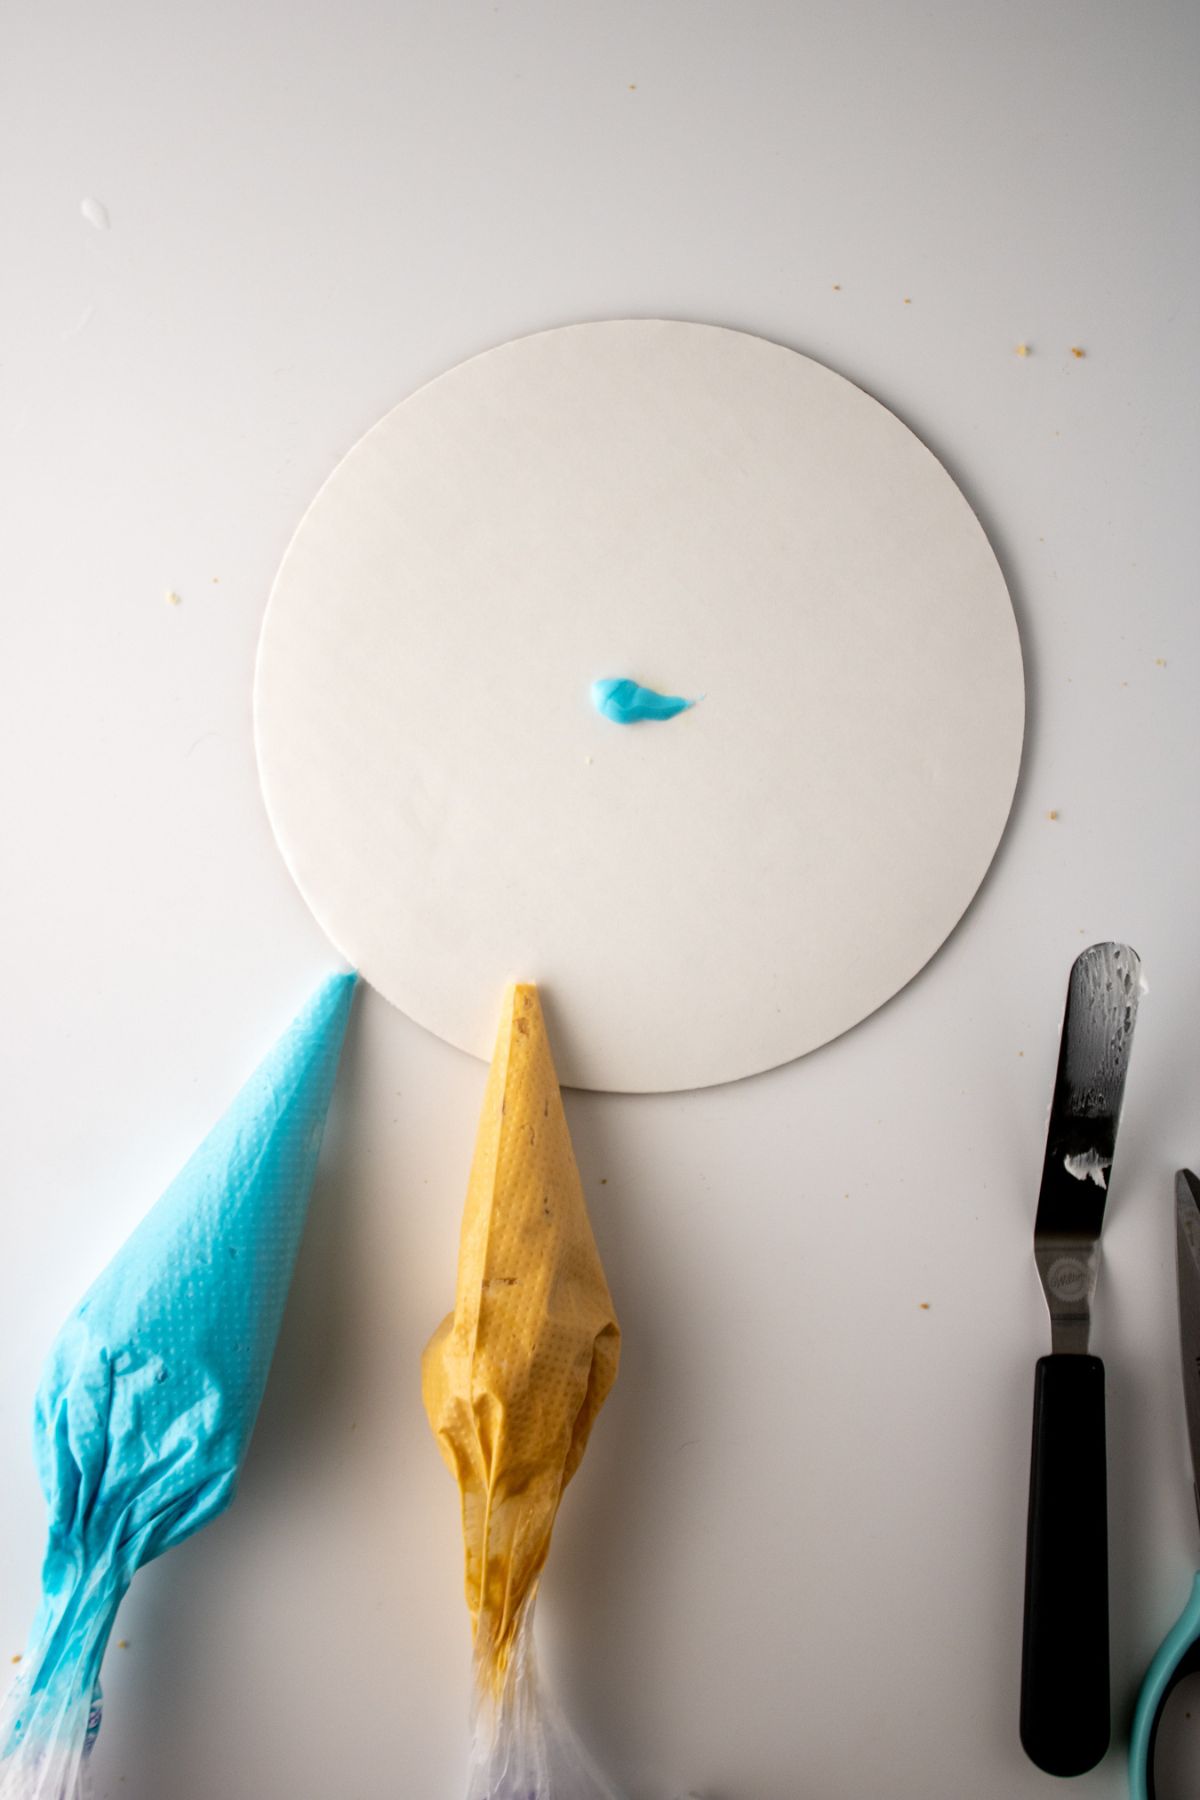
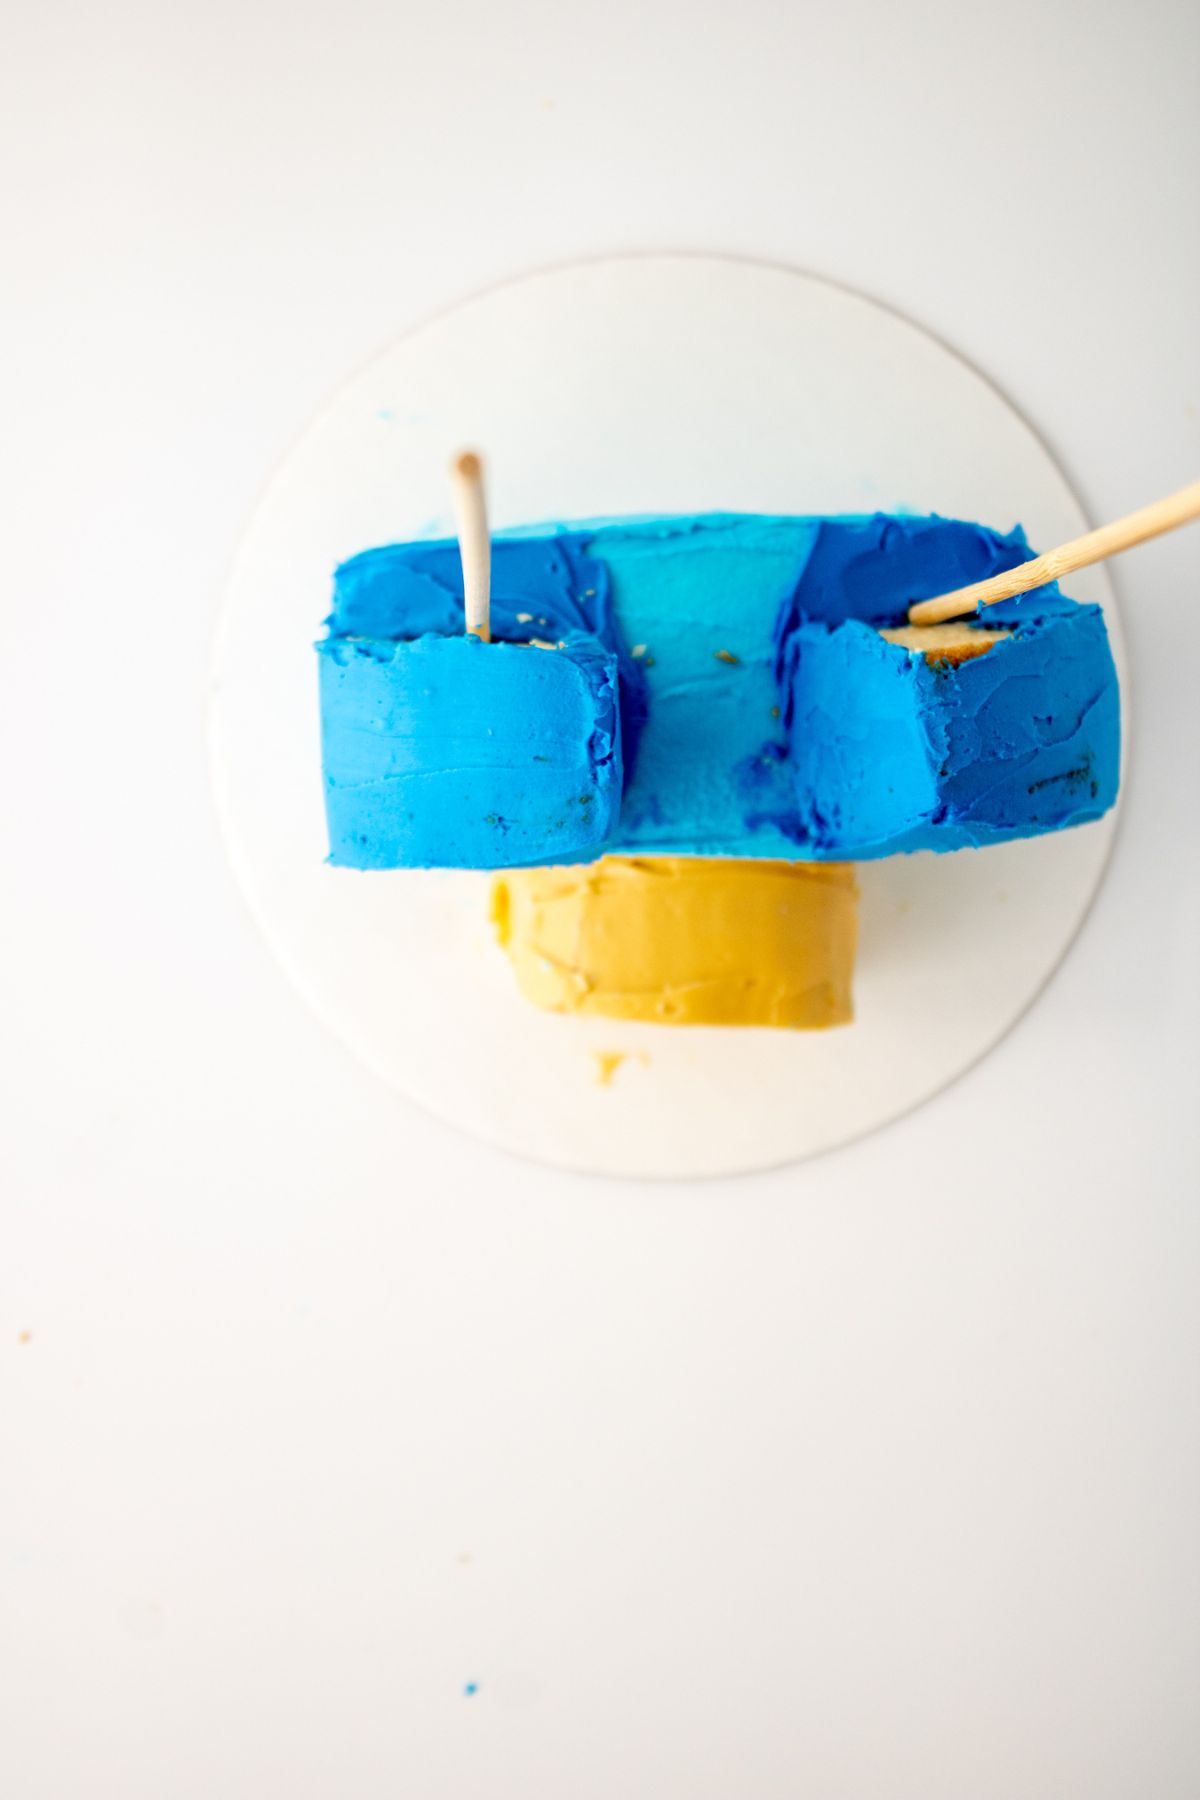
Assemble the head
Add a dollop of dairy free buttercream to the cake board where you want the head to be positioned leaving space for Bluey's nose.
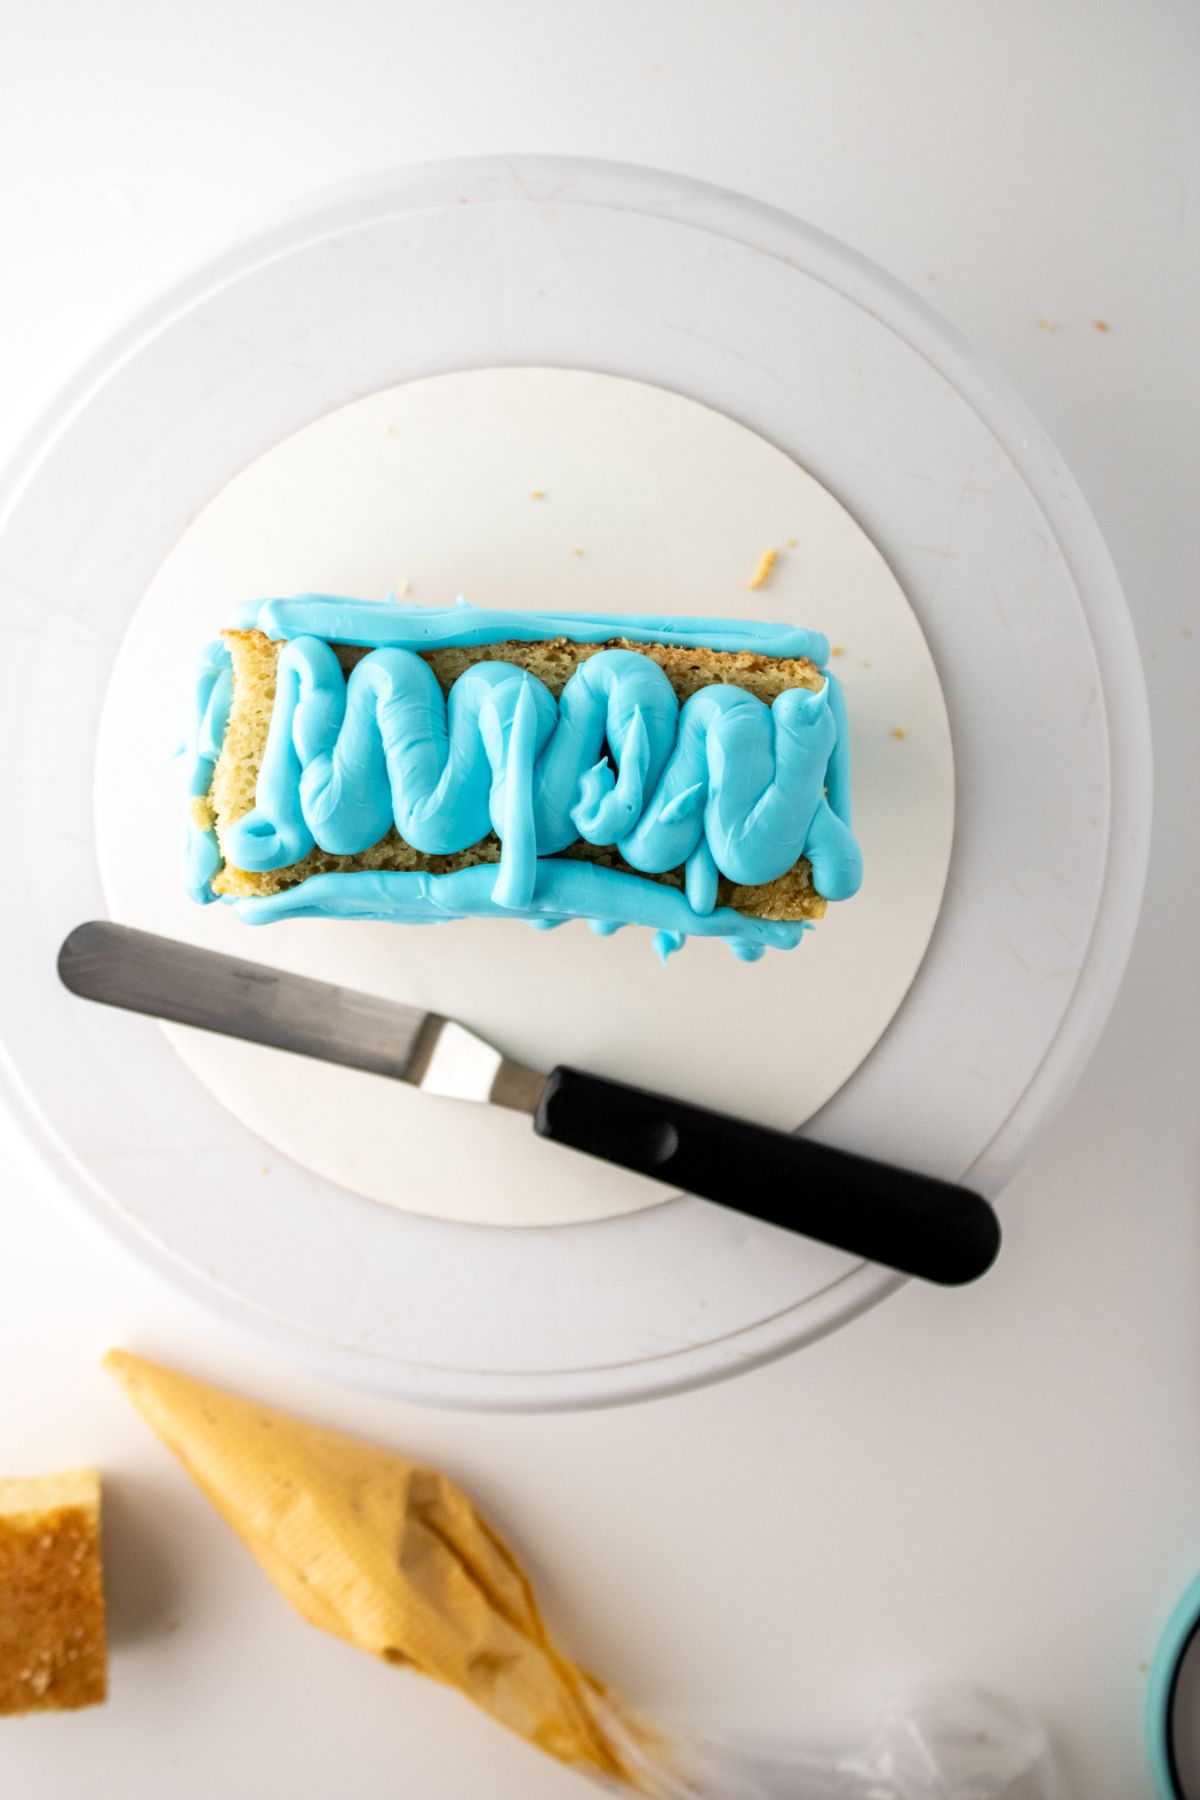
Place the piece of squared-off cake upright onto the cake board.

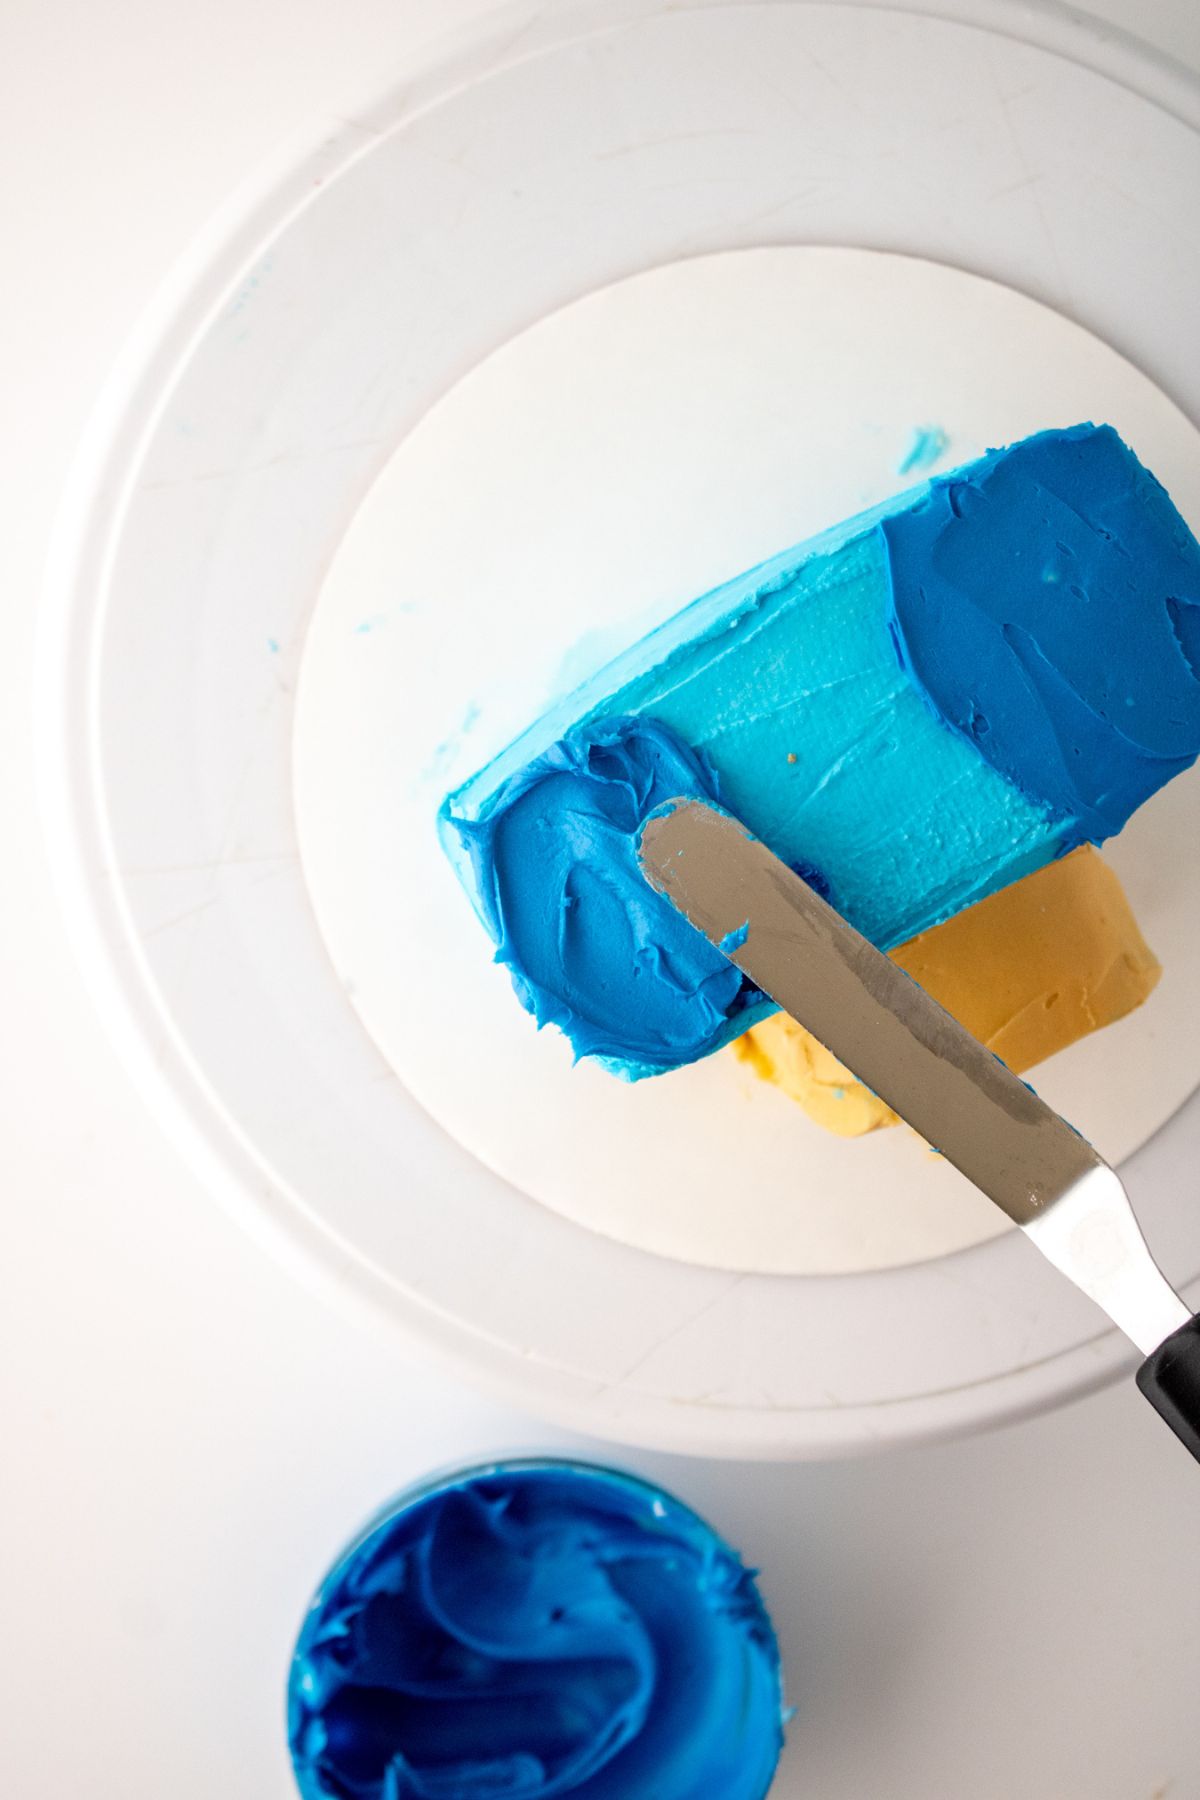
Carefully, transfer the sky blue buttercream to a piping bag and add more frosting than you think you need on.
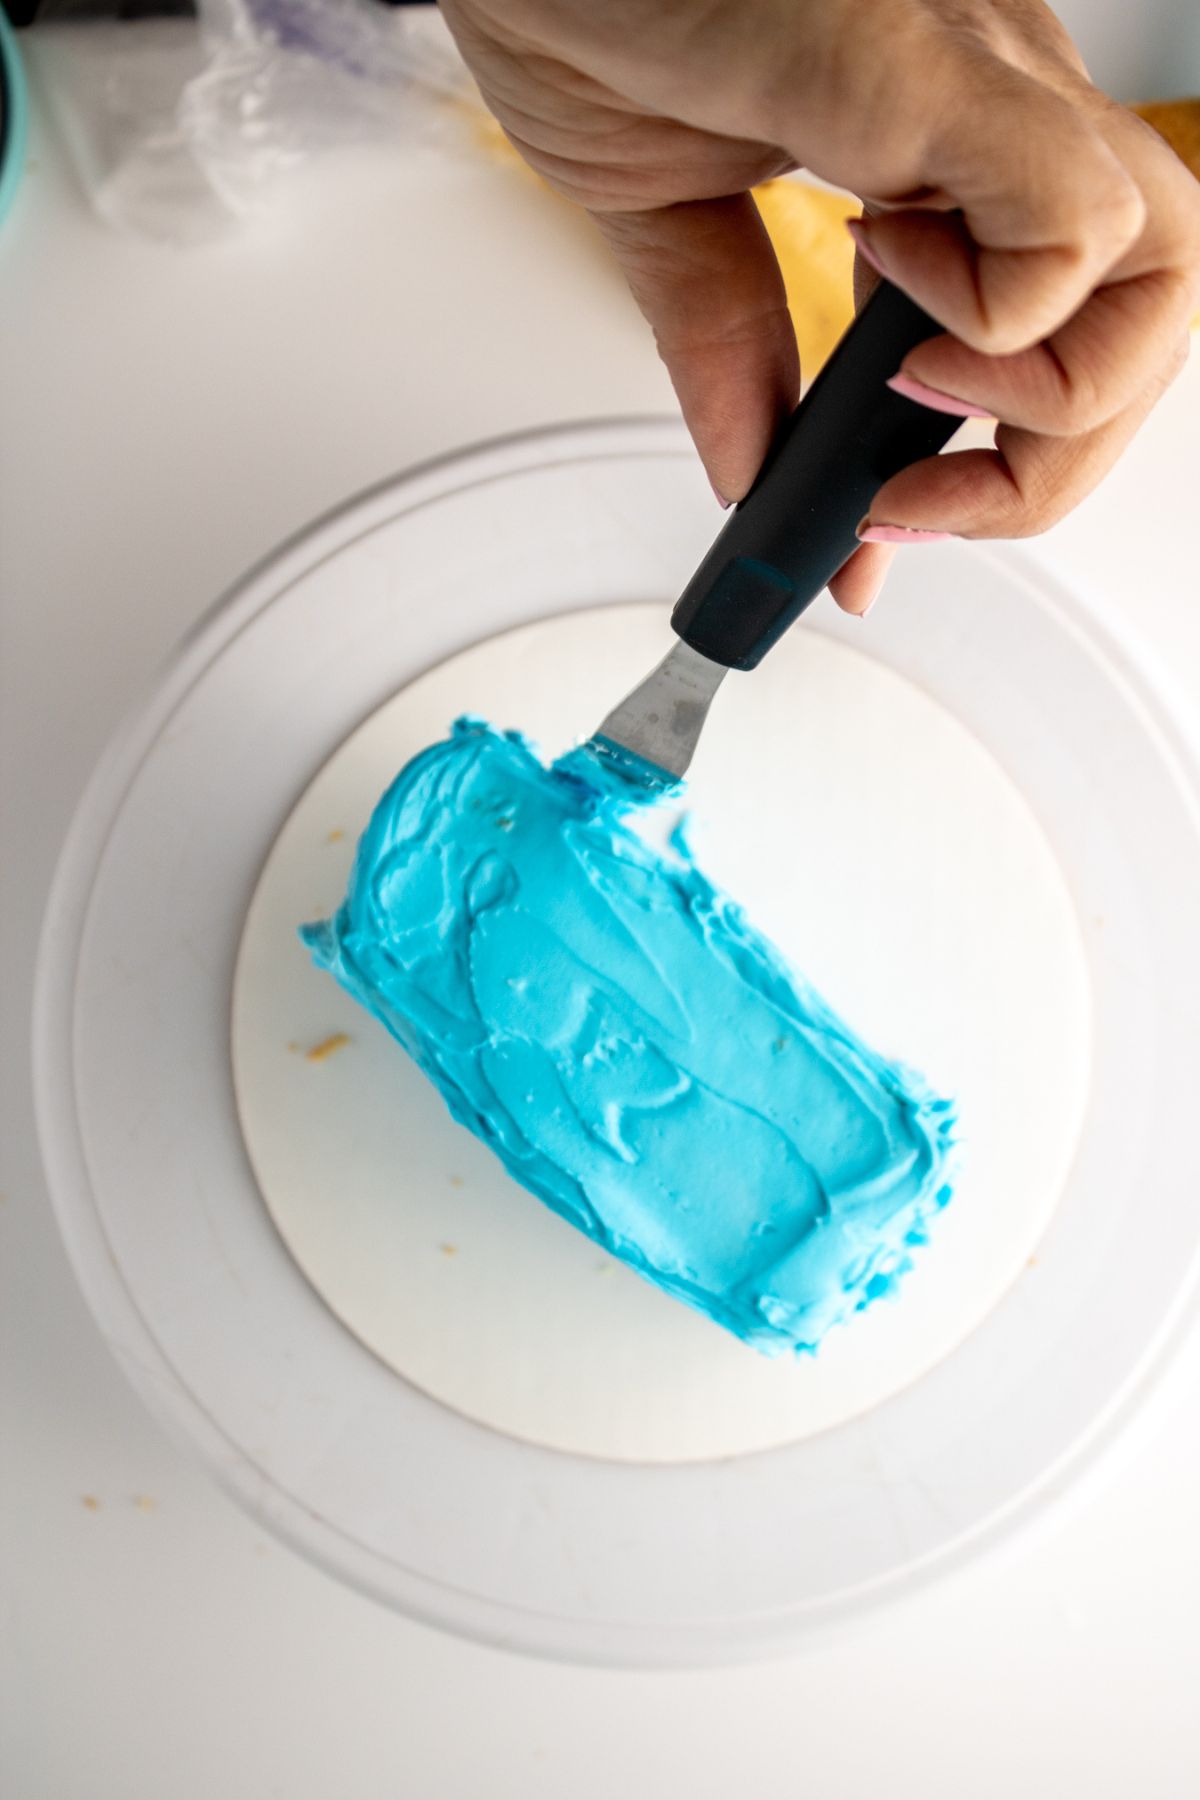
Frost the cake by using the angled spatula and then the icing smoother to help remove any excess frosting. We also like to use a plain white Viva paper towel to help smooth the frosting (no other brand works because of designs.
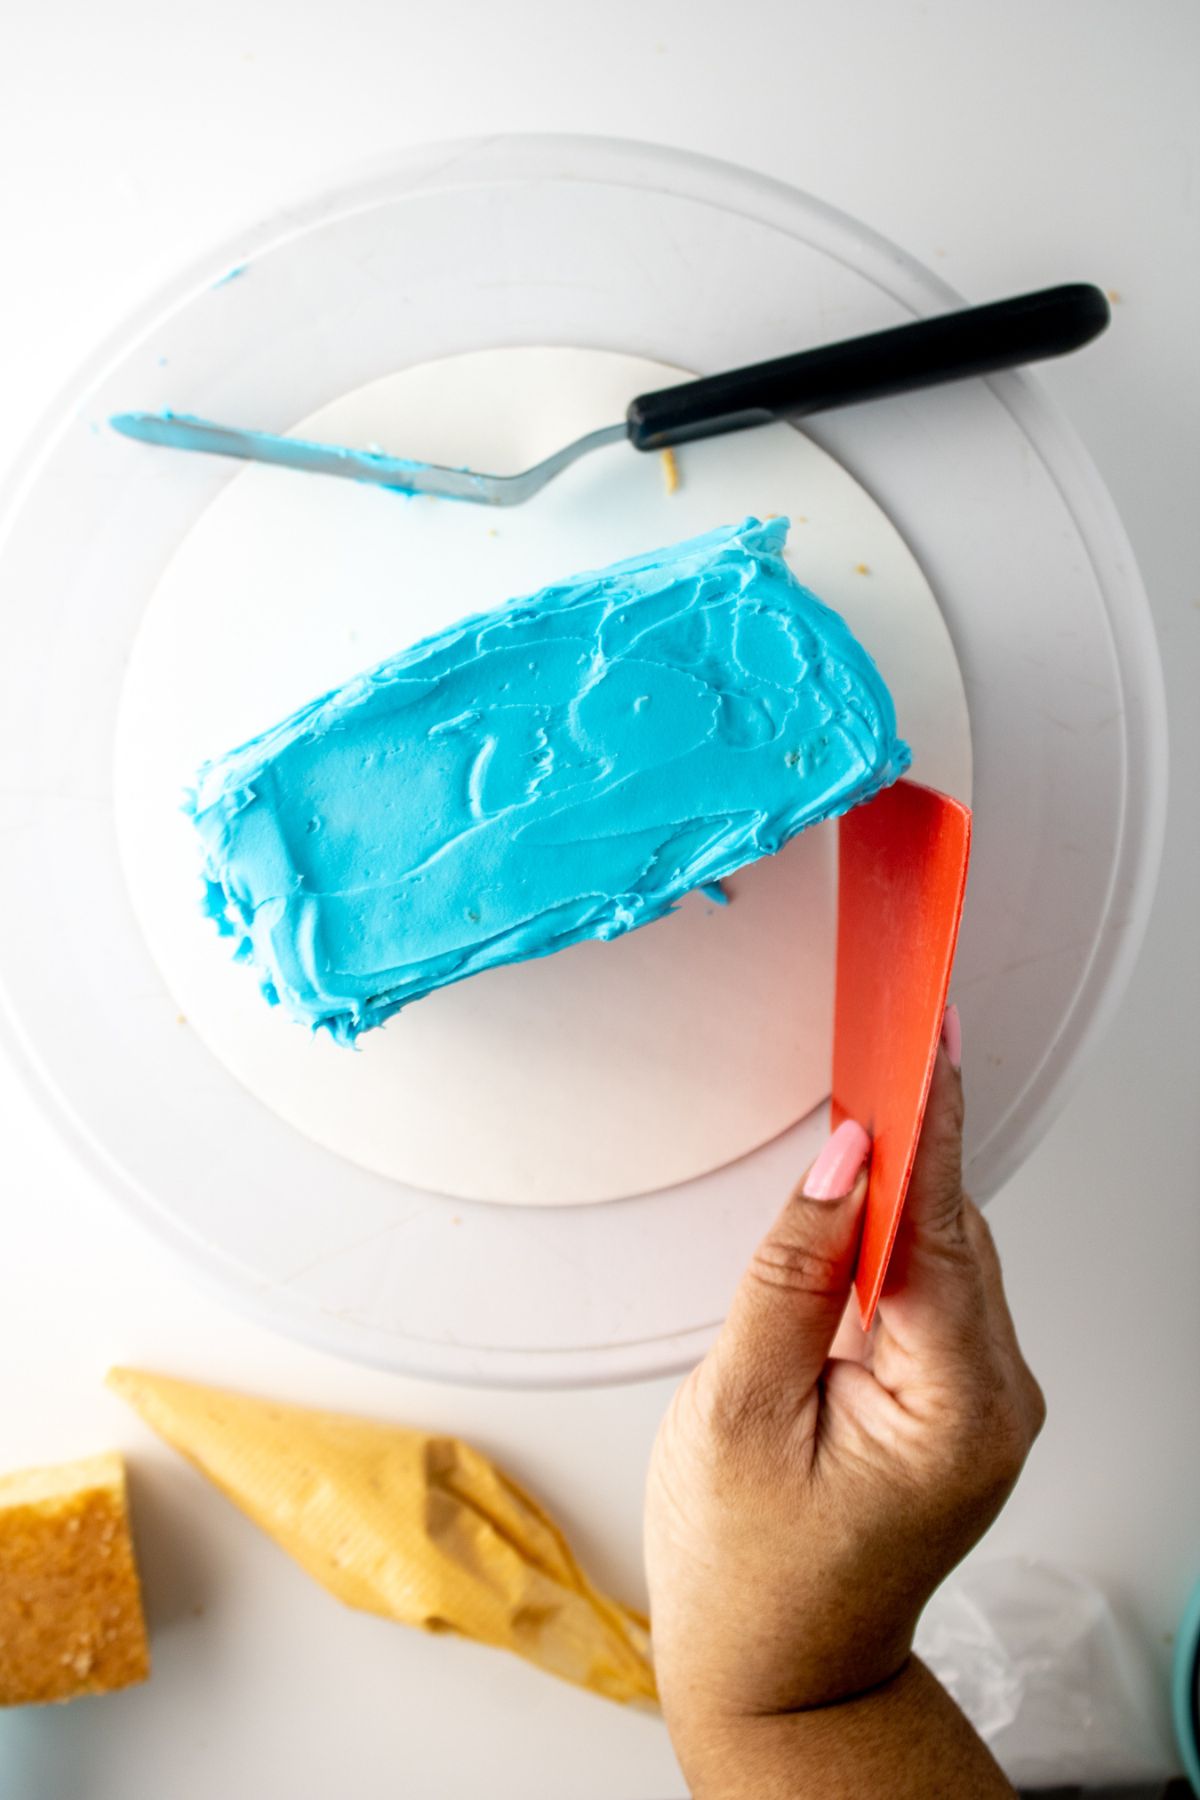
Wait for the frosting to harden a bit, so you can touch it with your hands without the frosting coming off on your hands. Speed this up by placing it in the fridge to cool for 15-20 minutes.
Remove from the fridge and use your hand to smooth out the frosting. It doesn’t have to be perfect as we need to add more frosting, but as smooth as possible.
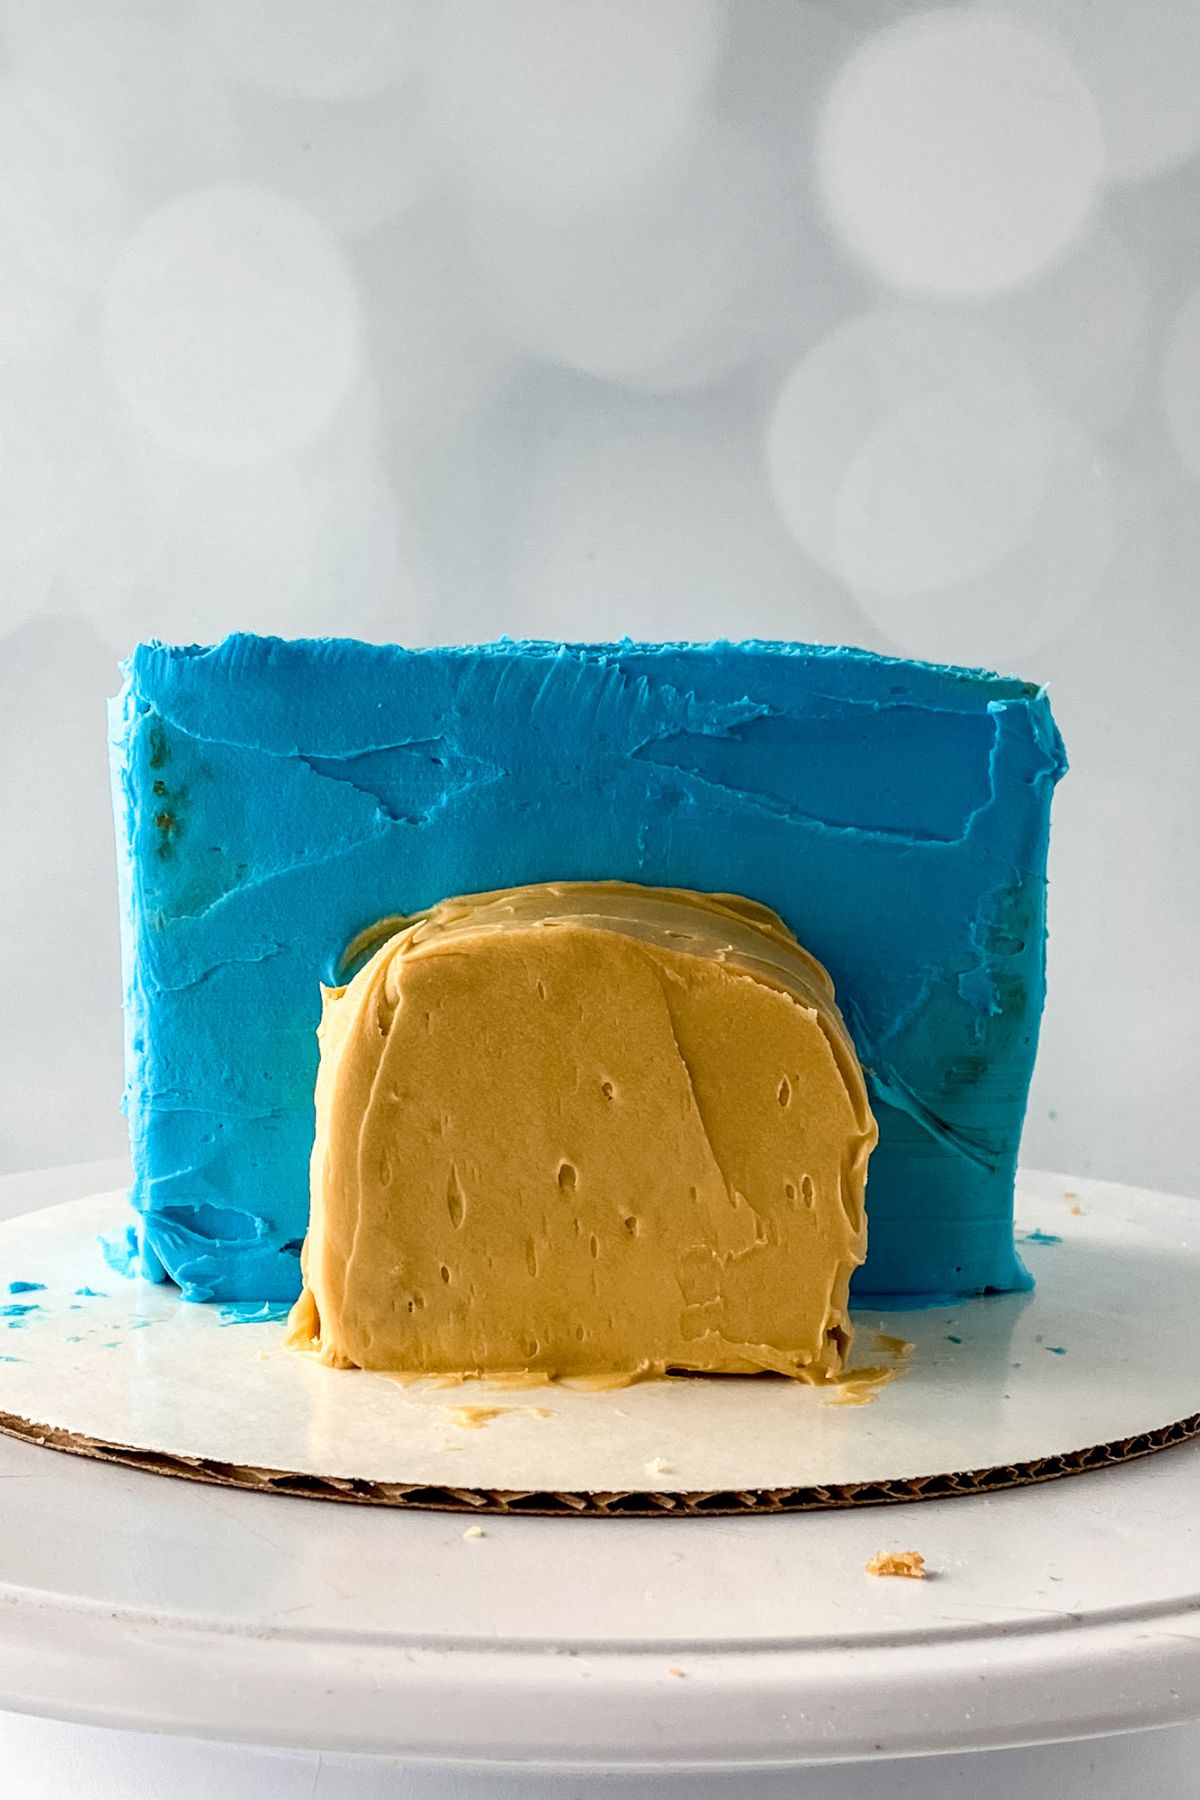
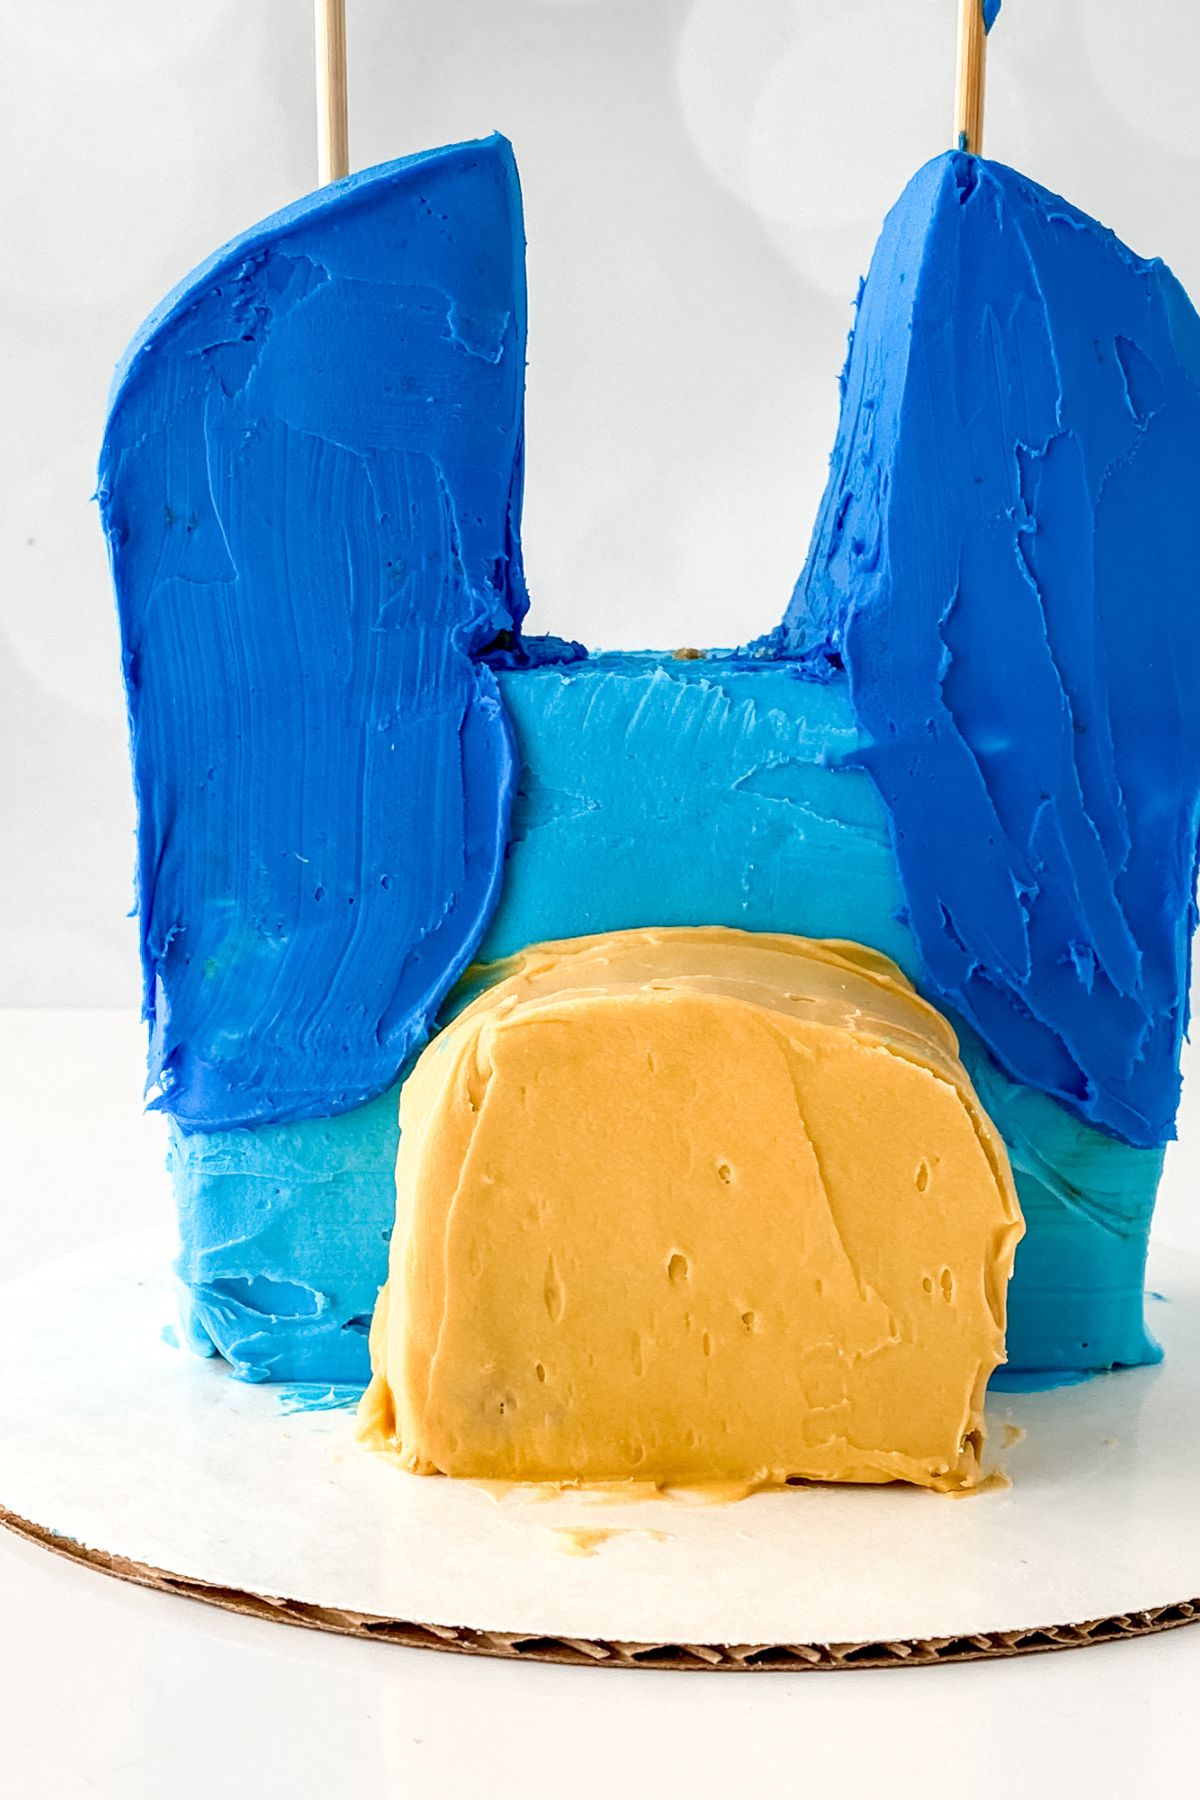
For the nose
Place the middle piece of cake from before, up against the square to create the nose.
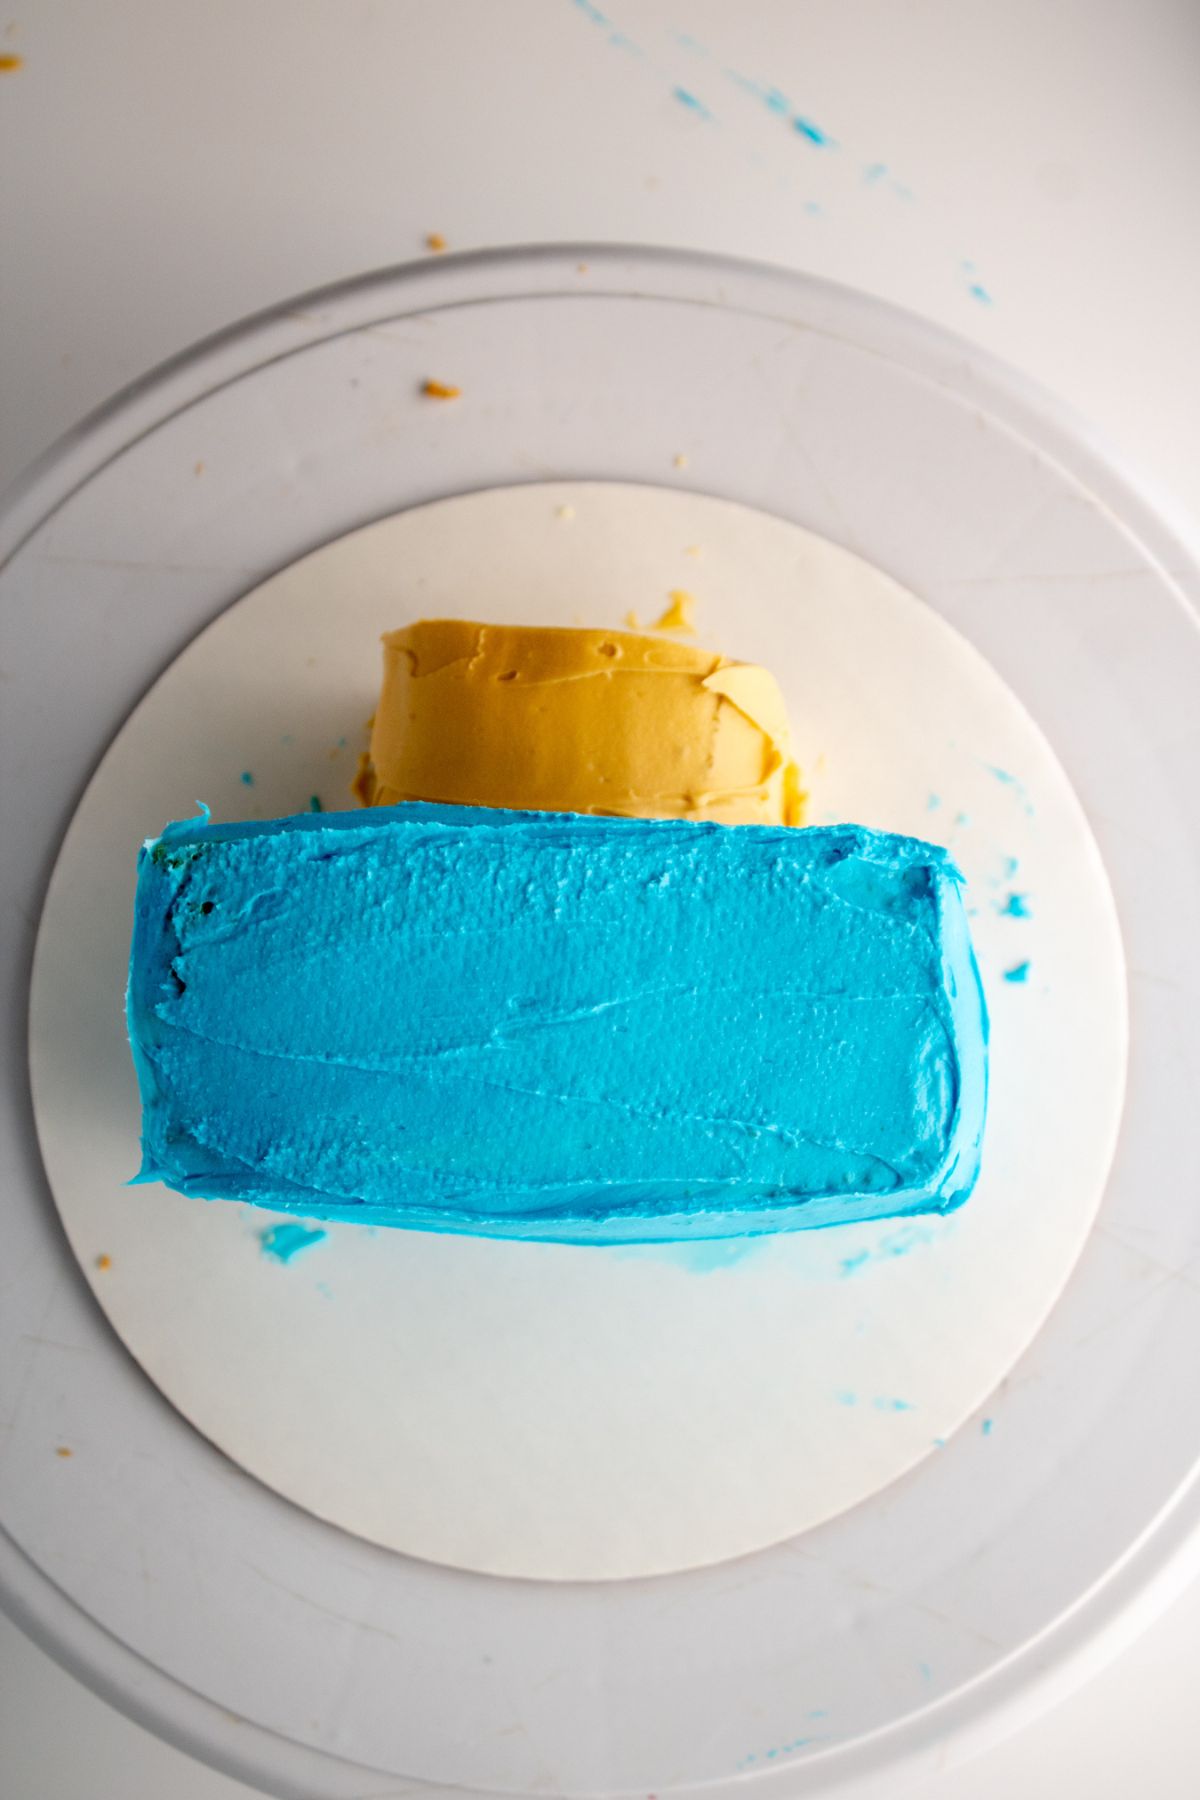
Transfer ivory buttercream icing to a piping bag and add the ivory buttercream to the nose, careful not to get it onto the blue.
Smooth it down.
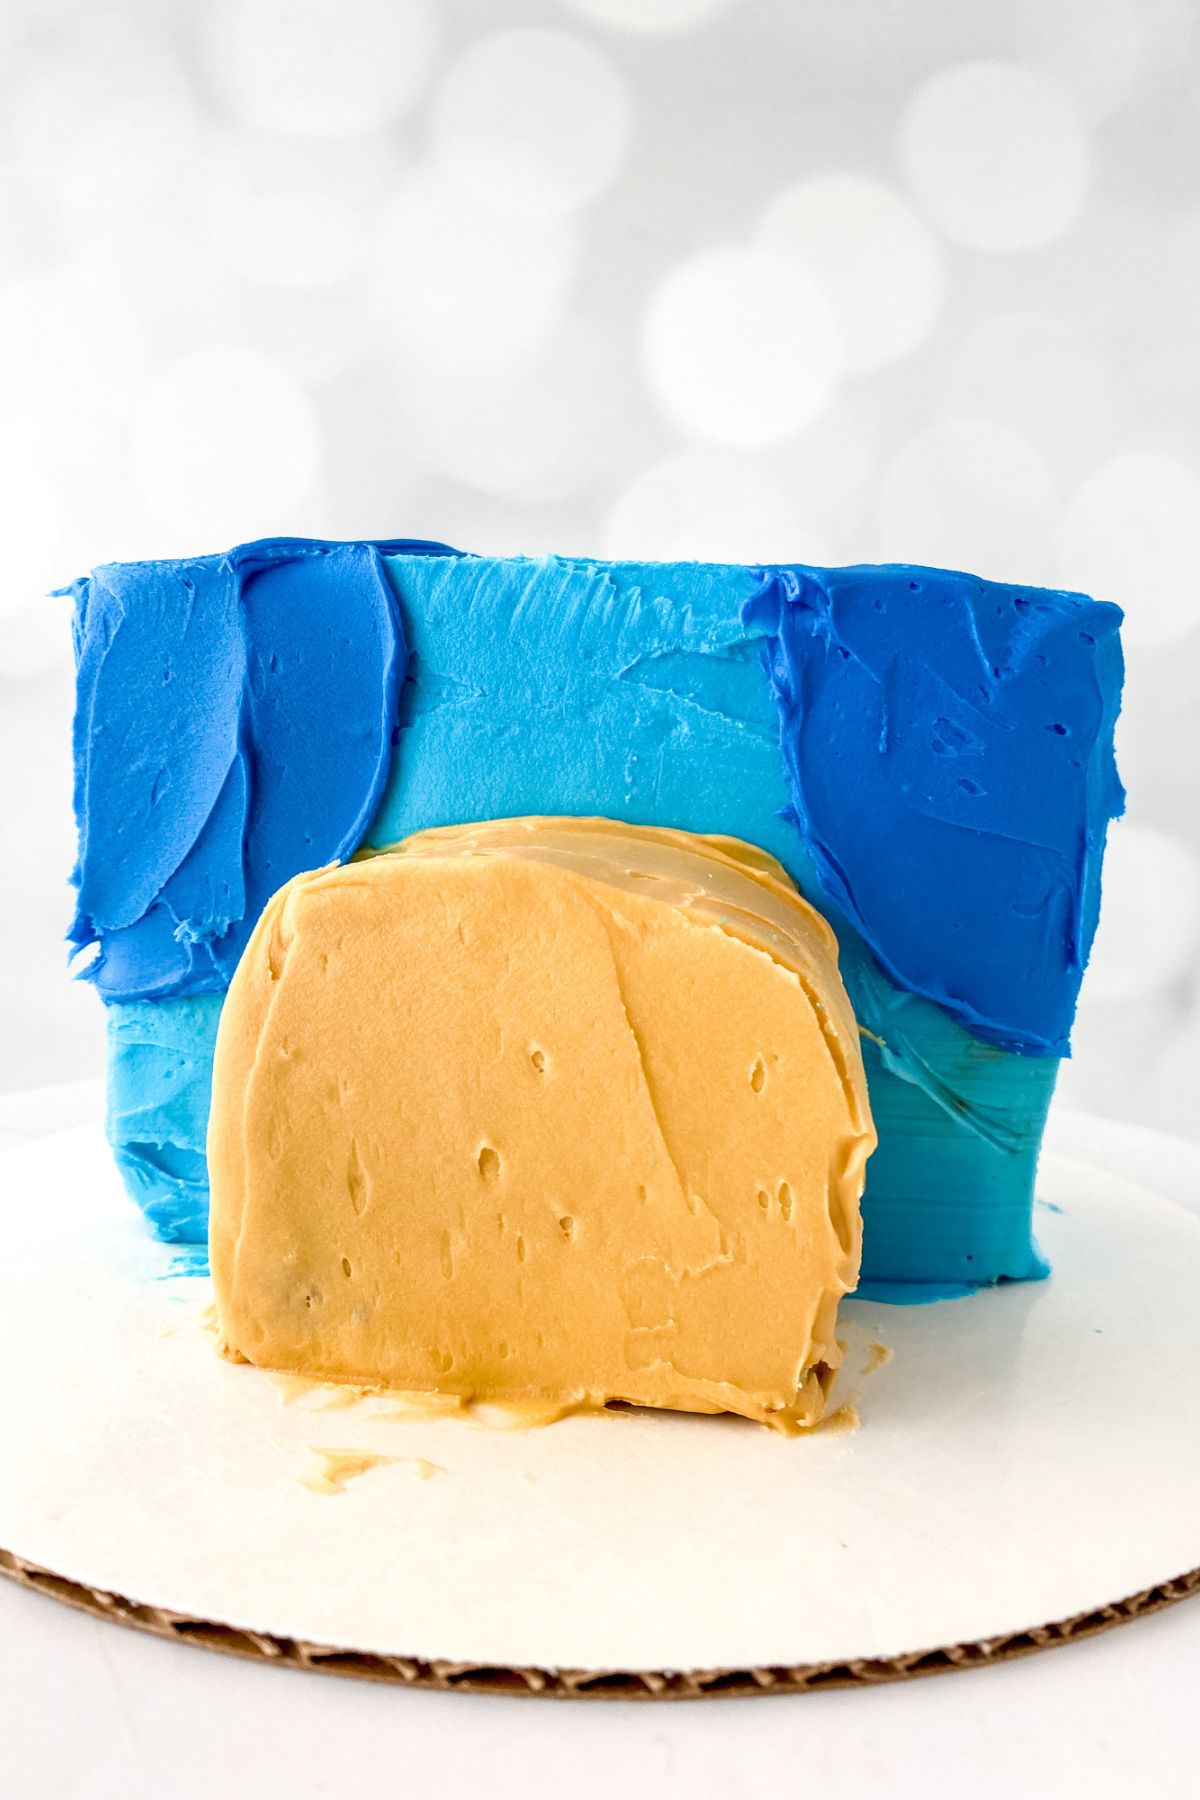
For the ears
Dye the leftover sky blue frosting with your royal blue dye. If you need to add more buttercream so you have enough to complete the eyes and ears, do so before adding the royal blue dye. Generally, you can see how much you've used for what you've done and know if you'll need more or not.
First, add dairy free buttercream frosting to where the eyes will be.
Position the ears where you’d like them to go, then add the long skewers behind them to hold them in place.
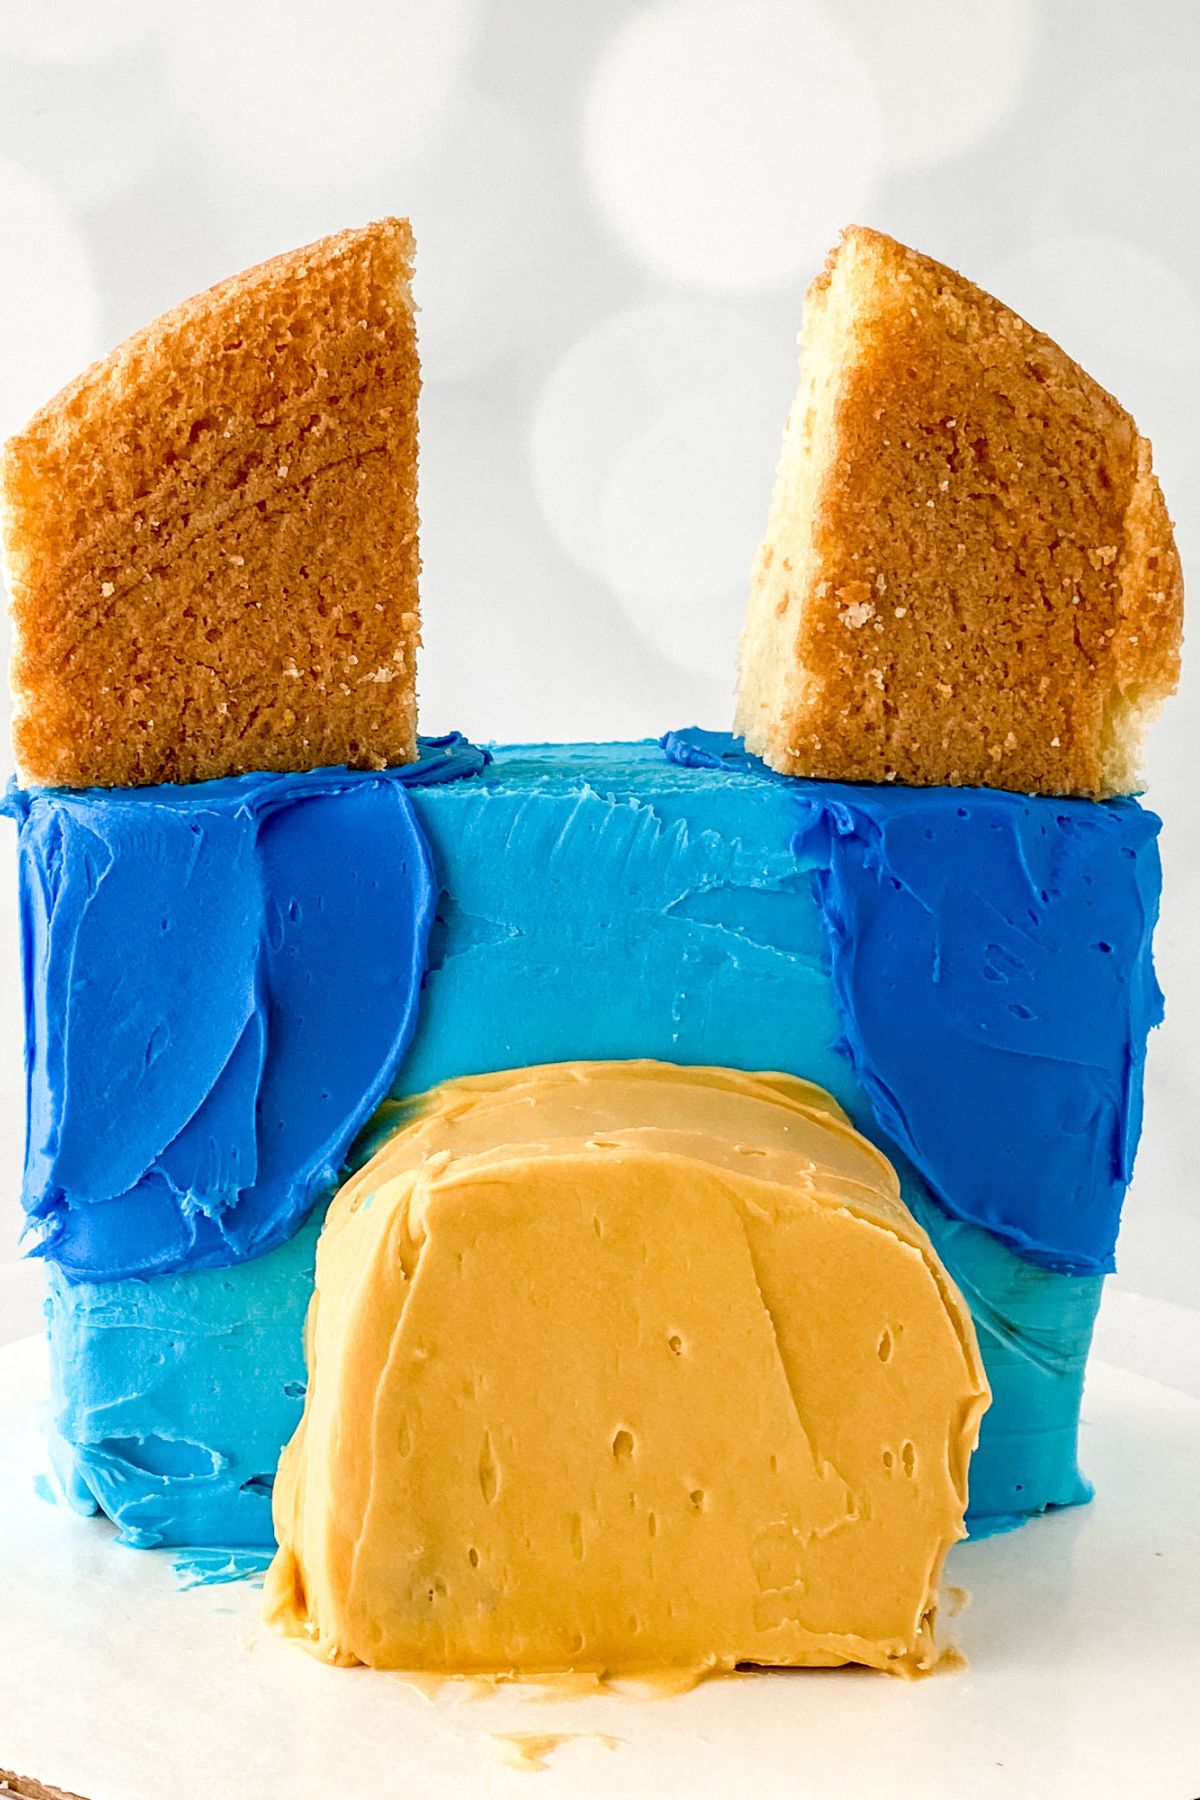
Frosting the ears with the darker blue frosting, again, adding more than you need. It goes quick.
Use the frosting smoother to clean up the rough edges and smooth the cake out.
Place the cake in the fridge while making the fondant pieces.
Fondant accents
Grab gloves before you start working with your fondant.
Knead the white fondant until smooth and no longer sticky. If it's sticking to your hands, dust them with 1 Tablespoon of cornstarch or powdered sugar.
Dust your surface with a Tablespoon of cornstarch or powdered sugar and roll out the white fondant until it is a ½ inch in thickness.
Cut out two eyes with either a small egg or an oval cookie cutter.
Once the eyes are cut out, knead and roll out the black fondant.
Use the open end of a small piping tip to create the black dot for the eyes.
Lightly moisten a paper towel and rub it against the back of the black dot to help act as glue.
Position it on the white part of the eye and let dry for 2-3 minutes before moving them.
Re-roll the black fondant and roll out a thick piece. Use the back of a large piping tip to cut out the circle for the nose.
Use your fingers to lightly press in the sides of the circle to create a triangle for the nose.
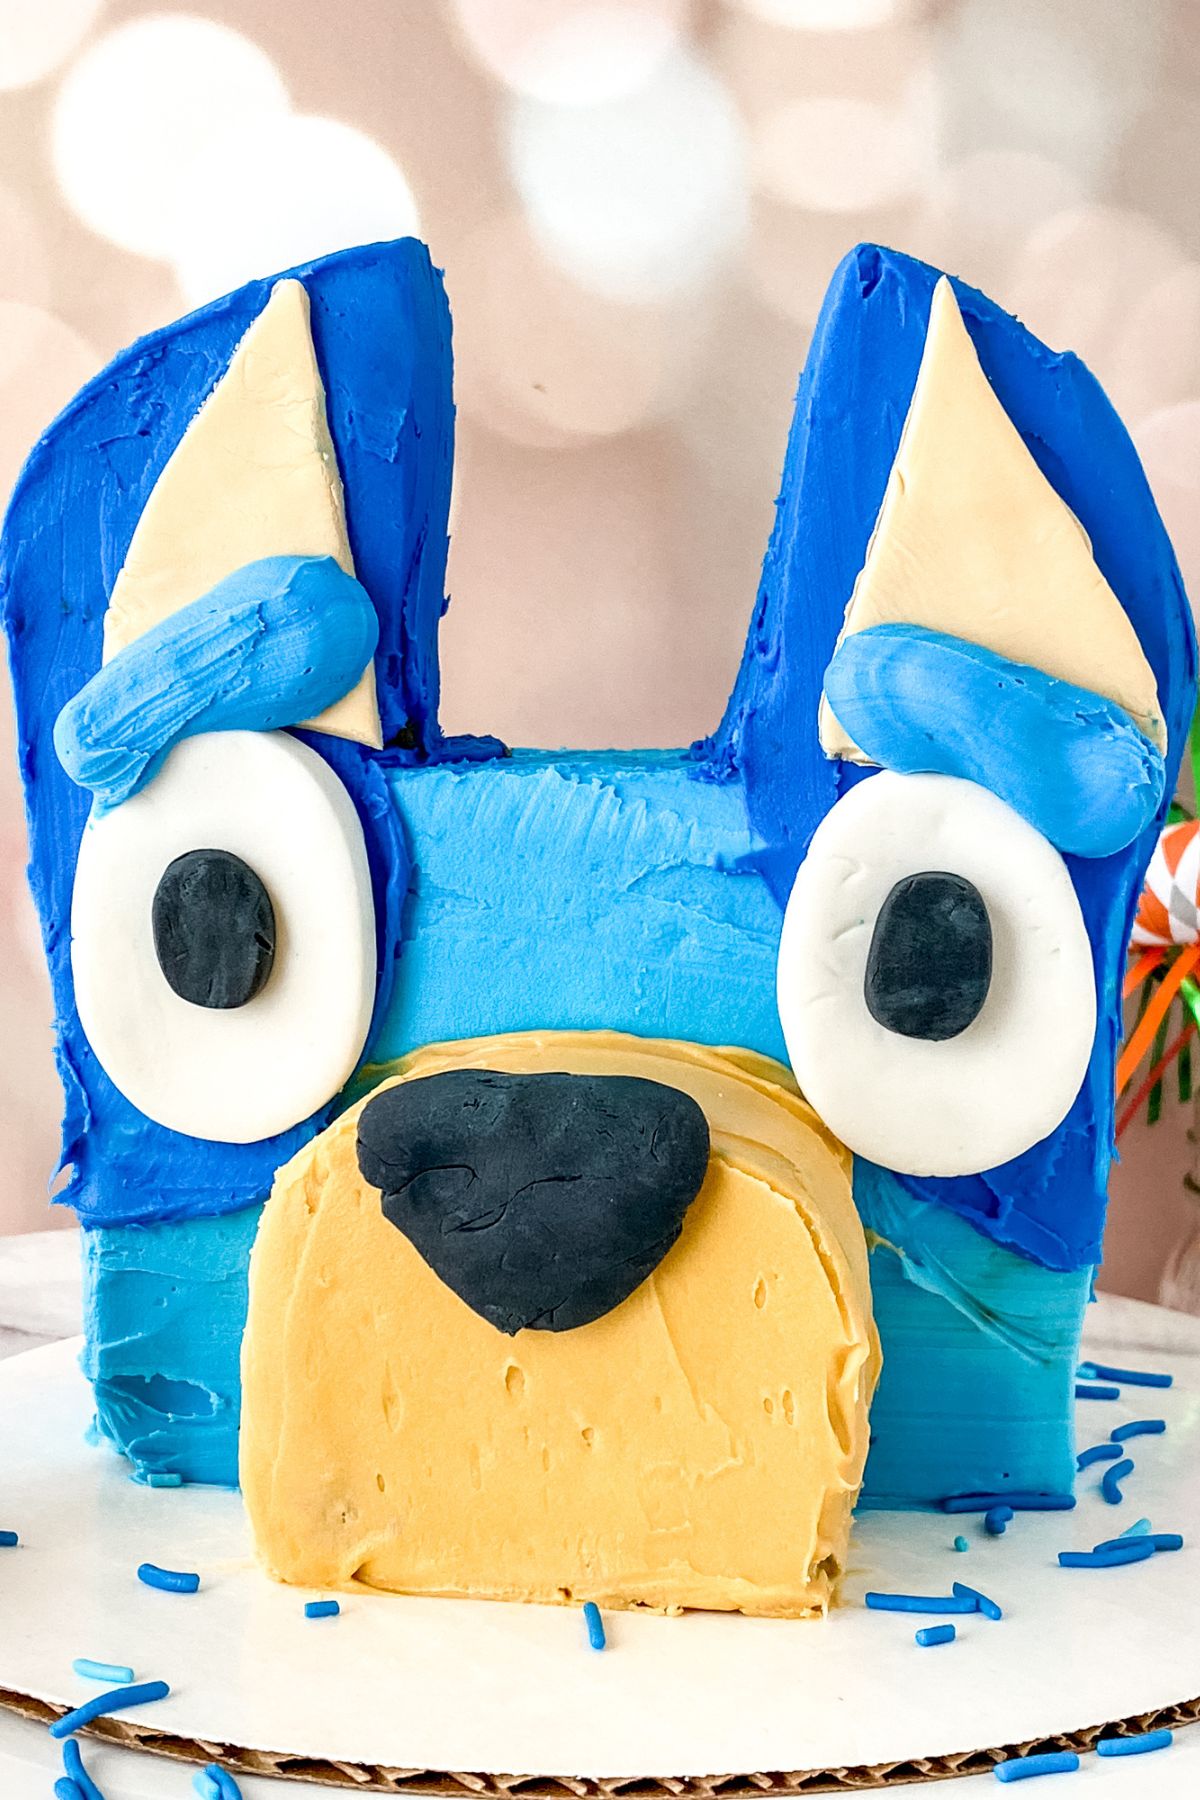
Final Assembly
Remove the skewers from the head.
Frost the back of the ears.
Press the eyes and nose into place. Add a small amount of water to the back of the fondant pieces to help them stick if needed.
Thick frost two eyebrows on above the eyes.
Congrats! You’ve made Bluey's face and head!
Tips and Tricks
- The dairy free buttercream needs to be VERY soft, if it's not stick it in the microwave for about 4 seconds.
- Be mindful that when working with fondant you may want to use plastic gloves.
- We imagine you could make a Bingo cake using the same directions, just change up the coloring a little bit.
- When you're ready to use the frosting cake scrapper, warm it with some hot water and dry it off. It will helps to smooth the frosting)
Why do I have to dye the sky blue frosting with the royal blue?
Wondering why you can't just use the vanilla frosting to get the shade of blue you want? Well, it's because this is a two-toned coloring method.
You have to dye it the lighter blue first then the darker blue to get the deeper shade of blue that you want for Bluey.
Do I have to use fondant?
Whether you aren't comfortable with using fondant or just prefer to use something else, we do have a suggestion that you could use in place of the white and black fondant.
Instead of the white fondant, you can use Jumbo gluten and dairy free marshmallows.
Instead of black fondant, you can use dairy free chocolate chips. Our go to brand is Enjoylife- they're free of the top allergens! Since we use them SO often in all of our baking recipes, we buy them in bulk as they tend to be cheaper that way.
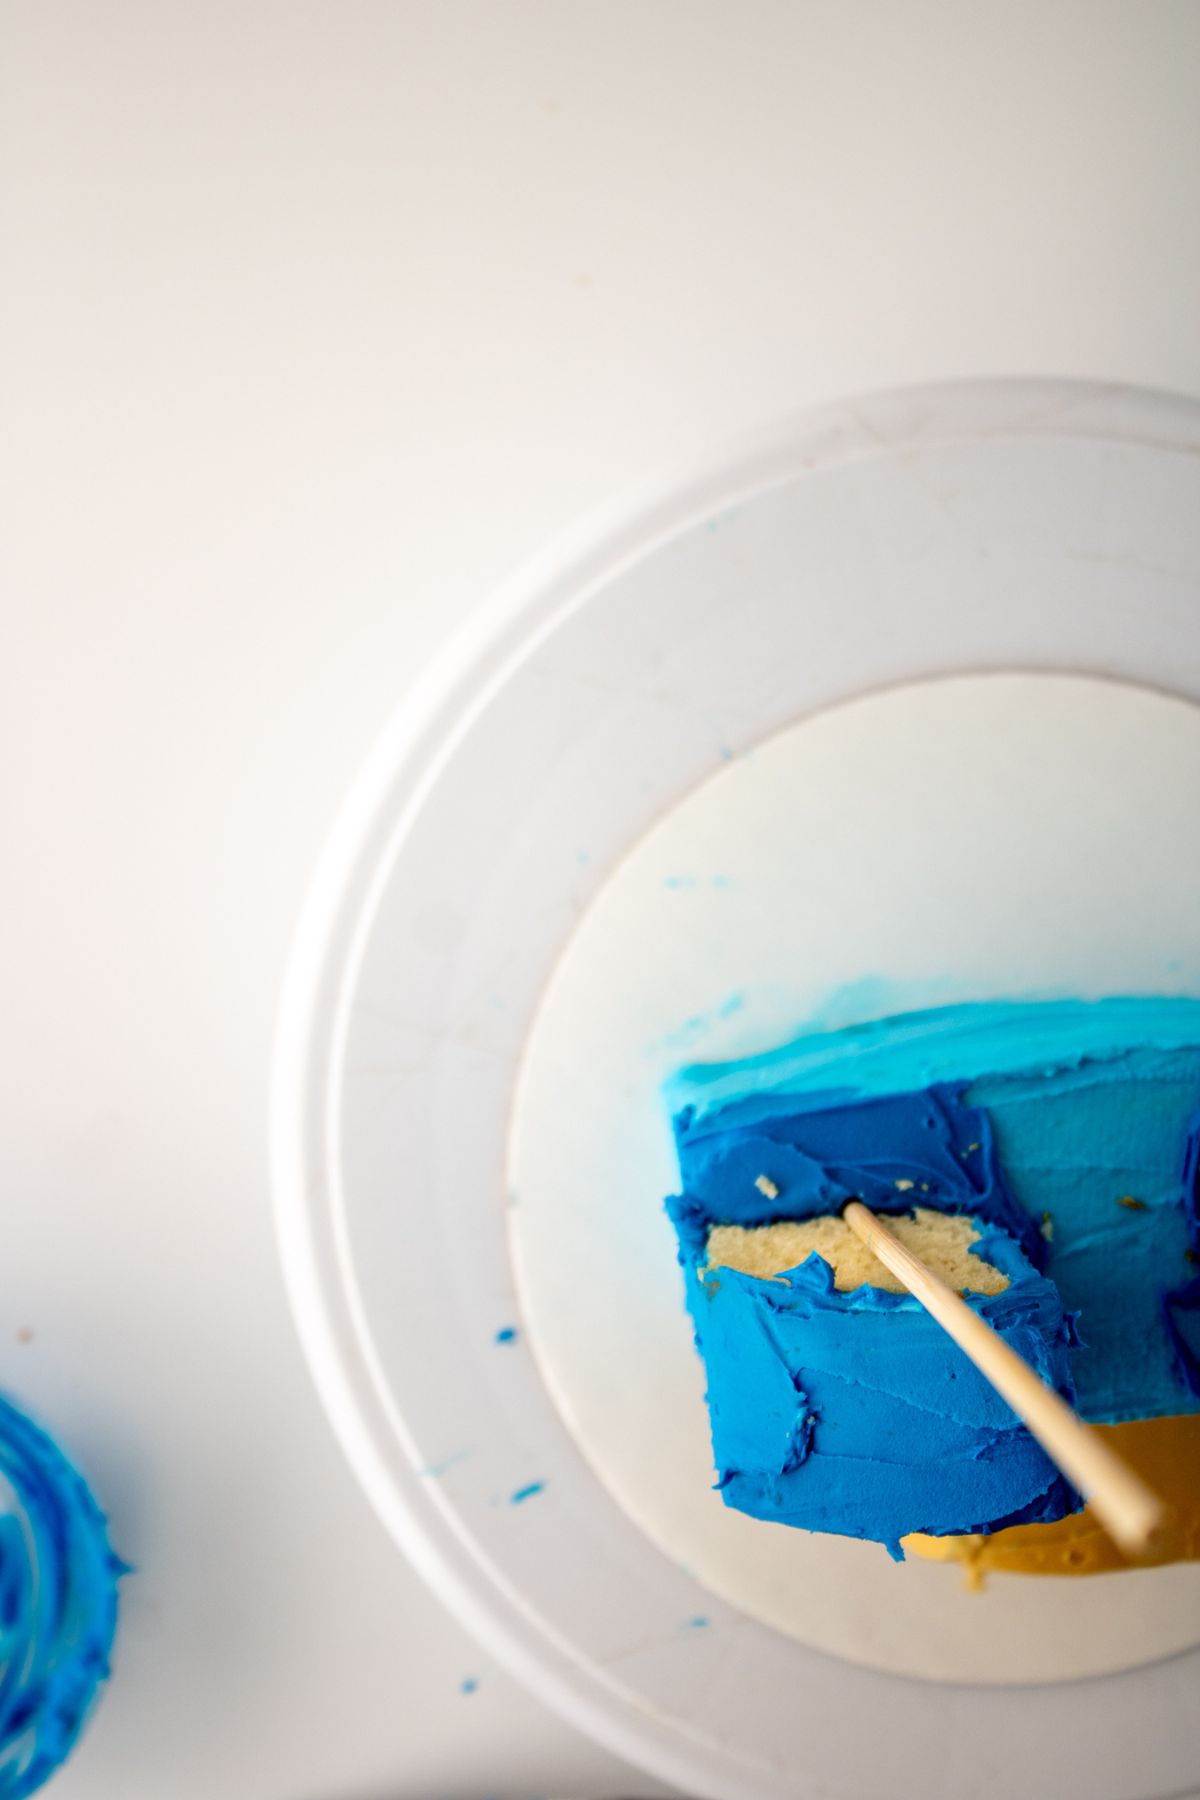
What do I do if my colors start bleeding together?
DON'T PANIC!
All you have to do is use vodka and a paintbrush to rub it off (make sure the brush stays clean).
Don't worry, the vodka will evaporate within minutes, nothing will taste like alcohol nor does it have any effects on children when they eat the cake.
More gluten and dairy free cake recipes
- Strawberry Layered Cake
- Lemon Raspberry Cake
- Eggnog Cake
- Pineapple Cake
- Shark Cake
- Chocolate Bundt Cake
- Lemon Poppy Seed Bundt Cake
How to Make a Bluey Cake
Ingredients
- 1 oz Black Fondant see suggstions in post
- 1.5 oz White Fondant see suggstions in post
- Sky Blue Gel Food Color see suggstions in post
- Royal Blue Gel Food Color see suggstions in post
- Ivory Gel Food Color see suggstions in post
- 8 inch cake see suggstions in post
- 1-2 Tablespoons lemon extract optional
Instructions
- While the cakes are still in the pan, use a serrated knife to cut the dome of the cake, or the top off of the cake.
- Cut off 1.5 inches of the cake from the side and cut it into three sections of equal size. This will make the ears and the nose.
- Square off the rest of the cake. You can use the scrap cake for cake pops if desired!
To Make the Ears:
- The two outer pieces of the cake that you cut off will be the ears.
- Pay attention to the sizes and the direction you have cut them in, place them on a baking sheet and freeze them while you work on the rest of the cake.
Dye the frosting
- Add two cups of dairy free buttercream frosting to a mixing bowl with 1-2 drops of sky blue food coloring gel. Mix it well before adding more.
- In another bowl, add ½ cup of buttercream for the nose and add 1 drop of ivory gel food coloring.
Assemble the head
- Add a dollop of dairy free buttercream to the cake board where you want the head to be positioned leaving space for Bluey's nose.
- Place the piece of squared-off cake upright onto the cake board.
- Carefully, transfer the sky blue buttercream to a piping bag and add more frosting than you think you need on.
- Frost the cake by using the icing smoother to help remove any excess frosting. We also like to use a plain white Viva paper towel to help smooth the frosting (no other brand works because of designs.
- Wait for the frosting to harden a bit, so you can touch it with your hands without the frosting coming off on your hands. Speed this up by placing it in the fridge to cool for 15-20 minutes.
- Remove from the fridge and use your hand to smooth out the frosting. It doesn’t have to be perfect as we need to add more frosting, but as smooth as possible.
For the nose
- Place the middle piece of cake from before, up against the square to create the nose.
- Transfer ivory buttercream icing to a piping bag and add the ivory buttercream to the nose, careful not to get it onto the blue.
- Smooth it down.
For the ears
- Dye the leftover sky blue frosting with your royal blue dye. If you need to add more buttercream so you have enough to complete the eyes and ears, do so before adding the royal blue dye. Generally, you can see how much you've used for what you've done and know if you'll need more or not.
- First, add dairy free buttercream frosting to where the eyes will be.
- Position the ears where you’d like them to go, then add the long skewers behind them to hold them in place.
- Frosting the ears with the darker blue frosting, again, adding more than you need. It goes quick.
- Use the frosting smoother to clean up the rough edges and smooth the cake out.
- Place the cake in the fridge while making the fondant pieces.
Fondant accents
- Grab gloves before you start working with your fondant.
- Knead the white fondant until smooth and no longer sticky. If it's sticking to your hands, dust them with 1 Tablespoon of cornstarch or powdered sugar.
- Dust your surface with a Tablesoon of cornstarch or powdered sugar and roll out the white fondant until it is a ½ inch in thickness.
- Cut out two eyes with either a small egg or an oval cookie cutter.
- Once the eyes are cut out, knead and roll out the black fondant.
- Use the open end of a small piping tip to create the black dot for the eyes.
- Lightly moisten a paper towel and rub it against the back of the black dot to help act as glue.
- Position it on the white part of the eye and let dry for 2-3 minutes before moving them.
- Re-roll the black fondant and roll out a thick piece. Use the back of a large piping tip to cut out the circle for the nose.
- Use your fingers to lightly press in the sides of the circle to create a triangle for the nose.
Final Assembly
- Remove the skewers from the head.
- Frost the back of the ears.
- Press the eyes and nose into place. Add a small amount of water to the back of the fondant pieces to help them stick if needed.
Nutritional Disclaimer
These Nutritional Facts are ESTIMATED. Your actual nutritional info with this recipe may vary depending on the brands you choose. “Eating Gluten and Dairy Free” is not a registered dietician or nutritionist. The provided nutritional info above is based on a generic calculator, if you want more accurate info, use your nutritional calculator of choice where you can choose brands and get more info that way.
Pin It For Later
Never Run Out of Safe Recipes
Loved this recipe? Our cookbooks are packed with tested, family-approved gluten & dairy free recipes so you never have to hunt for a safe one again. The Holiday Recipes Cookbook has 50+ recipes for every season, and The Classics has our all-time family favorites.