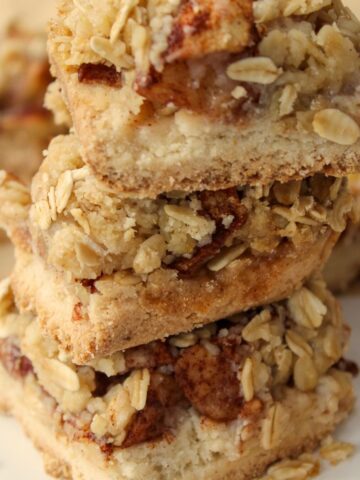
The Best Homemade Gluten Free Bread Recipe (Dairy-Free)
This post may contain affiliate links. As an Amazon Associate, and through other affiliate programs, I earn a small commission from qualifying purchases — at no extra cost to you. I only ever recommend products I use and love. See our full disclosure policy for details. Thank you for supporting Eating Gluten and Dairy Free!
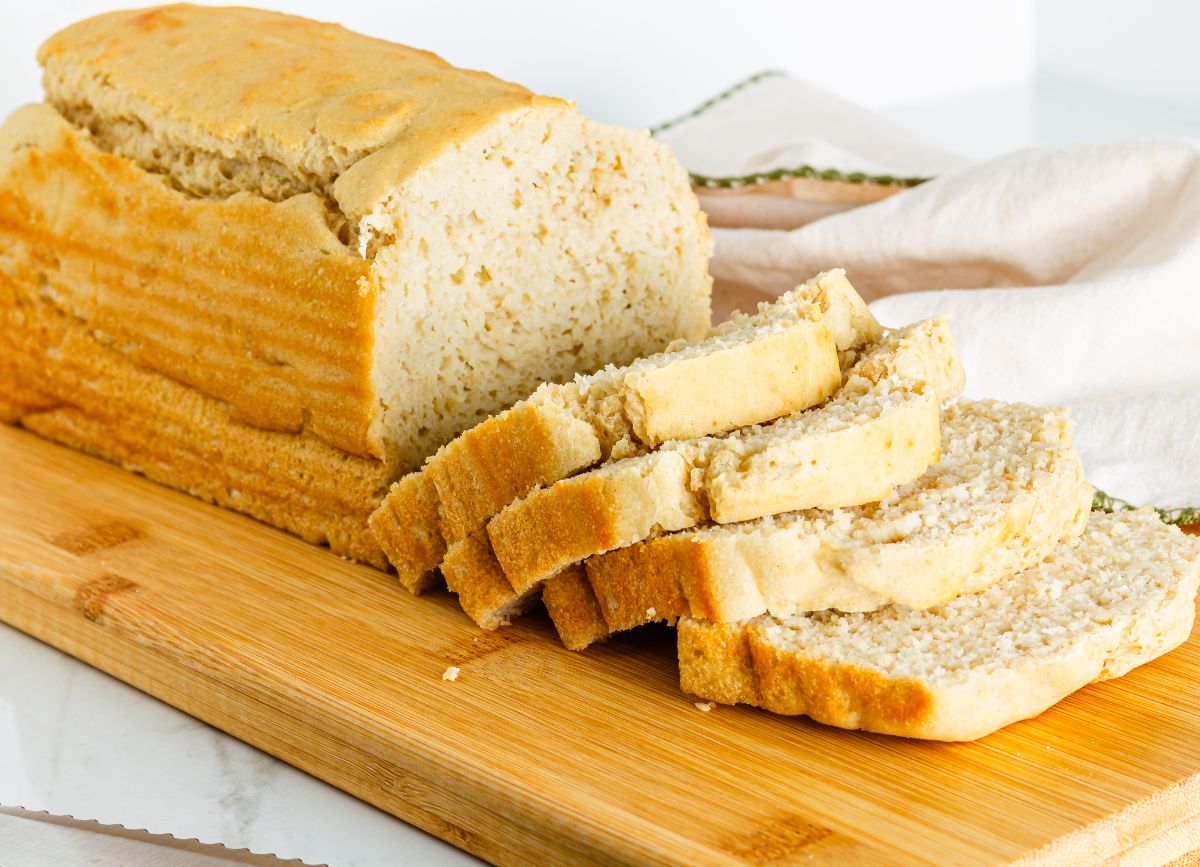
Forget the tiny, scrawny slices of bread you buy at the store. With this easy, homemade Gluten Free Bread Recipe, you'll have beautiful slices of fluffy bread to enjoy with your family in no time.
Not only is this a gluten free bread recipe, but this is a Dairy Free Bread Recipe too!
Who is tired of paying an arm and a leg for gluten free bread??! WE ARE!
So, we went on a mission to make our own gluten free white bread recipe that is PERFECT for using in sandwiches, as toast, in French Toast, to make croutons with, and so much more.
If you've been searching for a SIMPLE, fail proof gluten-free bread recipe, this one is it!
We have tried a few different ones over the years and some were okay but a pain in the butt to make.
We even tried converting a bunch of different traditional gluten containing bread recipes to safe versions using gluten-free flours and for some reason or another, so many of them failed.
With this recipe, it's the first time we have made bread from scratch without a premade (preservative and other junk filled) mix to give us a nice loaf of bread for our family that nobody complained about and it didn't break the bank making it either.
Why Make Homemade Gluten Free Dairy Free Bread?
- You get NICE sized bread slices. No more tiny, pathetic slices of "bread" from the store.
- You don't have to overpay for this deliciousness. Sure, gluten free and dairy free ingredients themselves are pricier than their gluten and dairy containing counterparts, but we find ways to cut costs on our ingredients. Buy in bulk, keep eyes peeled for sales and, ALWAYS, always, ALWAYS, price compare in stores and online. Prices are so volatile and ever changing, especially in today's economy.
- This homemade gluten free bread is ready in 70 minutes, just over 1 hour. You don't have to spend all day in the kitchen worrying about if all of this work is going to pay off.
- It's easy to scale this dairy free bread recipe to make more loaves if you have a bigger family or have a bread heavy meal plan for the week.
- We've tested it and tested it and tested it. We've tried different brands for ingredients are will share which ingredients and brands have worked best for us, so you don't have to wonder if your brand of flour will work in this recipe or not. Trust us, we know the frustration, in fact, two of our usual "go to" brands for flour just DID not work with this recipe. Each time we made it something went wrong, so once we found two brands that DID work, we stuck to them and that's what we recommend doing too. Unless, you have the time and money to experiment with other brands. Just know we recommend certain brands for a reason.
- This recipe is gluten free, dairy free, and soy free. Plus we have swaps to make it egg free and xanthan gum free too in the substitution section!
Helpful Kitchen Tools and Equipment
Here's a list of things to gather up to make your homemade bread.
- Measuring Cups and Spoons- be sure to use the scoop (with a spoon) and level method (with the back of the knife) when measuring your flour. Do NOT just dip the measuring cup into the flour container or you'll end up with an incorrect amount. Be sure to use dry ingredient measuring cups as well.
- Mixing Bowl or Stand Mixer with Paddle Attachment
- 9x5-inch bread pan or 9x4-inch Pullman style loaf pan- check out which one we prefer throughout this post.
- Gluten Free baking spray
- Cutting board and knife

Ingredient Notes
Here are the ingredients you'll need for a nice loaf of gluten free and dairy free bread.
In this section, we discuss the brands we tried and which work best for this SPECIFIC recipe. We recommend sticking to these brands if you can. If you're willing to experiment with other brands, you can do so.
But, just know we have tried with various brands and have found that these are the ones that worked best for us in our kitchen.
Get more info on the quantities of these ingredients in the recipe card at the bottom of the post.
- all-purpose gluten-free flour- For best results, we suggest using the Simple Truth brand or the Pillsbury brand for this specific gluten and dairy free bread recipe. These are the two brands that worked the best for us. Unfortunately, two of our top flour choices that we use in SO many other recipes shared on our site just didn't work well with yeast and to get that nice rise for sandwich bread, we needed to use yeast. So, for this particular recipe, we will say DO NOT USE Bob’s Red Mills 1 for 1 Gluten Free Flour (they specifically state on their website that their 1-1 blend is best for quick breads, and is not made for baking with yeast) or King Arthur's Measure For Measure Gluten Free flour (their website says that this flour blend is great for muffins, cookies, cakes, brownies, but not for recipes that use yeast). If you choose to experiment with other brands than what we recommended, make sure it has xanthan gum or guar gum in it. Both Simple Truth and Pillsbury GF flours do already.
- baking powder (double acting preferred over single acting baking powder)- when choosing your baking powder, there are some brands that include aluminum in them. We prefer aluminum free baking powder, not just for health reasons, but because it can make things taste "chemically", like you can taste a metallic flavor. This bothers many people (like us), but some people don't ever notice it. Use a good quality baking powder and make sure it's fresh and within date for the best results. We like to use Bob's Red Mill No Aluminum Added, Double Acting Baking Powder since we know it's a safe brand, is gluten free, dairy free, kosher, and so much more. You can read more about that product on their site here. In the FAQ section below, we shared more on why we use aluminum free baking powder, check it out if it interests you. We like to buy from Thrive Market where it's cheaper for us than in the local grocery store. You can use a different brand of baking powder, as long as it's fresh and gluten and dairy free.
- rapid rise yeast - this can also be called fast acting yeast or instant yeast. We use Fleischmann's since their product states that it's a Gluten Free product on their packaging. Yeast is what creates air bubbles in the bread dough which gives the gluten-free sandwich bread that light and fluffy texture.
- olive oil- use a good quality oil. We like Thrive's Organic Olive Oil
- honey- use your favorite local honey. Honey helps to feed the yeast in this recipe and by feeding it it helps give that bread the lift you want.
- apple cider vinegar- we used to use Bragg, but have switched to Thrive Apple Cider Vinegar whenever we run out of our own homemade ACV. ACV helps give a nice texture to the homemade gluten-free bread loaf.
- warm water - you don't want super hot water because it will kill the yeast in the bread dough. Instead, use an instant read thermometer to see what temp your water is at. You want it to be between 100-110F.
- large egg whites- we have farm fresh eggs since we have a family farm with chickens, but commercial eggs should work fine
- salt- we just switched to using Redmond's Real Salt and love it!

Bread Recipe Instructions:
Adjust the top oven rack to the middle position and preheat the oven to 350°F.
Prepare your chosen bread loaf pan by coating it with cooking spray.
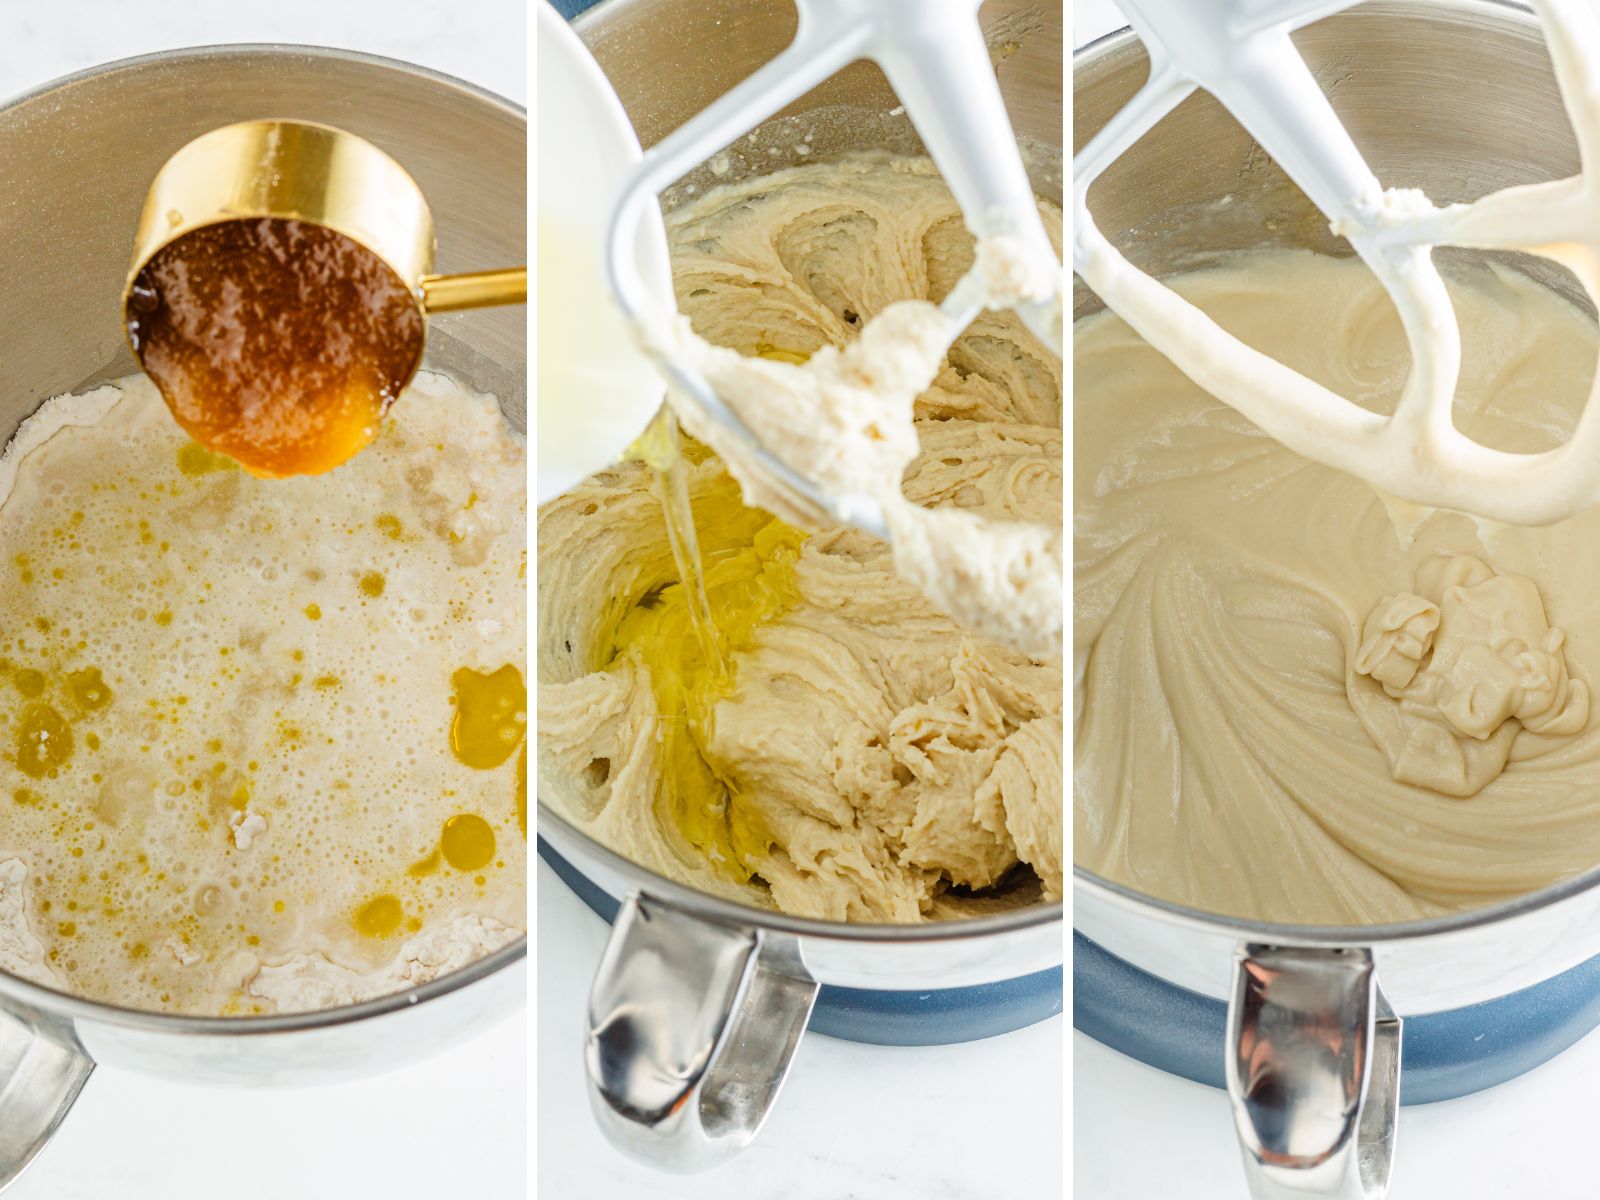
In a large bowl or the bowl of a stand-up mixer, combine the dry ingredients: your gluten-free flour blend, baking powder, and instant yeast.

Add the wet ingredients- olive oil, honey, apple cider vinegar, and warm water to the flour mixture and mix on low for 1 minute.
Then, add the egg whites and salt to the dough and mix on medium for 1 minute until the mixture resembles a thick cake batter.
After transferring the gluten-free bread dough into the greased bread pan, cover the top with Bees wax wrap or plastic wrap that has been sprayed with cooking spray.
Then, place a kitchen towel over the pan and allow the bread to rise in a warm spot for 30 minutes.

Remove the towel and plastic wrap. Position the bread horizontally on the middle rack in the preheated oven for 35 minutes at 350°F until it turns golden brown.
Check with a toothpick to make sure the dough is cooked through, the toothpick should come out clean.

Let the loaf cool for 10 minutes in the pan, then remove it from the pan and place it on a cooling rack. Let the bread cool thoroughly before slicing.

Storage
Once the gf bread has cooled completely, store any remaining bread in an airtight container. It is best not to pre-slice the bread before storing it. Store at room temperature for up to 5 days.
We like to use use linen bread bags or use Bees Wax Wraps. But you store how you prefer.
Can I freeze this homemade bread?
If desired, the bread can be frozen once completely cooled.
Wrap the loaf tightly in plastic wrap, then in aluminum foil, and place it in a freezer bag.
The bread can be frozen for up to 3 months and should be thawed in the refrigerator overnight.

FAQ
What size bread loaf pan should I use?
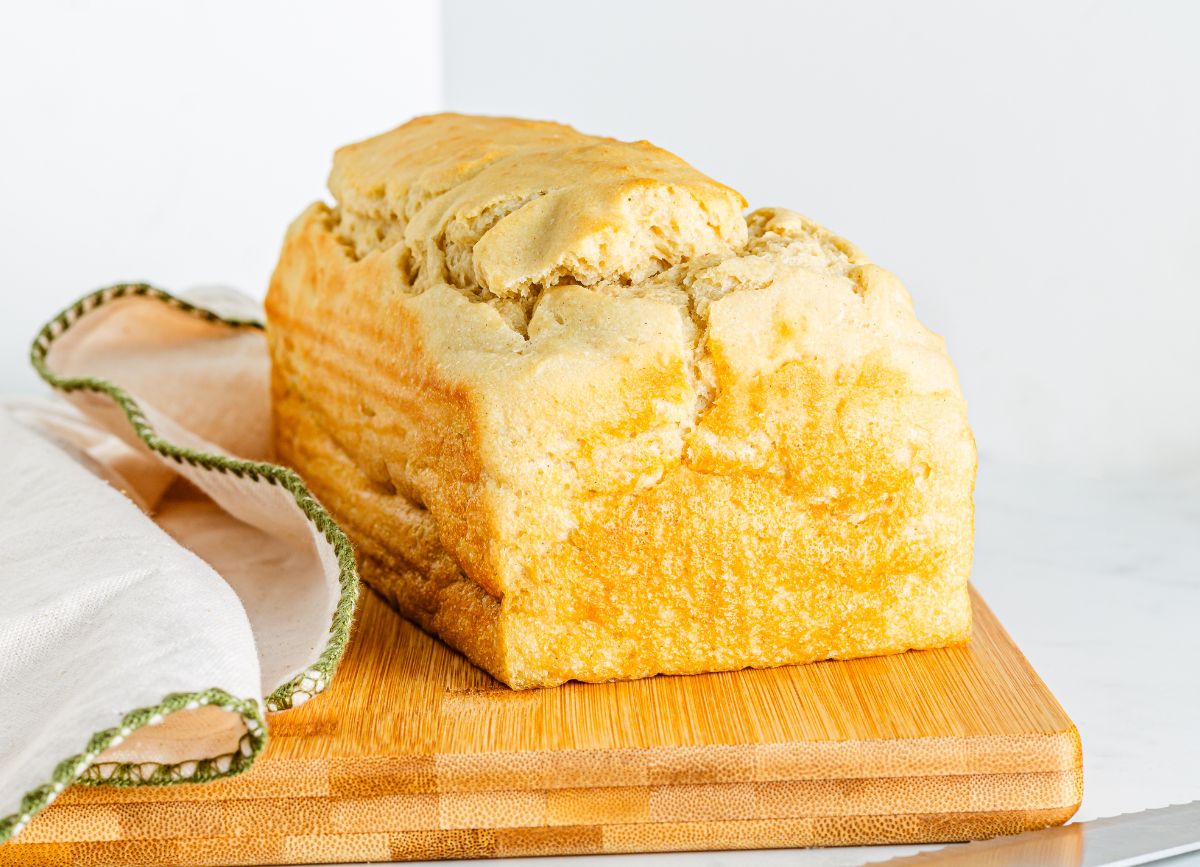
We have used a 9 x 5-inch bread pan or 9 x 4-inch small Pullman loaf pan or this Pullman loaf pan with this recipe.
You can use either type of pan, but you will have a shorter bread if you use a normal 9 x 5 inch bread pan.
You can see, we used the Pullman loaf pan when photographing our bread.
One reason we really like using it is because it gives the dough the support it needs to help rise nicely.
If you don't have a Pullman loaf pan, but want a higher rise than your traditional 9x5-inch bread loaf pan, you can use aluminum foil to make a bread sleeve to line your pan with to make higher sides so you can attempt a higher bread rise.

Why use aluminum free baking powder?
Aluminum is common ingredient in many traditional baking powders in the grocery aisles. When looking at ingredients, you'll see it listed as sodium aluminum sulfate or sodium aluminum phosphate.
So, as we mentioned in the ingredient section, "normal" baking powder can have a metallic taste to some people.
Some people may not taste it, but many, like ourselves, do notice it in baked goods.
In addition to the taste factor, we don't like ingesting any more aluminum than we already do whether we realize it or not.
So, if there's an aluminum free version, we tend to opt for that.
The brand that we use is Double Acting, meaning that it will react and create bubbles when it comes in contact with the liquid first and then again when heat comes in to play.
So, it reacts twice, rather than once and that may help give a nicer rice in bread (especially important in getting a nice texture in gluten free bread).
Since gluten free bread uses gluten free flours that typically don't yield that nice elasticity in their bread, you really need a good leavening agent to help make up for it, and that's why we like to use a double acting baking powder instead of a single acting baking powder.

What type of yeast should I use to make gluten free bread?
When making dairy free and gluten free bread, it's important to use the correct kind of yeast.
Different types of yeast are best used for different things since they have different properties.
In this recipe, we recommend rapid rise yeast.
This kind of yeast is designed to be used the same day for baking your yeast bread and other gluten-free baking goods.
If you have dough that need a longer ferment, you can use either active dry yeast or instant yeast.
These types of yeast will give your bread a longer rise, which can result in a more complex flavor.
However, for this recipe, we find that rapid rise yeast works best.
What's the best gluten-free flour blend to use to make bread with?
We tested this recipe with various brands.
We suggest you stick to either Pillsbury or Simple Truth.
Pillsbury Best GF All Purpose flour is made from rice flour, potato starch, pea fiber, tapioca starch, and xanthan gum, according to the Pillsbury website.
Simple Truth GF All Purpose Flour Mix is made from Brown Rice Flour, Potato Starch, White Sorghum, Rice Flour, Quinoa, Millet, Amaranth, Tapioca Starch, Xanthan Gum, according to their info on the Kroger website (also available from Vitacost- where we get it since we don't have Kroger locally)
For our Canadian friends, we haven't made this recipe with this brand, but we shared this recipe with Canadian friends of ours and they said they used President’s Choice Gluten free flour blend and it turned out perfect! So, that may be an option for you if you can't find one to try.

Do I need to adjust this recipe for high altitude?
We do NOT have any experience changing recipes for those who live at a higher altitude. So, we took a second to look into it.
We hope these resources help you decide if you need to adjust this recipe. Best of luck if so.
In general, Fleischmann's (who makes the yeast we recommend) says to follow these tips when making a recipe with their products at high altitudes.
Any tips for cutting the best gluten-free bread?
We have them for sure!
1. Use a sharp serrated knife: A sharp serrated knife will help you achieve clean and even slices without crushing the bread when trying to cut the loaf.
2. Let the bread cool completely: Gluten-free bread tends to be more delicate and crumbly compared to regular bread. Allowing it to cool completely will make it easier to handle and cut without falling apart.
3. Freeze the bread slightly: If you find that the bread is too soft or crumbly but it is fully cooked, you can try placing it in the freezer for about 10-15 minutes before cutting. This will firm it up slightly and make it easier to slice. It's not a favorite thing to do, but can help out if needed.
4. Use a gentle sawing motion: Instead of applying too much pressure, use a gentle sawing motion when cutting the bread. This will help prevent the bread from getting squished or crumbling into pieces.
5. Clean the knife between cuts: Gluten-free bread can be sticky or gummy, especially if your flour blend already has xanthan gum and you added more (DON'T DO THIS!), so it's a good idea to clean the knife between each slice to ensure clean cuts.
6. Consider using a bread slicer: If you frequently bake good gluten-free bread or find it challenging to achieve even slices, investing in a bread slicer can be a helpful tool.
A bread slicer will ensure consistent results and make slicing bread a breeze.
7. Experiment with different techniques: Don't be afraid to try different cutting techniques to find what works best for you.
Some people find that cutting the bread while it's still slightly warm or using an electric knife yields better results.
Remember, gluten-free bread may have a slightly different texture and consistency compared to traditional bread.
With practice and experimentation, you'll find the best method for cutting gluten-free bread that suits your preferences.

Bread Recipe Tips
- If using a KitchenAid or a different stand-up mixer, do not use a dough hook, use the paddle attachment when making the bread dough.
- Typically, most yeast is gluten free. We always check our labels to make sure they're gluten free, so you need to as well.
- Moving the rack in the oven is an important step. You don't want your bread to touch the top of the oven. This is especially important if you're using your oven as the warm place for your bread dough to rise.
- Using room temperature egg whites and other ingredients is helpful so the yeast can thrive and do its thing in your bread dough. Yeast likes to be warm to work and do its thing, so using ingredients that are already warm will only help the rest of the dough. You can let your refrigerated eggs sit out at room temperature for a bit to warm up, or use farm fresh, non-refrigerated, room temp eggs that still have an intact protective bloom like we do 🙂 Or, you can warm your egg whites up to a room temperature quickly by placing the whole eggs in a bowl of warm water for a few minutes.
- If experimenting with flour that doesn't have xanthan gum in it, or guar gum or another similar ingredient, you'll need to add 1 teaspoon to your dry ingredient mixture.
- While completely optional, feel free to brush on an egg white or some dairy free melted butter on top of the bread before baking for a nice, deep, golden brown crust.

Recipe Substitutions
Take note that we haven't tried all of these substitutions personally, but while testing this recipe we asked friends who commonly need substitutions with certain things to try some substitutions out for us.
No Xanthan Gum- For those who can't have xanthan gum, guar gum, or other gums, we had a friend try psyllium husk powder instead.
hey said it worked out nicely. They said they wanted to try it with a chia seed mixture next instead of the powder to see how it goes.
That may be an option for you to try.
Egg free, gluten free dairy free bread recipe. If you wanted to make this homemade loaf but can't use eggs, no worries.
We had our friend who has an egg allergy try this out. They chose to use Bob's Red Mill Egg Replacer as their option to make this an egg free bread recipe.
On the back of the bag are instructions on how much to use and how to make the mixture to use in this recipe.
Our friend said this replacement worked out nicely and he wanted to note that it also contains psyllium husk fiber which may be helpful for a xanthan gum free bread too.
No Olive oil. If you don't have olive oil on hand, you could use coconut oil or avocado oil.
Our recipe testing friend said coconut oil was preferable over the avocado oil for her family, but that may have just been a personal preference.
If you don't want to use the oils, you can try a dairy free butter option. But make sure it's melted.
Try using Miyoko's Kitchen sticks or Earth Balance Buttery Sticks. Skip the spreads because they won't work in this bread recipe.
Alright guys, we've covered as many substitutions, tips, tricks, and suggestions that we can think of to share with you.
We want to make sure that you feel prepared to make the absolute BEST loaf of gluten free dairy free sandwich bread!

More bread loaf recipes
Here are a few of our favorite dessert type bread loaves. A bit different than this sandwich recipe, but fun and delicious none the less!

The Best Homemade Gluten Free Bread Recipe (Dairy-Free)
Ingredients
- 2 ½ cups all-purpose gluten-free flour see post for brand suggestions
- 1 teaspoon aluminum free baking powder see post for brand suggestions
- 2 ¼ teaspoons rapid rise yeast or 1 packet, see post for brand suggestions
- ¼ cup olive oil
- ¼ cup honey
- 1 ¼ teaspoon apple cider vinegar see post for brand suggestions
- 1 ½ cup warm water
- 3 large egg whites room temperature
- 1 ⅛ teaspoon salt see post for brand suggestions
Instructions
- Adjust the top oven rack to the middle position and preheat the oven to 350°F.
- Prepare your chosen bread loaf pan by coating it with cooking spray.
- In a large bowl or the bowl of a stand-up mixer, combine the dry ingredients: your gluten-free flour blend, baking powder, and instant yeast.
- Add the wet ingredients- olive oil, honey, apple cider vinegar, and warm water to the flour mixture and mix on low for 1 minute. Then, add the egg whites and salt to the dough and mix on medium for 1 minute until the mixture resembles a thick cake batter.
- After transferring the gluten-free bread dough into the greased bread pan, cover the top with Bees wax wrap or plastic wrap that has been sprayed with cooking spray. Then, place a kitchen towel over the pan and allow the bread to rise in a warm spot for 30 minutes.
- Remove the towel and plastic wrap. Position the bread horizontally on the middle rack in the preheated oven for 35 minutes at 350°F until it turns golden brown. Check with a toothpick to make sure the dough is cooked through, the toothpick should come out clean.
- Let the loaf cool for 10 minutes in the pan, then remove it from the pan and place it on a cooling rack. Let the bread cool thoroughly before slicing.
Notes
- Check the post for all of the helpful tips and tricks.
- There are plenty of substitutions if you can't have eggs, xanthan gum, and other ingredients in the substitution section.
- We recommend only using the two brands we suggested in this post for the best results.
Nutrition
Nutritional Disclaimer
These Nutritional Facts are ESTIMATED. Your actual nutritional info with this recipe may vary depending on the brands you choose. “Eating Gluten and Dairy Free” is not a registered dietician or nutritionist. The provided nutritional info above is based on a generic calculator, if you want more accurate info, use your nutritional calculator of choice where you can choose brands and get more info that way.
Are you following us on Instagram, Pinterest, and Facebook? We share tons of good info and recipes there.
We even have a Facebook group where we share our new recipes, and reach out to you guys first for feedback, recipe suggestions, and more!
Make sure to follow and join us in any or all of those capacities. And, if you're an avid Pinner, below is a Pinterest image you can save to your boards so you never lose our site.


Hey, It's Victoria!
Welcome! Victoria creates yummy gluten and dairy free recipes to make mealtime more delicious and less stressful without breaking the bank.
Never Run Out of Safe Recipes
Loved this recipe? Our cookbooks are packed with tested, family-approved gluten & dairy free recipes so you never have to hunt for a safe one again. The Holiday Recipes Cookbook has 50+ recipes for every season, and The Classics has our all-time family favorites.


I have made it twice! Best bread ever, even my non GF husband loves it! Very easy recipe and no odd ingredients or grainy flours. I use KA measure for measure.
I made it the day I after I saw the recipe. Perfection! Going to have a happy celiac kiddo tonight 😉