
Homemade Peppermint Marshmallows
This post may contain affiliate links. As an Amazon Associate, and through other affiliate programs, I earn a small commission from qualifying purchases — at no extra cost to you. I only ever recommend products I use and love. See our full disclosure policy for details. Thank you for supporting Eating Gluten and Dairy Free!
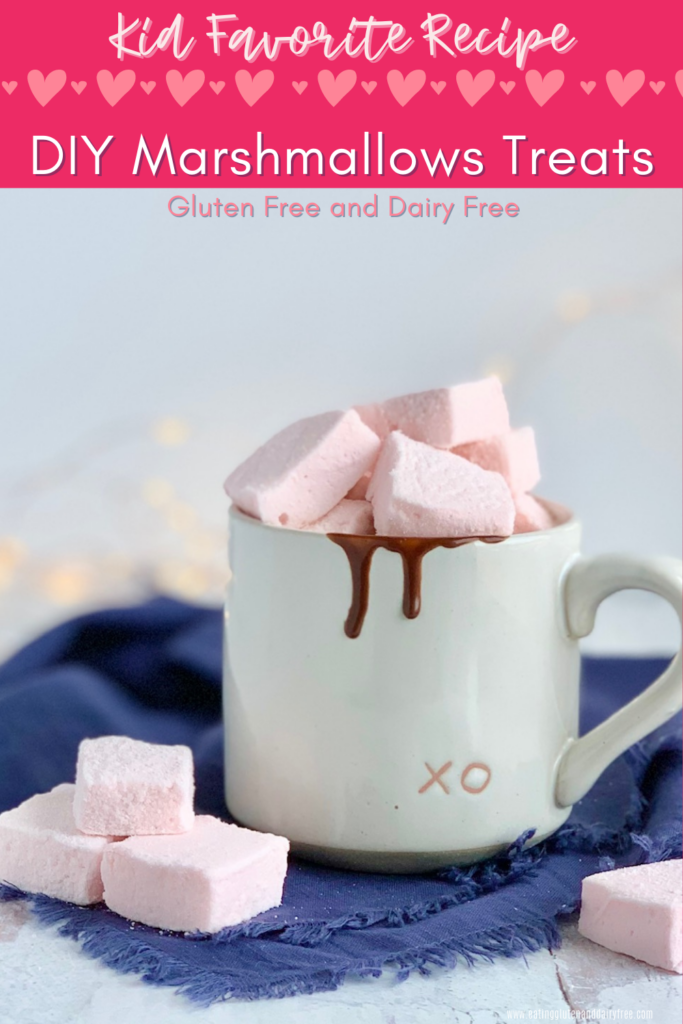
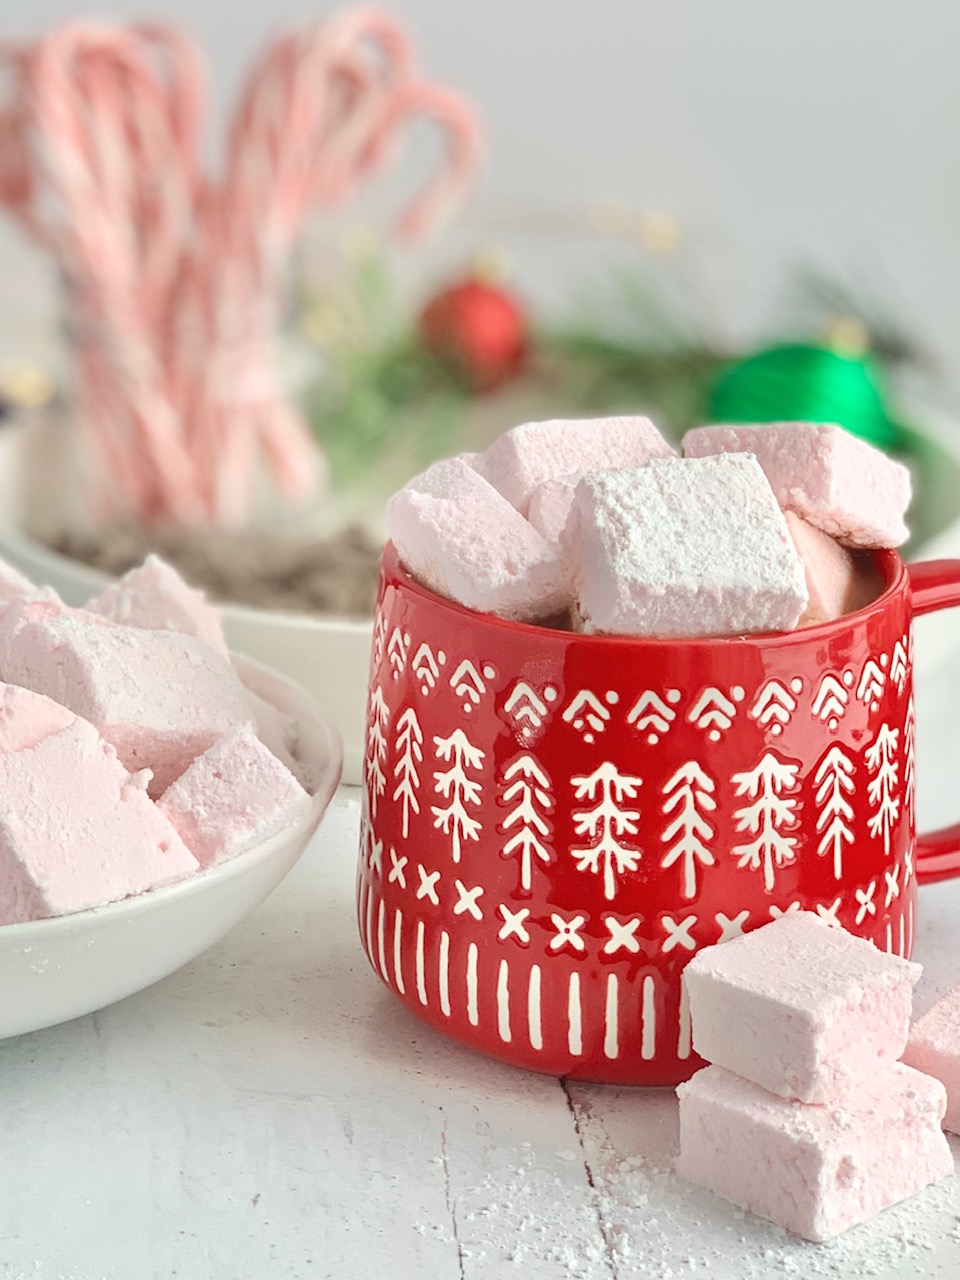
Let's jump into hot chocolate season with these fluffy and soft pink Homemade Peppermint Marshmallows. Enjoy these marshmallows with a hint of peppermint dropped into a cozy mug of delicious hot chocolate for the ultimate Christmastime beverage.
Lastly plan to prepare a second batch of marshmallows tucked inside cellophane gift bags for gifting loved ones.
This recipe is really quite straightforward and easy despite any preconceived fears of making your own marshmallows. These favorable treats are completely worth the homemade time and effort. And trust me-- you'll never look at store-bought marshmallows the same after tasting these.
Years ago a friend gifted me a lovely holiday jar of marshmallows similar to this peppermint recipe.
I enjoyed the entire gift as little snacks over the course of a week-- they never even made it into a mug of steamy hot chocolate.
Instead I nibbled on them, savoring every bite.
And I thought I'd died and gone to Heaven. I didn't even know you could make these in your own kitchen-- I was convinced they were a specialty item saved for manufacturing companies with fancy ingredients and kitchen machinery.
Needless to say, I was stunned and absolutely delighted to learn differently. The following Christmas I enjoyed preparing this Homemade Peppermint Marshmallow recipe from a Family Circle publication.
And nowadays my kids love helping prepare these hot chocolate toppers.
After just one batch you will have mastered this homemade recipe too! Yes, this recipe is that easy.

homemade peppermint marshmallow ingredients + tips
- confectioners' sugar
- cornstarch
- water
- unflavored gelatin-- Vital Proteins Beef Gelatin unflavored is available to purchase here. Also consider Great Lakes Unflavored Gelatin, but I found their labeling and allergen statement wasn't as clear as I'd hoped. Use the brand best for your "free froms."
- granulated sugar
- light corn syrup-- the Karo brand is gluten free; see their allergen statement here
- crushed candy canes-- YumEarth is an allergen-friendly brand available in most grocery stores and here. This recipe uses 6 large crushed candy canes.
- salt
- optional-- cut these with a cookie cutter coated in the sugar-cornstarch mixture for an ultra festive flare
- handheld mixer-- I've tried this recipe with an electric stand mixer and the results were not the same. You need to use a handheld mixer for this recipe so the beaters can get to the bottom and sides of the bowl, unlike with an electric stand mixer. The peppermint sugar and corn syrup mixture will quickly harden at the bottom or sides of the bowl if not continually mixed into the rest of the marshmallow mix.
- lastly-- I'd suggest using a timer for the 10 minutes needed to mix the marshmallow mixture
- here's the handheld mixer and sifter similar to what I use in my kitchen


more Christmastime recipes you'll love
- DIY Hot Chocolate Bombs-- enjoy these hollow chocolate balls filled with hot chocolate mix and mini marshmallows that open up to everyone's amazement in a warm filled mug
- Chocolate Kiss Cookies-- this classic cookie is a family favorite and yours will love it too
- Christmas Desserts-- over 20 gluten + dairy free festive desserts perfect for the holidays
lastly
How can you possibly resist these "bucket list" homemade treats perfect for Christmastime? Made with basic ingredients these marshmallows have serious "wow factor."
After you try this recipe Instagram it. And don't forget to tag me @eatingglutenanddairyfree so I can enjoy your marshmallow pic and leave a comment.
Ingredients
- ½ c confectioners' sugar
- ⅓ c cornstarch
- 2 tablespoon unflavored gelatin, or 2 envelopes suggestion in post
- ⅔ c water
- 1⅓ c granulated sugar
- ⅔ c light corn syrup
- ½ c crushed candy canes or mint candies suggestion in post
- ⅛ teaspoon salt
Instructions
- In a small bowl, sift together confectioners' sugar and cornstarch.
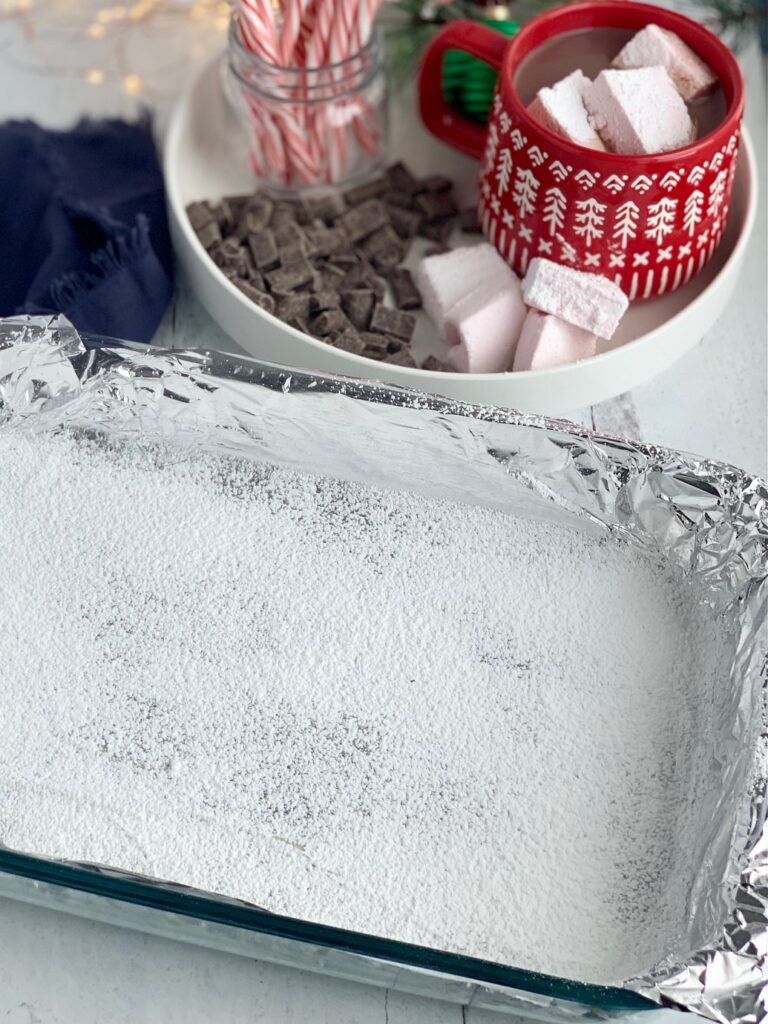
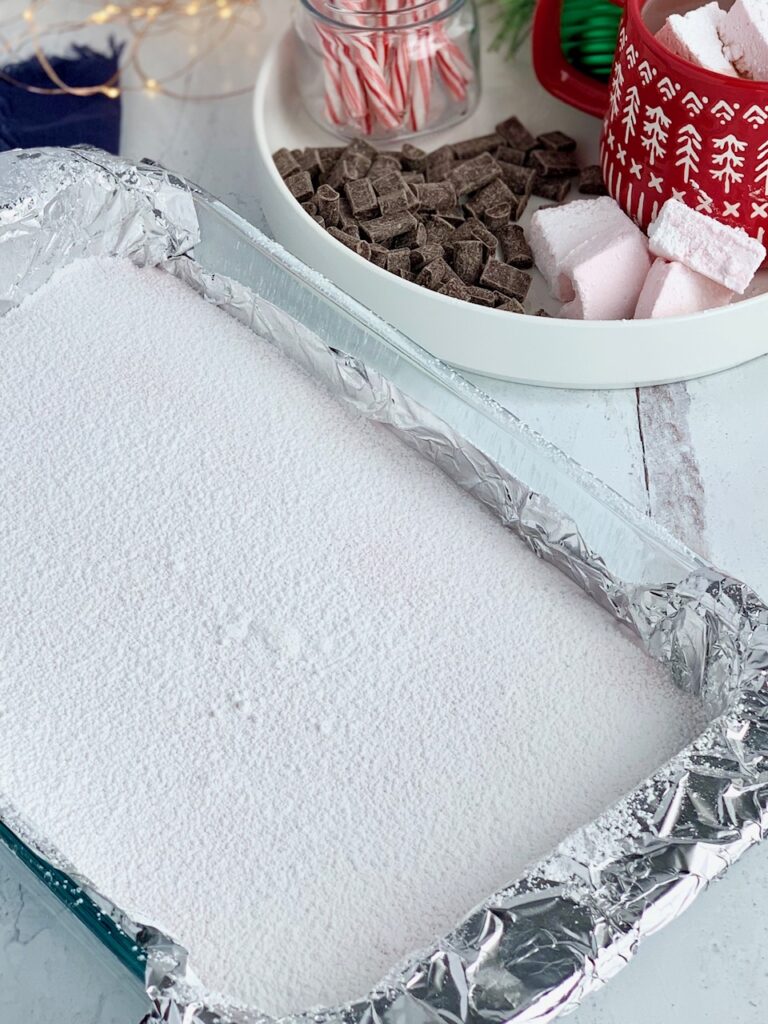
- Line a 9 x 13 inch baking sheet with foil, coat with nonstick cooking spray.
- Sift 2 tablespoons of the sugar and cornstarch mixture into the sheet. Evenly coat the baking sheet and set aside.
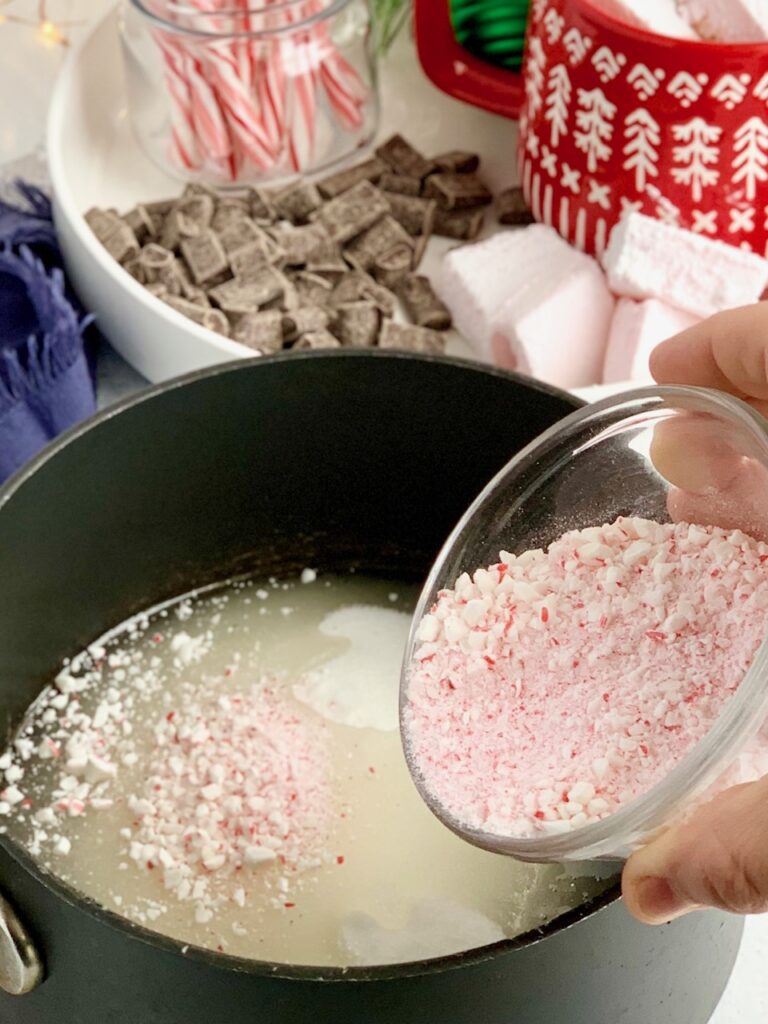
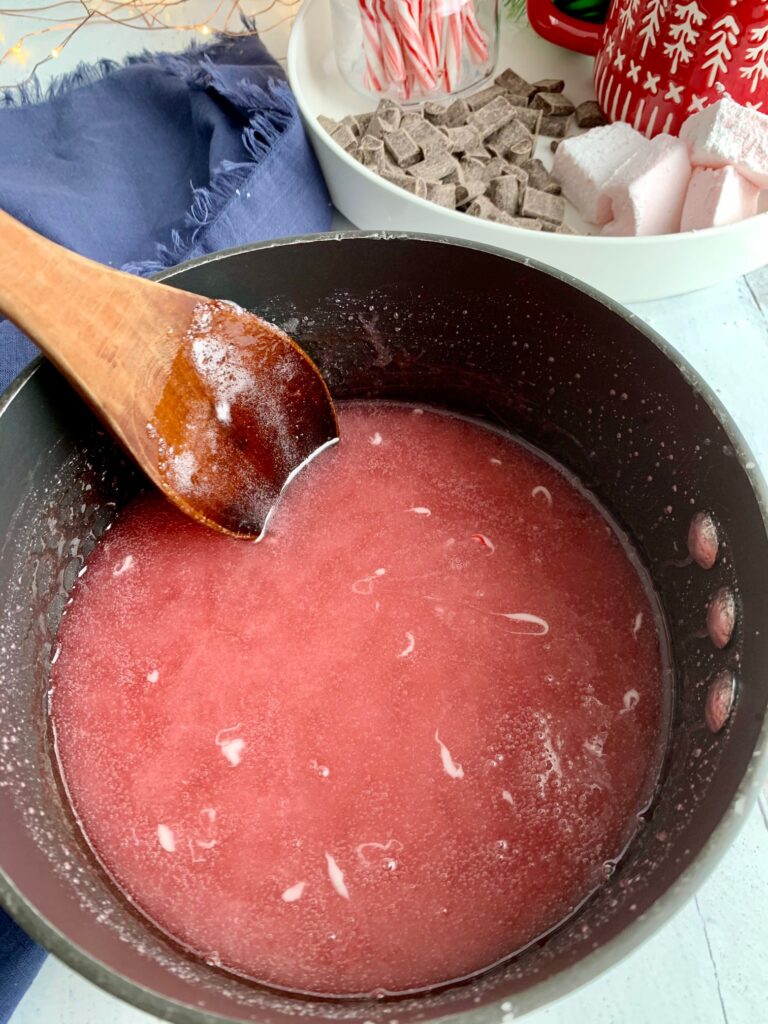
- In a medium size saucepan, heat sugar, corn syrup, crushed candy canes, and salt over medium heat, about 1-12 minutes until dissolved. Stir occasionally. Don't bring to a constant boil.
- While peppermint mixture in the saucepan is dissolving, place water in a large mixing bowl. Add in gelatin and allow to soften for 5 minutes.
- Add the peppermint saucepan mixture to the large mixing bowl with gelatin.
- With a handheld mixer beat on high for 10-12 minutes, until light and fluffy. Wipe down the sides of the bowl early on with a wooden spoon; otherwise the peppermint mixture will harden to the sides of the bowl and not be incorporated into the marshmallows.
- Then, spread evenly onto the prepared baking sheet with a spatula.
- Dust with 2 tablespoon of the sugar-cornstarch mixture.
- Allow marshmallow mixture to sit at room temperature for 2 hours.
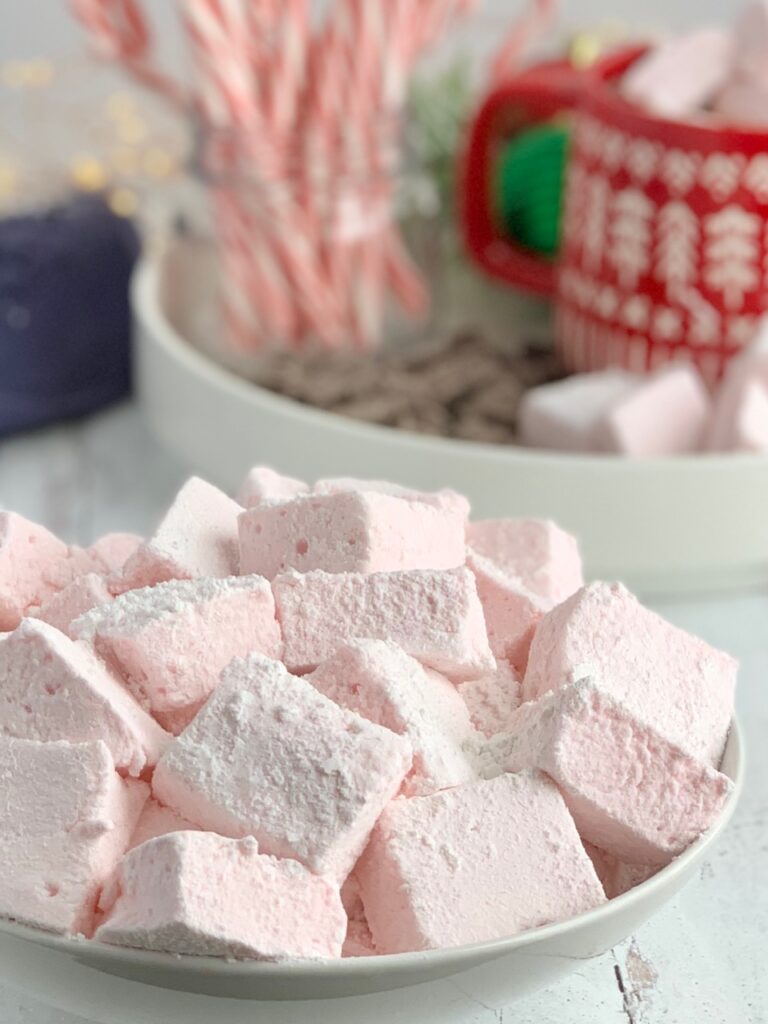
- Then lift the marshmallow mixture off the baking sheet by the foil. Using a wet knife, cut the mixture into 6 large squares.
- Now spread remaining sugar-cornstarch mixture on the baking sheet.
- Flip over 6 marshmallow squares; cut each square into 9 even pieces.
- Toss marshmallows in sugar-cornstarch mixture and then leave in the pan for an additional hour to set completely.
- Store Peppermint Marshmallows at room temperature in an airtight container up to several days.
Notes
Nutritional Disclaimer
These Nutritional Facts are ESTIMATED. Your actual nutritional info with this recipe may vary depending on the brands you choose. “Eating Gluten and Dairy Free” is not a registered dietician or nutritionist. The provided nutritional info above is based on a generic calculator, if you want more accurate info, use your nutritional calculator of choice where you can choose brands and get more info that way.
Cooking Gluten & Dairy Free for the Holidays?
Our Holiday Recipes Cookbook has 50+ tested gluten & dairy free recipes — desserts, sides, and holiday staples for every season and celebration, all in one place. Instant download, just $15.