
Gingerbread House Recipe
This post may contain affiliate links. As an Amazon Associate, and through other affiliate programs, I earn a small commission from qualifying purchases — at no extra cost to you. I only ever recommend products I use and love. See our full disclosure policy for details. Thank you for supporting Eating Gluten and Dairy Free!
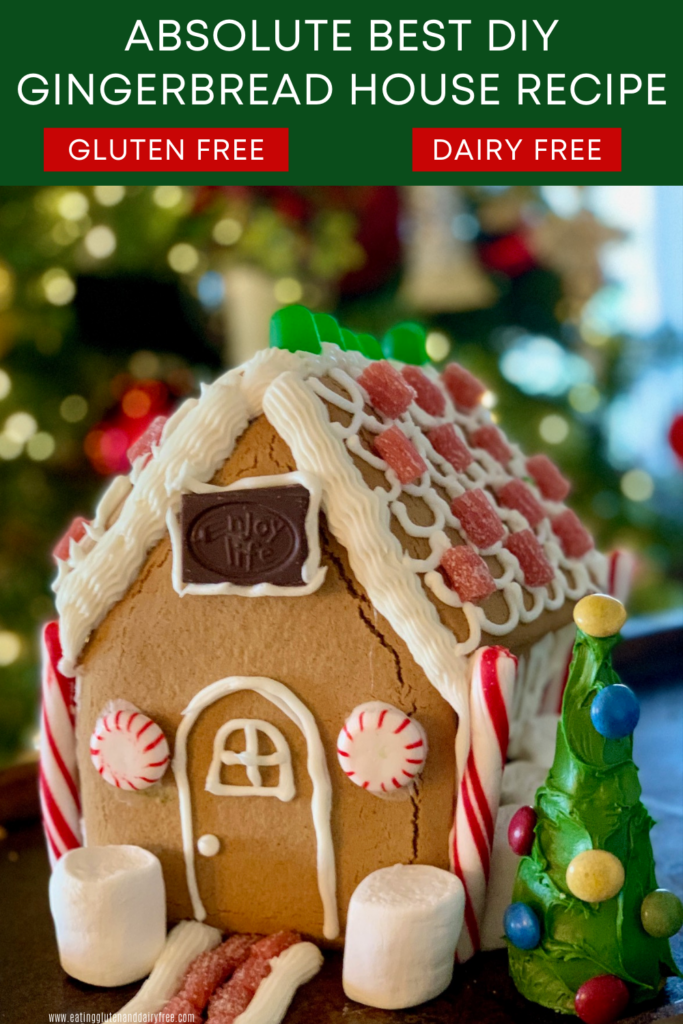
Are you ready to create heartwarming memories gathered around the table enjoying this festive Gingerbread House Recipe and decorating guide? This gluten and dairy free gingerbread dough recipe provides a safe and fun filled way to enjoy the best Christmas tradition in your home year after year.
And you'll find everything you need in this guide to bake and decorate your dream gingerbread house. You'll never need another recipe again-- this will be your recipe for life.
And to be honest, in the past I've wasted too much money purchasing expensive safe gingerbread house kits online, only to have our houses fall apart while decorating and arrive with just a few candy pieces. Needless to say our family always felt disappointed and like we were missing out on the real experience. Thankfully this isn't the case anymore!
While the thought of baking homemade Gingerbread Houses can be intimidating, try this recipe once and you'll be hooked on baking your houses at home. With this easy recipe and just a few simple tricks, you'll look forward to this Christmastime activity year after year.
gingerbread house recipe notes
- gingerbread dough-- I recommend the strong and smooth Gingerbread Cookie dough recipe from my website here. When using this recipe, allow the panels to bake an extra 1-2 minutes. This will allow the panels to become stiff . This recipe makes 1 house as pictured and will have enough dough leftover to bake a few gingerbread cookies. The baked panels from this recipe will keep for four weeks.
- icing recipe-- the Buttercream Frosting recipe from my website here is my most used icing recipe for these houses. You can adjust this recipe to be runnier or thicker depending on what aspect of the house you're designing. A thicker icing (less dairy free milk) will give you perfect roof outlines while a thinner icing (adding in extra dairy free milk) can be used for snow hanging from the roof edge. Royal icing works to add details to these houses too.
- gingerbread house paper cutout guide-- there are over 20 free house templates available here
- candy decoration ideas-- see below
- hot glue gun-- this is one of my go-to tricks. I preassemble all our family houses with a hot glue gun before we start decorating. Then we use frosting to decorate over the glue. Our houses stay together this way instead of collapsing. I use a hot glue gun similar to this.
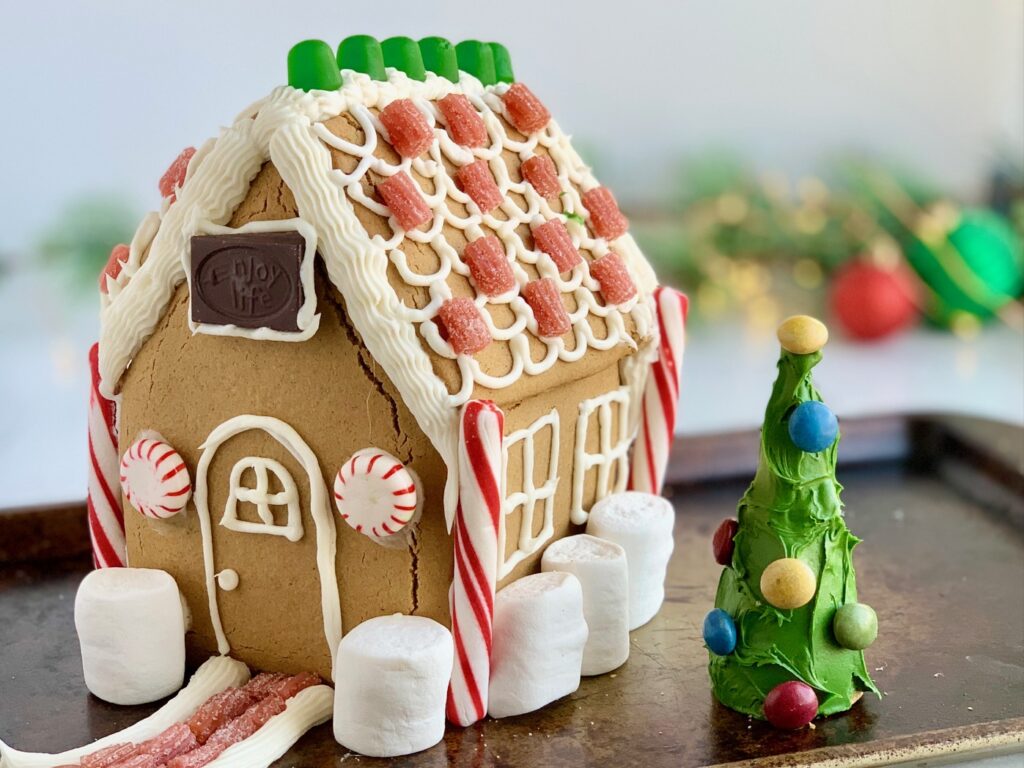
- evergreen tree-- the trick to these festive trees is an upside-down sugar cone from Let's Go Gluten Free available to purchase here. Add green food coloring to ¼ c buttercream frosting and mix well. Spread onto your tree with an angled spatula or dull knife.
- tree decorations-- we use No Whey Chocolate No No's here
- piping bags-- frosting filled Ziploc bags with the corner cut work; for more precise lines and decorating use these disposable bags
- piping tips-- for the outline of the roof we use a #4B icing tip, and for the scalloped roof design and windows we like this #5 icing tip.
candy decoration ideas
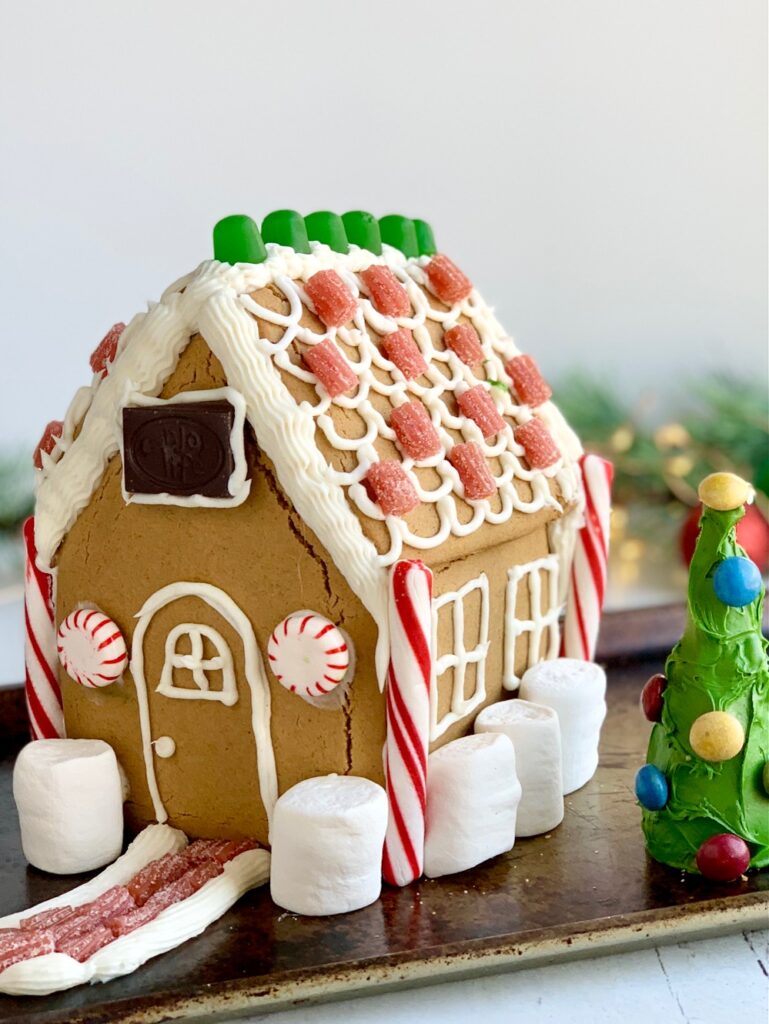
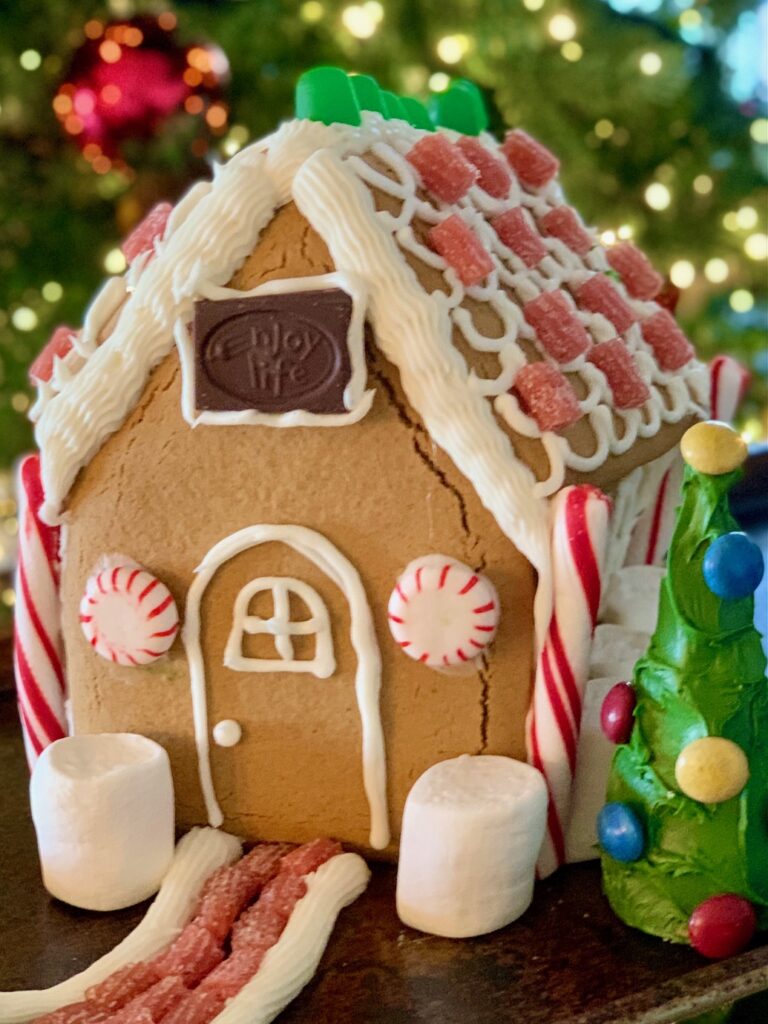
- Enjoy Life Chocolate Bar-- as pictured adorning the front of the house
- Dandies-- marshmallows in 2 different sizes available to purchase here
- YumEarth Organic Sour Twists-- on the roof, found here
- Bob's Sweet Stripes Peppermint Candy Sticks-- these make for perfect pillars on the house, found at Dollar Stores and labeled gluten free (there wasn't website information available for their manufacturing processes)
- DOTS Gumdrops--their manufacturing statement is here
- Starburst
- YumEarth Black Licorice-- found here
- No Whey Peppermint No No's-- the green and white color of these No No's is lovely and festive
- Glee Gum-- these small colored squares can decorate the roof nicely or line a sidewalk
- Annie's Homegrown Fruit Tape-- this can make for a fun sidewalk
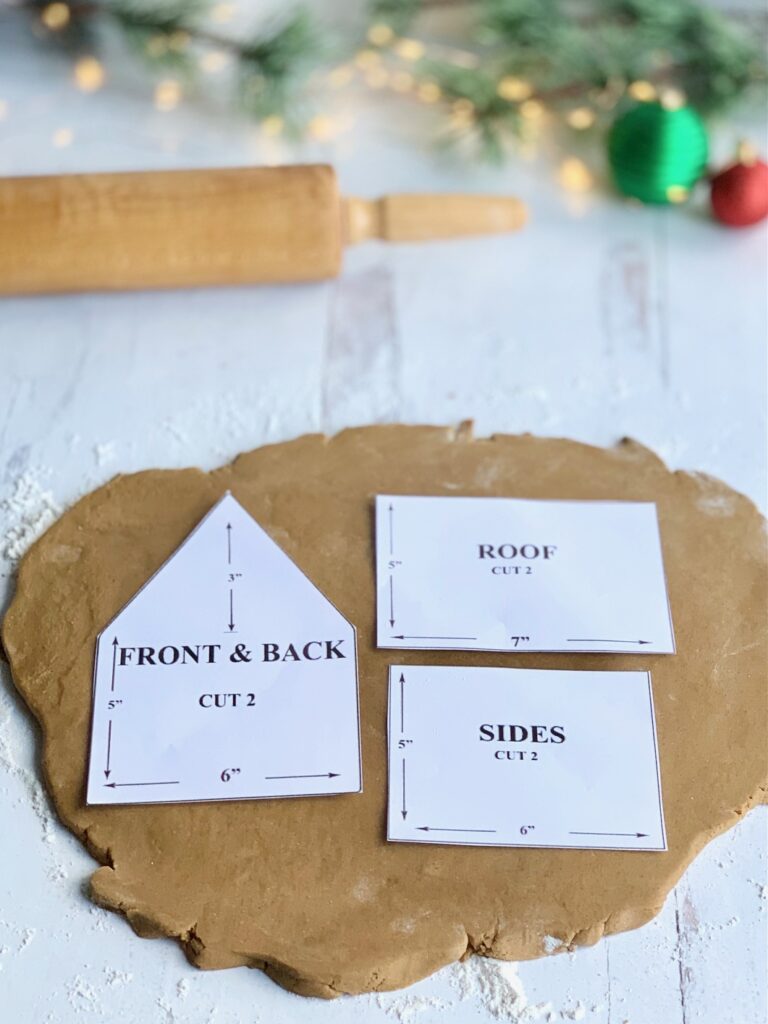
Follow the recipe for the gingerbread dough. After it has chilled, remove it from the refrigerator. Divide the dough in half. Then with a rolling pin spread the cookie dough on a lightly dusted countertop with gluten free flour to prevent the dough from sticking. Form the dough into a wide section ¼ inch thick. Place your paper panels over the rolled dough.
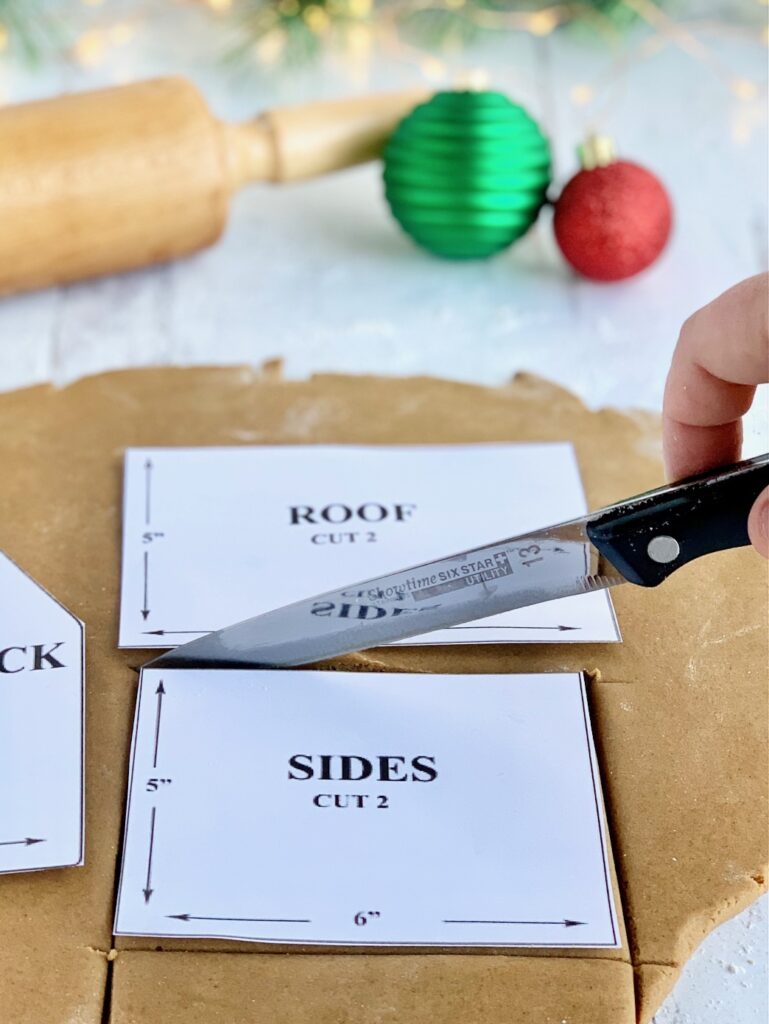
Using a sharp knife cut out the front, side, and roof panels of the house. Transfer panels to a parchment-lined baking sheets. Bake according to dough instructions (recipe link above). Keep in mind I add an extra 1-2 minutes baking time so each panel slightly stiffens. Enjoy using festive cookie cutters with any leftover dough and bake according to recipe instructions.
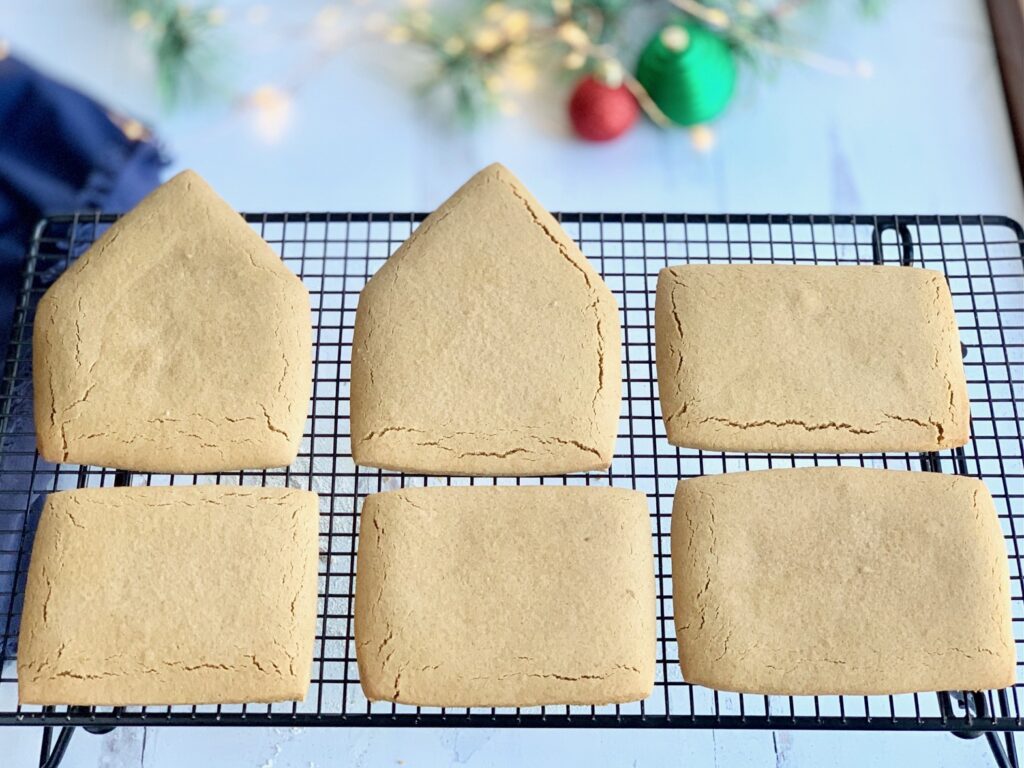
After panels have been removed from the oven and allowed to cool briefly on the baking sheet, transfer to a wire rack. Allow panels to cool completely on a wire rack. Baked gingerbread panels can be stored in an airtight container for up to 4 weeks.
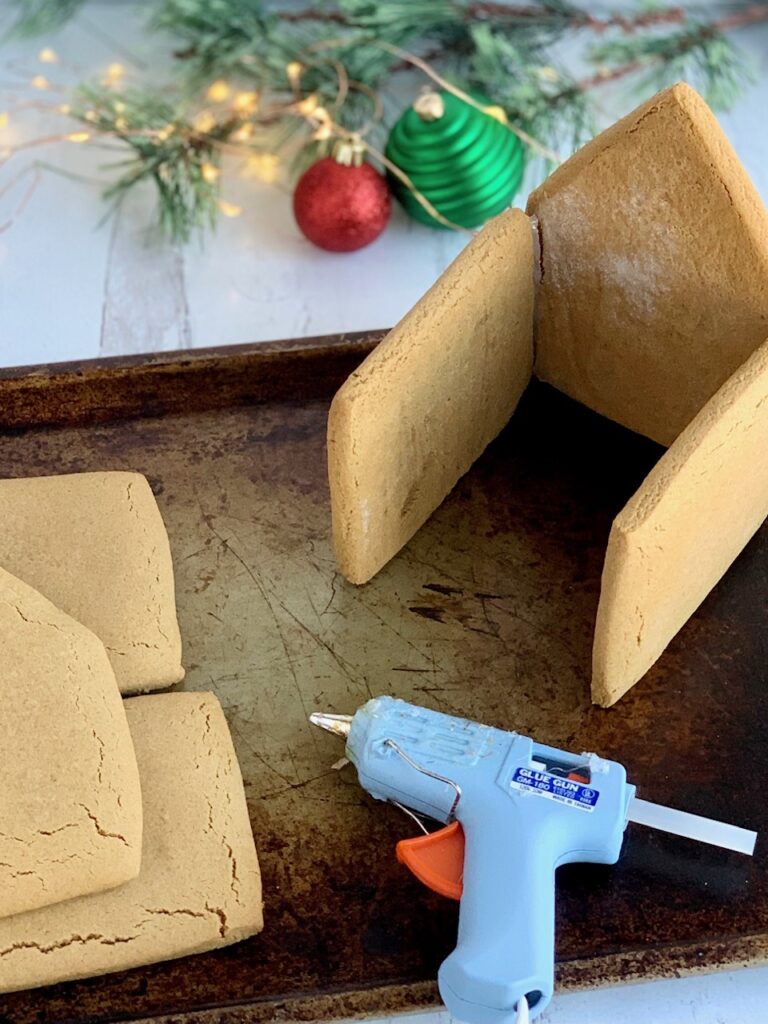
Some suggest decorating the panels before assembling the house. My family and I find our houses fair better if we assemble them first, then decorate. Most importantly my favorite gingerbread house assembling trick is a hot glue gun. I find it less expensive than using additional royal icing, and the house is sturdier with the panels glued together. Our houses don't collapse or fall apart with this trick. Once your hot glue gun is hot, pipe melted glue to one side of the panel and press the other panel to it. Hold in place for 30-40 seconds.
Another icing option is thickened royal icing in a piping bag or a melted sugar recipe.
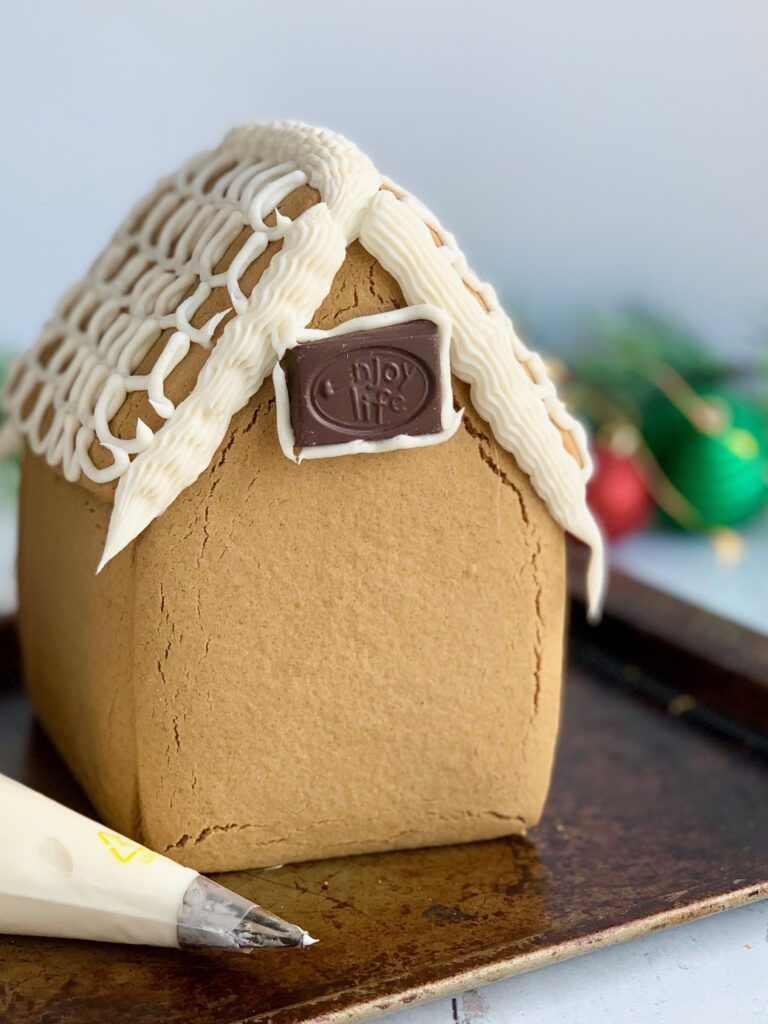
Place the Buttercream Frosting recipe from my website here in a piping bag with a #4B piping tip. Outline the roof of the house, and any other sections with this large tip.
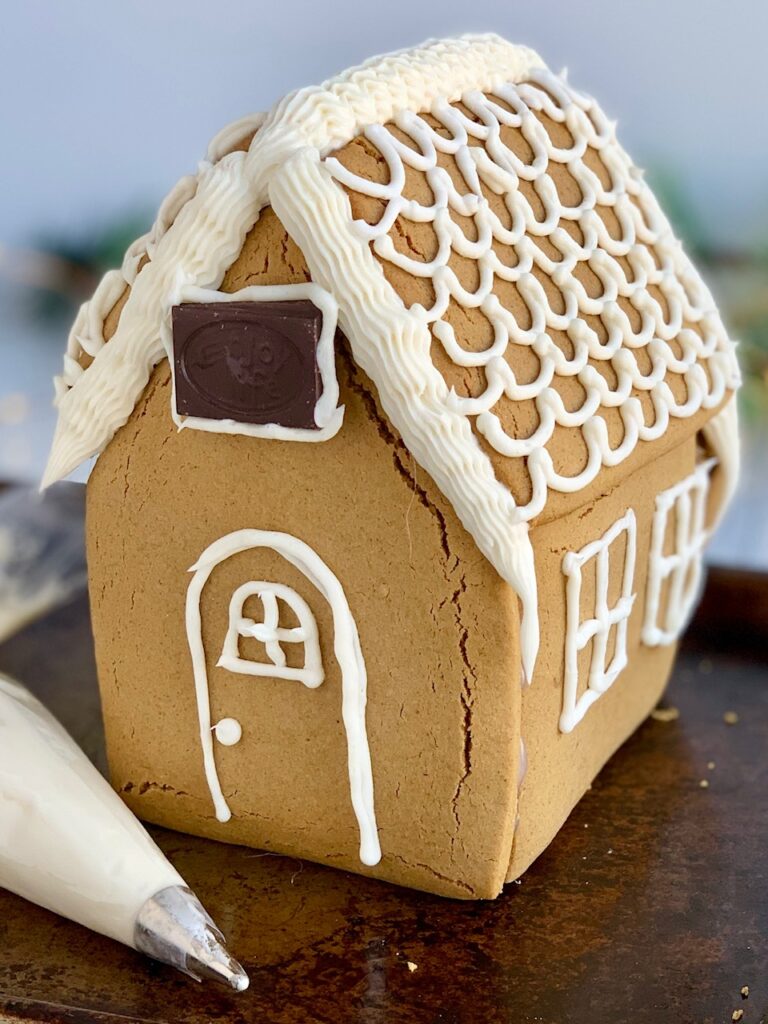
Then using a piping bag with a smaller #5 piping tip add roof scallops, windows, a door, and any other decorative details.
Now your gingerbread house is ready to decorate with safe candies, more frosting, and sprinkles-- check these out. Let your imagination run wild and decorate your dream gingerbread house.
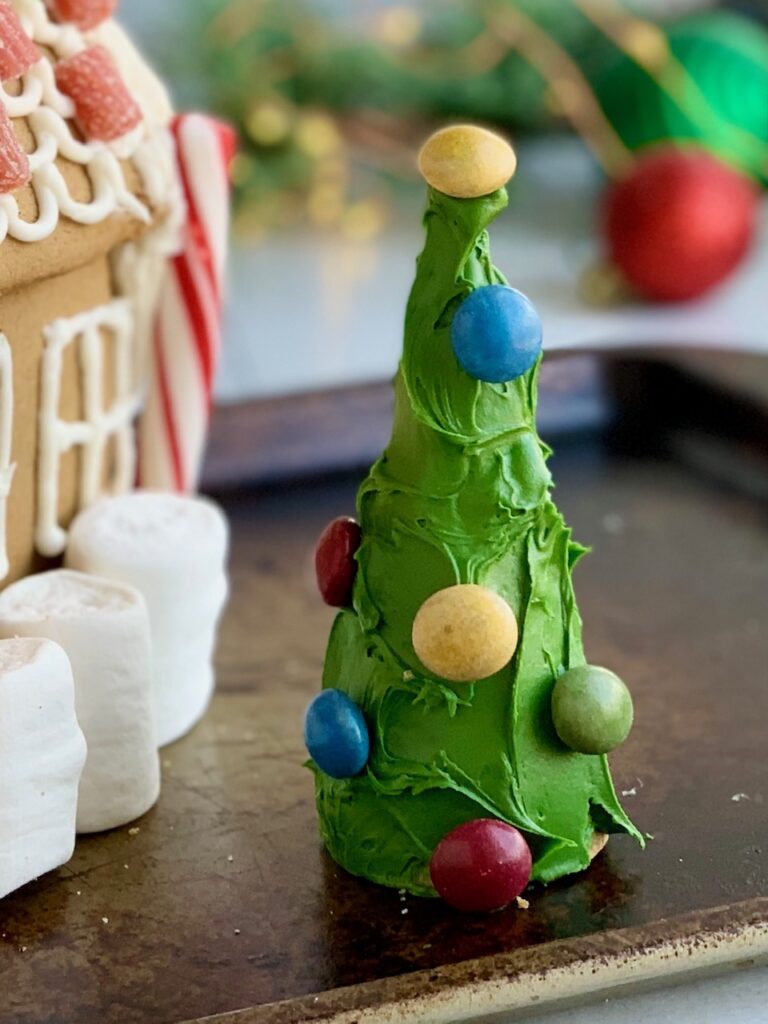
Using an angled spatula and ¼ cup green frosting, lather the ice cream cone with frosting. Then decorate with candies like these No Whey No No's.
more holiday recipes
- Christmas desserts-- 20+ gluten and dairy free desserts, candies, and cookie recipes perfect for Christmas
- homemade peppermint marshmallows-- these soft pink fluffy and festive marshmallows are a Christmas must
- diy hot chocolate bombs-- these reader favorite Christmastime treats are easy to assemble and bring amazement to everyone's faces.
- cinnamon rolls with cream cheese frosting-- this will be your go-to cinnamon roll recipe for life! These soft rolls are mouthwatering with a decadent frosting.
lastly
With this no-fuss recipe and guide, you can enjoy this nostalgic Christmastime activity year after year. Start gathering your candy decorating supplies today.
When you use this recipe and guide, please share your dream gingerbread house creations on Instagram with the hashtag #eatingglutenanddairyfree. I definitely wanna check them out!
And be sure to follow along on Facebook, Instagram, and Pinterest so you don't miss the best of eating gluten and dairy free. Plus, by signing up for my exclusive emails below, you'll always be in the know-how.
Eat well and feel well,
Jill
Cooking Gluten & Dairy Free for the Holidays?
Our Holiday Recipes Cookbook has 50+ tested gluten & dairy free recipes — desserts, sides, and holiday staples for every season and celebration, all in one place. Instant download, just $15.